

In the 1980s and early ’90s Tamiya paved the way for the modern RC industry, setting the standards for technology, innovation, design and lifestyle changes. Their iconic kits—such as the Grasshopper, Hornet, Frog, and Lunch Box—introduced a generation of hobbyists to the world of hobby-grade radio control.
The Hornet, released in 1984, remains a fan favorite to this day, with Tamiya USA reporting it as one of their perennial top sellers. Nostalgic enthusiasts and creative minds continue to keep the Hornet and its siblings alive, even pushing the kit to do things it wasn’t originally meant to do. The customized Hornet you see here started out as Tamiya’s X-SA (Expert Semi-Assembled) version, which is a partially assembled kit that only requires the hobbyist to install a 2-channel receiver, steering servo and battery.
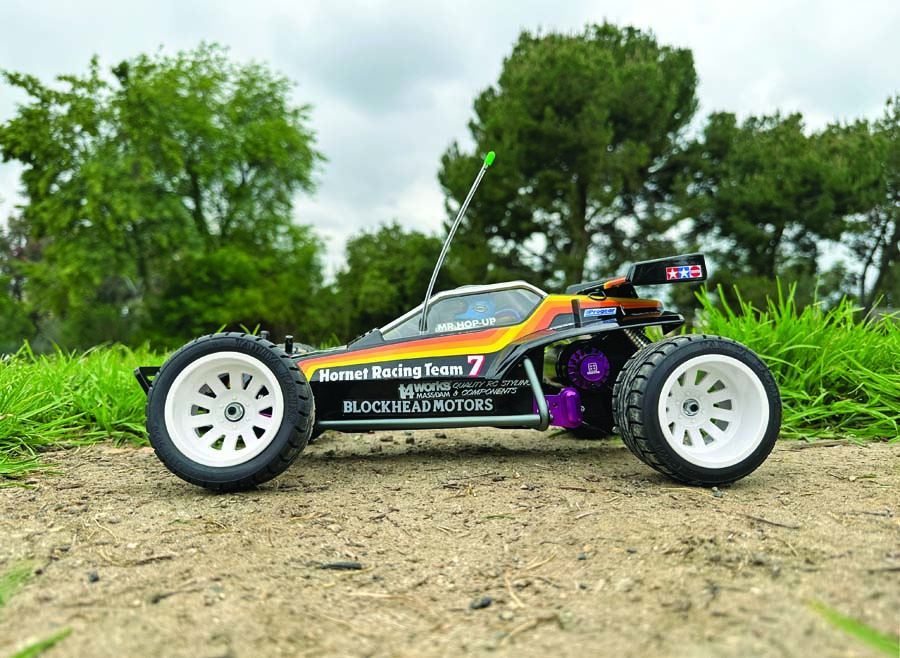
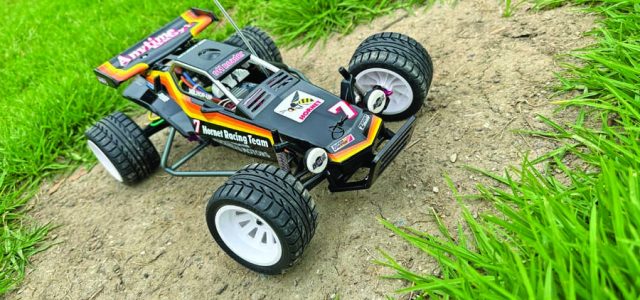
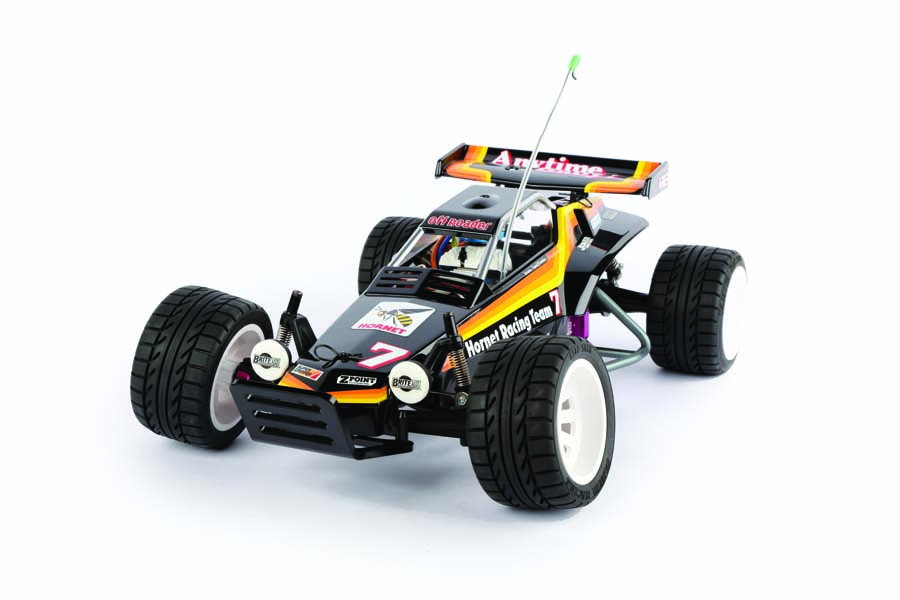
The lowered suspension gives this Hornet an aggressive stance.
THE INSPIRATION
Regular readers of RCCA may remember a “slammed” Hornet that I outfitted in similar fashion a couple of years ago. I have since updated the low-riding buggy style and adapted it to this X-SA Hornet. I embarked on my slammed Hornet project after being inspired by a group of RC customizers in Japan who were creating a unique style that I refer to as “slambug” or “slammed buggy.” These modified buggies were not built for performance but rather for their eye-catching appearance.
After seeing them during a trip to Japan, I knew I had to build my own version of a lowered and widened RC buggy. Since building my first lowriding Hornet, I’ve been itching to build another. This brings us up to date on the genesis of this latest special project.
THE BUILD
As mentioned earlier, the X-SA Hornet only requires a 2-channel radio system and steering servo to be installed. Being that it was a pre-assembled vehicle, all I needed to do was concentrate on upgrades. The Hornet even came with a factory painted and decaled body, which looks immaculate. I love the Hornet’s original vintage box art look, too.
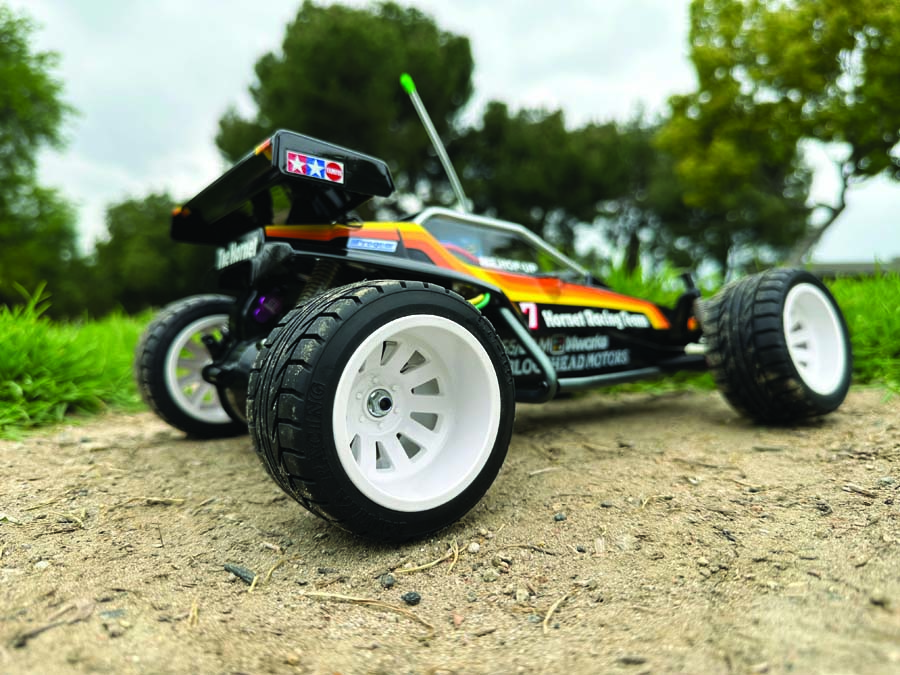
The deep-dish wheels come from a Tamiya Stadium Blitzer, while the tires are from a Tamiya Blitzer Beetle.
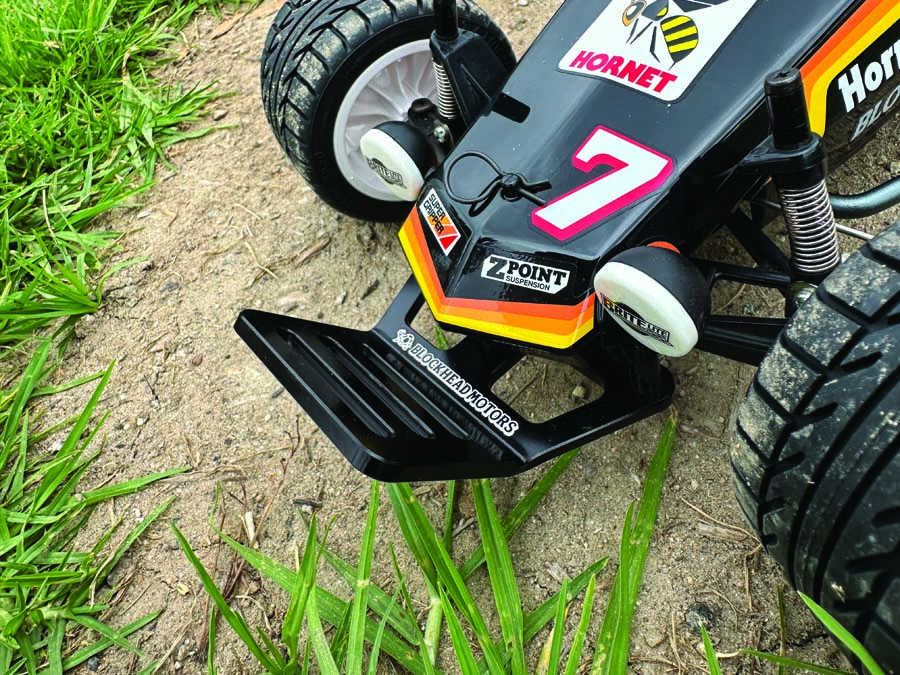
A minimalist Blockhead Motors aluminum bumper replaces the plastic bumper the Hornet came with.
Prior to starting the build, I made sure to gather all the aftermarket parts I intended on installing together beforehand. I dove head-first into T4works Tokyo’s catalog of hop-up parts. For those who may not be familiar with the brand, T4works is a Japan-based company that specializes in slick aluminum upgrade parts for vintage Tamiya buggies and trucks, including the Hornet. The T4works parts had to be ordered from overseas, so waiting for them to arrive was a trial of my patience. I also ordered parts from AMPro Engineering, which are 3D-printed on demand. The AMPro parts arrived quicker than I anticipated, which was nice.
The lowered stance was attained by placing spacers above the front shock towers and inside the rear shocks, resulting in a pre-compressed suspension and a decreased ride height. As a result, there is minimal or no damping from the springs and shocks, leading to a harsher ride similar to that of a real car when lowered. Although I aimed for the lowest possible ride height, I did leave a small amount of play in the suspension.
“The lowered stance was attained by placing spacers above the front shock towers and inside the rear shocks.”
Looking to inject more quality parts into the build, I jettisoned the flimsy plastic factory side bumpers in favor of T4works sturdy aluminum side bumpers. These are finished in gunmetal. It’s worth noting that most of T4works aluminum parts are available in at least ten different colors. The factory plastic steering uprights were replaced for T4works’ anodized pink reinforced aluminum uprights. I also opted for the Lunch Box version of the uprights, which come with longer shafts. The long shafts will be necessary when I mount wider-than-normal front wheels. We’ll get back to this in a little bit.
I installed T4works billet hangers in anodized purple, which are much stronger than the stock plastic parts and made a bit longer, at 8mm in length. To further enhance the build, I added a stylish T4works billet motor mount and billet oil cap. The aluminum motor mount increases the rigidity of the motor unit, while the oil cap adds a touch of flair.
I also replaced the stock plastic bumper with a Blockhead Motors aluminum bumper that is anodized in black. The minimalist-style bumper is sturdy and adds a realistic vintage buggy look to the Hornet. Although the Hornet is not a high-performance machine, it is an enjoyable and affordable basher. To preserve this spirit, I fitted the Tamiya TEU-105BK ESC and the stock silver-can Mabuchi 540 motor that came with the buggy.
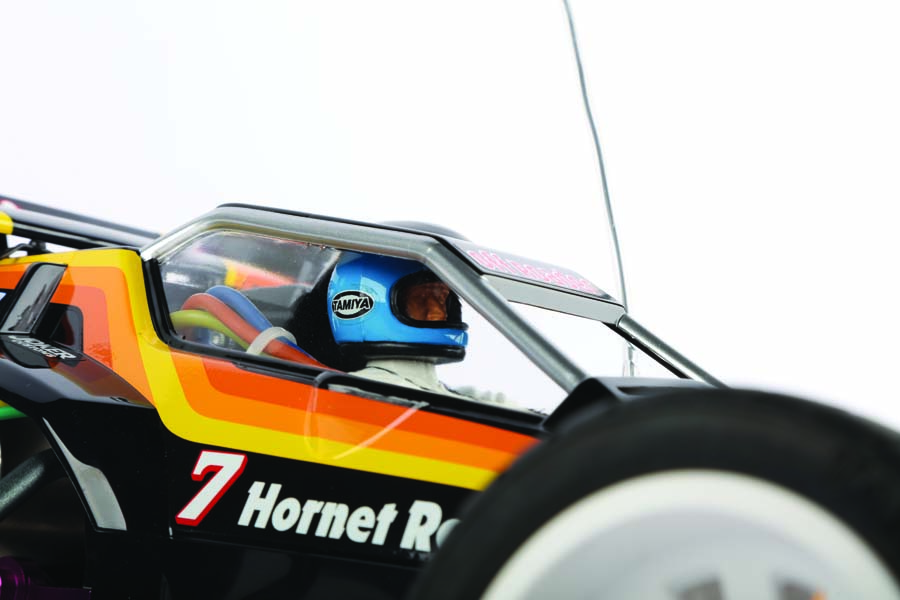
Tamiya’s X-SA Hornet comes with a painted and decorated body and a driver figure.
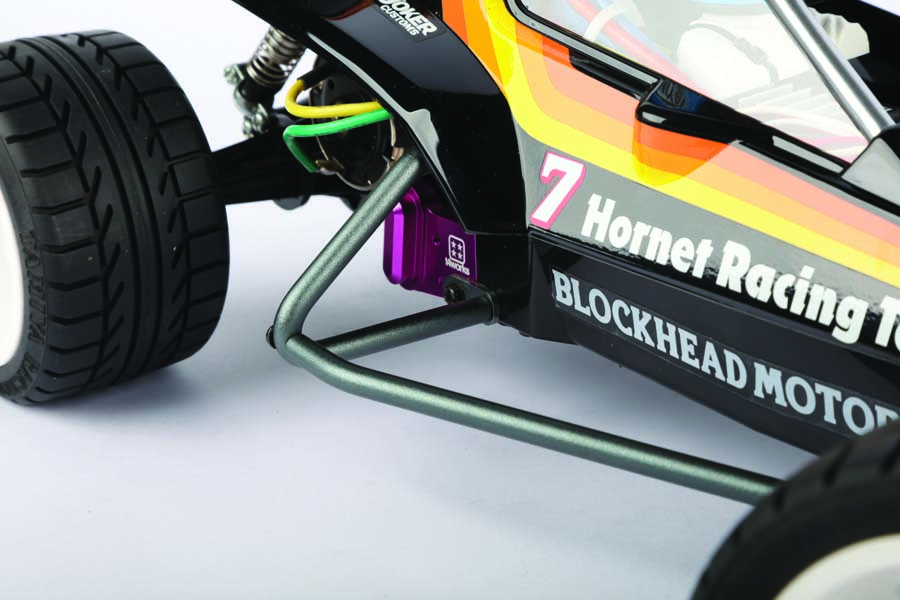
T4works Tokyo aluminum parts are utilized throughout this build. Note the purple billet hanger and anodized gray side bumper.

“It’s worth nothing that most of the T4works aluminum parts are available in at least ten different colors.”
To give the Hornet a wide stance, I went with a set of wheels from a two-wheel-drive Tamiya stadium truck called Stadium Blitzer. The white wheels match the color of the original Hornet wheels, but these truck wheels are much wider and have a ton of lip for a great look. I intend on driving the Hornet on pavement, so I mounted street tires that come from a Tamiya Blitzer Beetle. The front wheels fit without issue thanks to the wide Lunch Box shafts on the T4works uprights. The rear 12mm hex wheels required a set of Tamiya Frog 2005 aluminum wheel adapters to fit properly. These adapters push the rear wheels out a few millimeters more for an even wider stance.
Many Hornet and Grasshopper owners have experienced the problem of the stock battery door easily popping off and ejecting the battery—especially after a rough landing—causing the battery to scrape against the ground. I have had several batteries damaged due to this issue. A simple jury-rig fix is to install a screw and affix a body pin to the chassis and battery door, but I wanted a more elegant, factory-looking solution. In order to fix this common issue with the Hornet, I decided to upgrade the battery door with AMPro Engineering’s upgraded battery door.
The AMPro Engineering door is constructed from durable and sturdy SLS 3D-printed plastic and is attached to the mounts on AMPro’s Hornet battery tray retainer, which I also added to my buggy. The battery door features the Hornet logo etched into it, adding a nice touch to the overall appearance. With the use of two body pins, the battery door is now firmly locked and the battery is secure, eliminating the chance of it coming loose.
Tamiya XS-A Hornet VEHICLE SPECS
P/N: #46703
MSRP: $254
URL: tamiyausa.com
UPGRADE PARTS
T4works Tokyo Reinforced Aluminum Uprights w/ Long Shaft
T4works Tokyo Aluminum Side Bumpers
T4works Tokyo Billet Hanger
T4works Tokyo Billet Oil Cap
T4works Tokyo Billet Motor Mount
Blockhead Motors Aluminum Bumper
Tamiya Frog 2005 Aluminum Wheel Adapters
AMPro Engineering Battery Door, Hornet Logo
AMPro Hornet Battery Tray Retainer
ELECTRONICS
Tamiya TEU-105BK ESC
KO Propo PDS-2504 “Power” Low Profile Servo
KO Propo KR-211FH 2.4GHz FHSS 2-Channel Micro Receiver
KO Propo EX-2 KIY 2.4GHz FHSS Radio System
MaxAmps 5000 mAh NiMH Battery
WHEELS + TIRES
Tamiya Stadium Blitzer Wheels
Tamiya Blitzer Beetle Tires
BODY
Mr. Hop-Up RC Decals
Mass/Dam x T4works Tokyo Decals
Blockhead Motors Decals
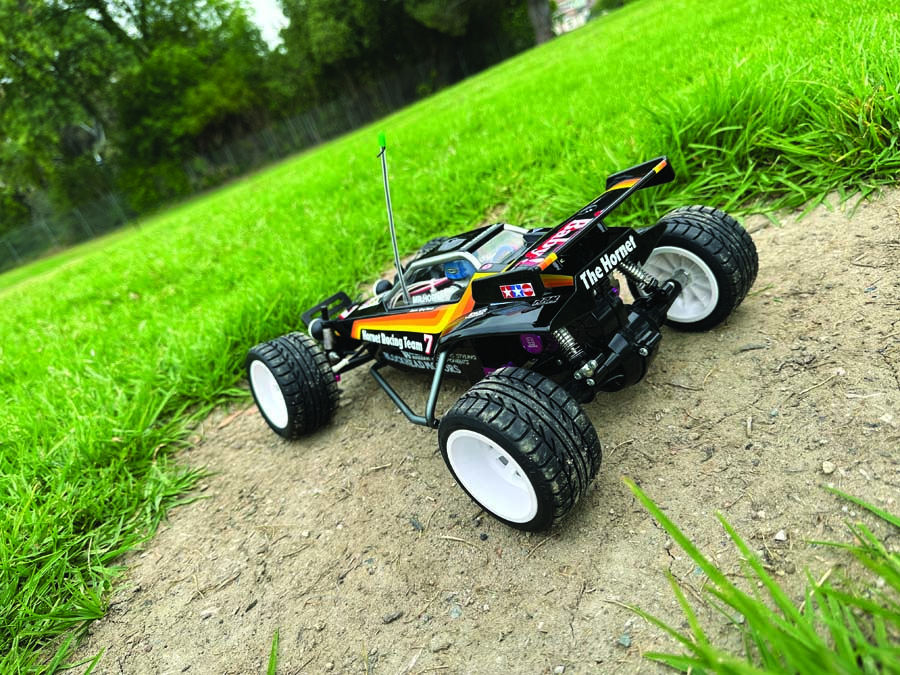
This modified Tamiya Hornet slides all over the place and easily does donuts and hops about thanks to its slammed suspension.
DRIVING THE THING
Now, you may ask, how does it drive? I’ll be honest and say not good… but it looks good while not driving particularly well, though! The best way to describe it is that this Hornet drives like a rear-wheel-drive car riding on oiled-up slick tires on an ice-skating rink. It slips and slides all over the place and easily does donuts and hops about thanks to its close-to-zero suspension travel. Chalk it up to the combination of its slammed ride height, wide wheels and widened stance; the buggy’s alignment is stretched well beyond its original design limits, and the extreme camber can’t be remedied without major modifications. But this build was never meant to perform well, just to look cool, and that it does that very successfully if you ask me.
FINAL WORD
The Tamiya Hornet was a game-changer in the RC industry, introducing a generation of hobbyists to the world of hobby-grade radio control. Decades later, enthusiasts continue to keep the Hornet and its siblings alive, with creative minds pushing the kit to do things it wasn’t originally meant to do.
Creating a unique and stylish “slammed buggy” version of the Hornet was fun to be sure. The result is a stunning take on a classic RC car that showcases the creativity and ingenuity of RC enthusiasts while keeping the love for classic kits such as the Hornet alive and well.
Text and Images by Jerry Tsai


![RC Car Action - RC Cars & Trucks | This 1/3 scale 125cc V10 Buggy is CRAZY [VIDEO]](https://www.rccaraction.com/wp-content/uploads/2018/05/V10-HP.jpg)


 Stay up to date with the latest information, sign up for our FREE newsletter today.
