

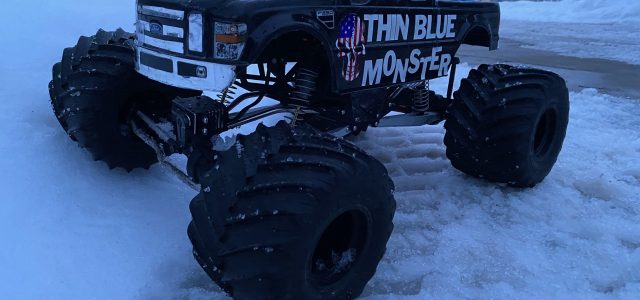
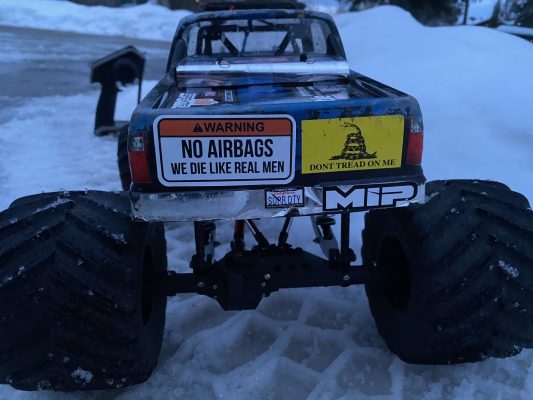
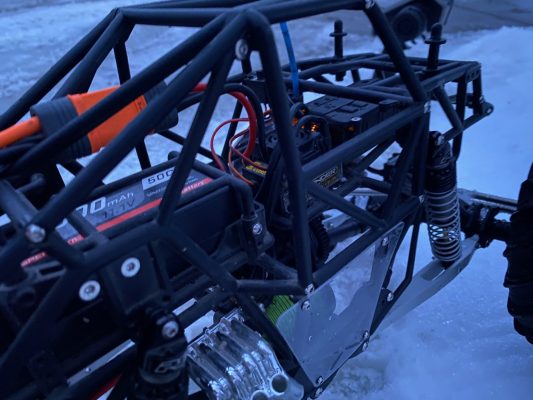
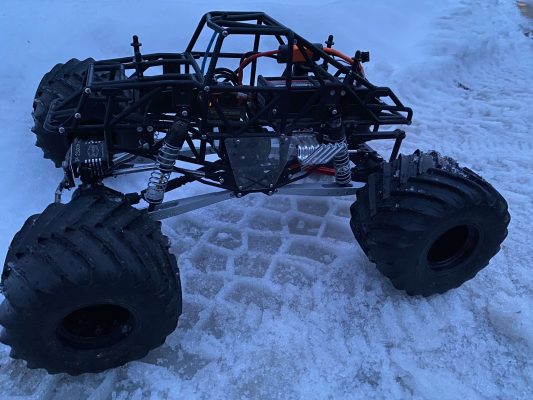
Final Build Photos


Please rate this ride  (1 votes, average: 5.00 out of 5) (1 votes, average: 5.00 out of 5) |
| Submitted By | |
| Ethan Stehr |
|
| Kalispell, Montana, United States of America | |
| Build Information | |
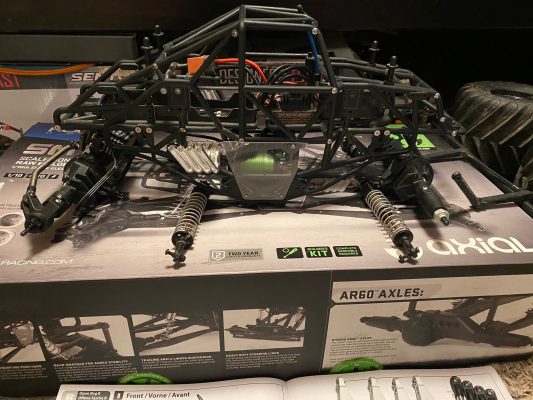
| Readers Ride Title | Father-Son SMT10 Build |
| Vehicle Class | Monster Truck |
| Chassis Brand | Axial |
| Chassis Model | SMT10 |
| Body Brand | Pro-Line |
| Body Model | Pro-Line 2008 Ford F-250 |
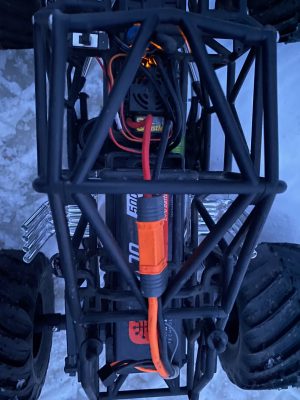
| Power System | Electric |
| Electric Motor Brand and Model | Castle 3800Kv Brushless motor |
| Speed Control Brand and Model | Castle Sidewinder ESC |
| Battery Brand and Model | Spektrum 3S Hardcase LiPo |
| Wheels and Tires Brand and Model | jConcepts Tribute wheels with jConcepts Renegades tires |
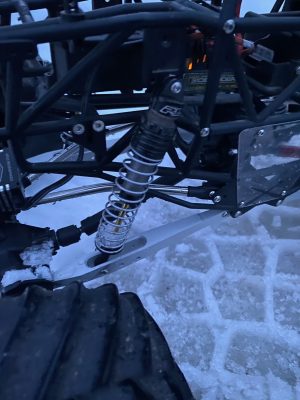
| Shocks Brand and Model | Pro-Line PowerStrokes XT (5") |
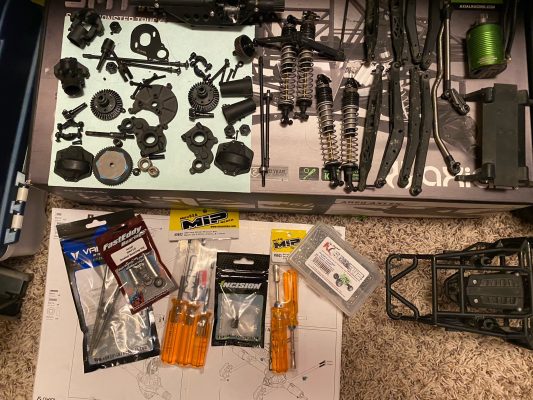
| Axles Brand and Model | Stock Axial housings, Vanquish VXD rear axle shaft, Vanquish Incision 38/13 ring/pinion gears front and rear, Vanquish aluminum lower trailing arms and Incision upper links |
| Paint Brand and Model | Tamiya Brilliant Blue and Tamiya Black rattle can paints |
| Graphics Brand and Model | Various decals and lettering |
| Light System Brand and Model | Pro-Line 4" Super Bright light bar |
| Radio System Brand and Model | Spektrum DX5 Rugged and SR515 reveiver |
| Other Options Brand and Model | SSD titanium steering links, Vanquish 25-tooth servo horn, Reefs RC servo, Fast Eddy bearings, RCScrewz stainless steel screws set |
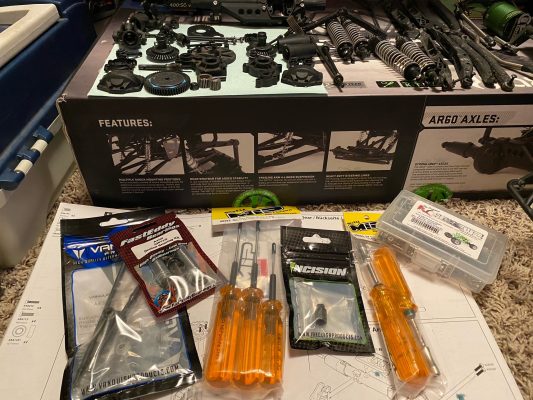
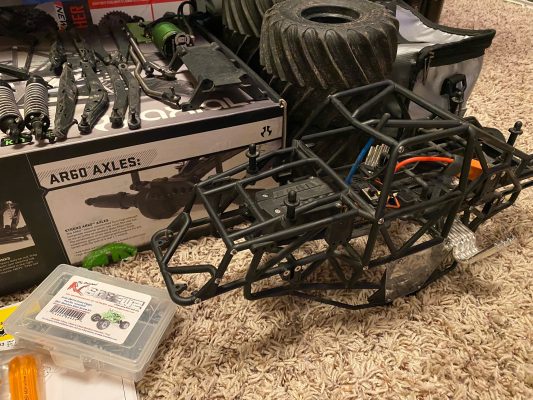
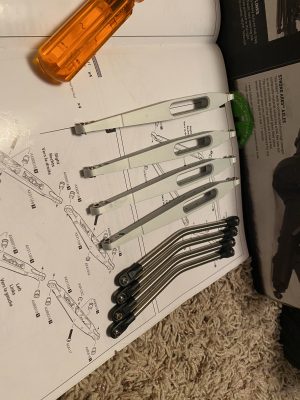
| Further Description/Back Story | My name is Ethan Stehr and I’m 17 years old! This project began over 4 years ago in 2020, when I got this SMT10 Raw Builders Kit for Christmas. My interest in solid axle monster trucks began with the June 2019 issue of RCCA, which contained Kevin Hetmanski’s King of Crushers monster truck, as well as many fond memories of watching Monster Jam in the old Metrodome and US Bank Stadium in Minneapolis, Minnesota. Me and my father built the kit, which was my first ever, over a couple of weeks. The electronics were recommended by my local hobby shop, and everything else was stock when we first built it. I was super excited to drive it for the first time, but when I did, I ended up snapping the stock steering links. I replaced them with some SSD titanium ones. Most of the other upgrade parts on the truck came in the same way, when I broke a part and had to replace it…mostly because I don’t have quite enough money to spend at one time to do everything that I want to it! Now that it works well (for the time being) it is super fun to drive! I plan to replace the front axle shafts with ones that match the rear, as well as aluminum OCP axle housings from Vanquish. Throughout this whole process, I learned so much, such as the fact that the L-wrenches included with the kit are not ideal for tinkering (so I bought some MIP wrenches), and have had so much fun figuring out how this kit works and enjoying the hobby! Thanks for reading and hope you enjoyed my project! |
Build Process Photos


![RC Car Action - RC Cars & Trucks | This 1/3 scale 125cc V10 Buggy is CRAZY [VIDEO]](https://www.rccaraction.com/wp-content/uploads/2018/05/V10-HP.jpg)


 Stay up to date with the latest information, sign up for our FREE newsletter today.
