

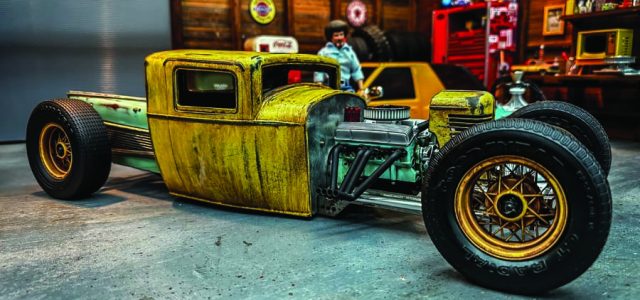
For seven incredible years, the world of RC Rat Rods has been my playground. I’ve embarked on countless journeys building and fine-tuning these miniature masterpieces. Today, I’m thrilled to share my passion with you by introducing my very first RC Rat Rod Builders Kit. It’s the culmination of years of knowledge and countless requests to create a versatile platform that allows you to channel your creativity and craft your own unique RC Rat Rod.
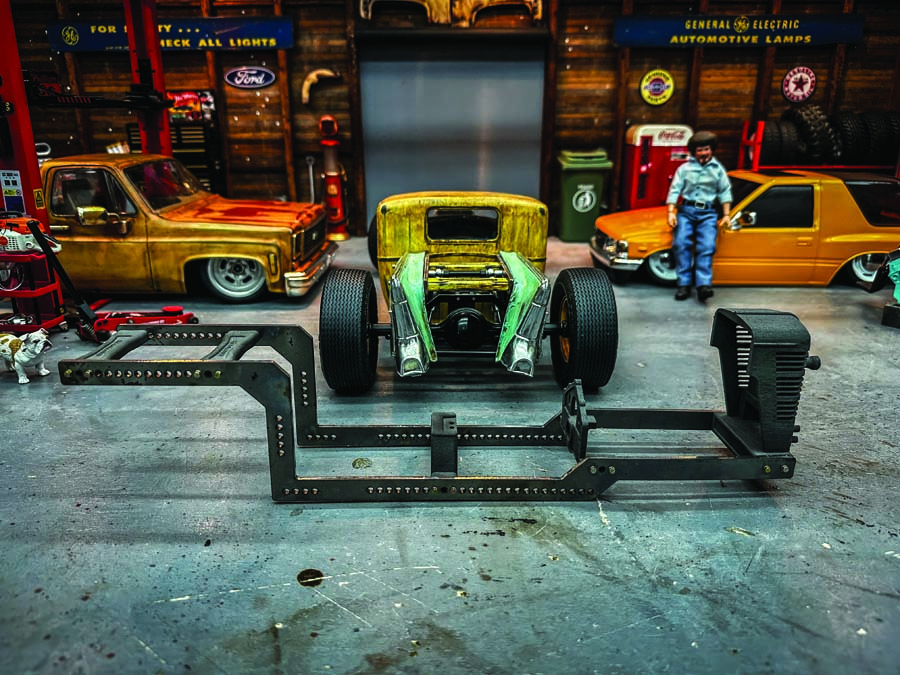
My #2 chassis kits are designed to be adaptable in every sense. They’re engineered to accommodate different tire sizes, various scale engines and your personal suspension design preferences. With these kits, the possibilities are limited only by your imagination.
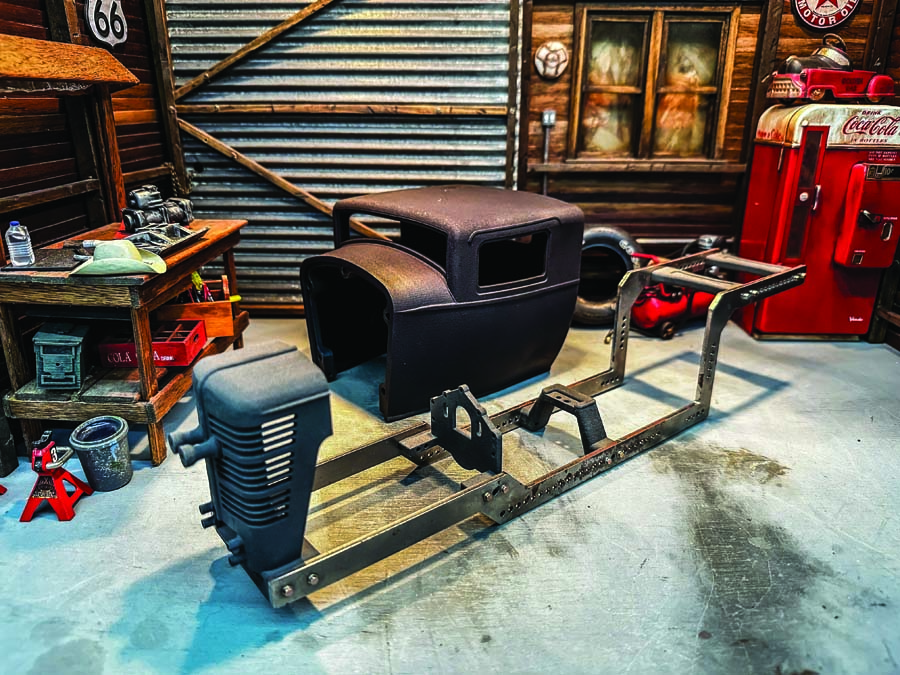
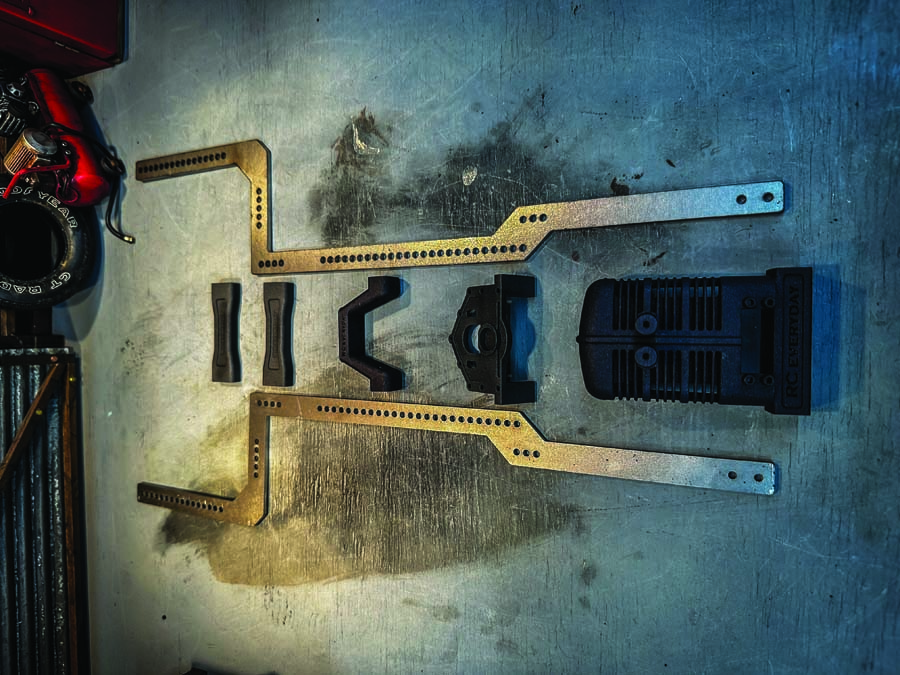
What’s included in the kit, you ask? You’ll find two laser-cut rails and five nylon-infused SLS printed crossmembers. These components are meticulously crafted to provide strength and durability. Two of the crossmembers are dedicated to reinforcing the chassis; one is designed for the transmission and another for the motor plate, perfectly suited for the RC4WD TCI scale transmission (the R4).
This chassis kit is the basis of many awesome Rat Rod and Hot Rod builds.
THE BUILD
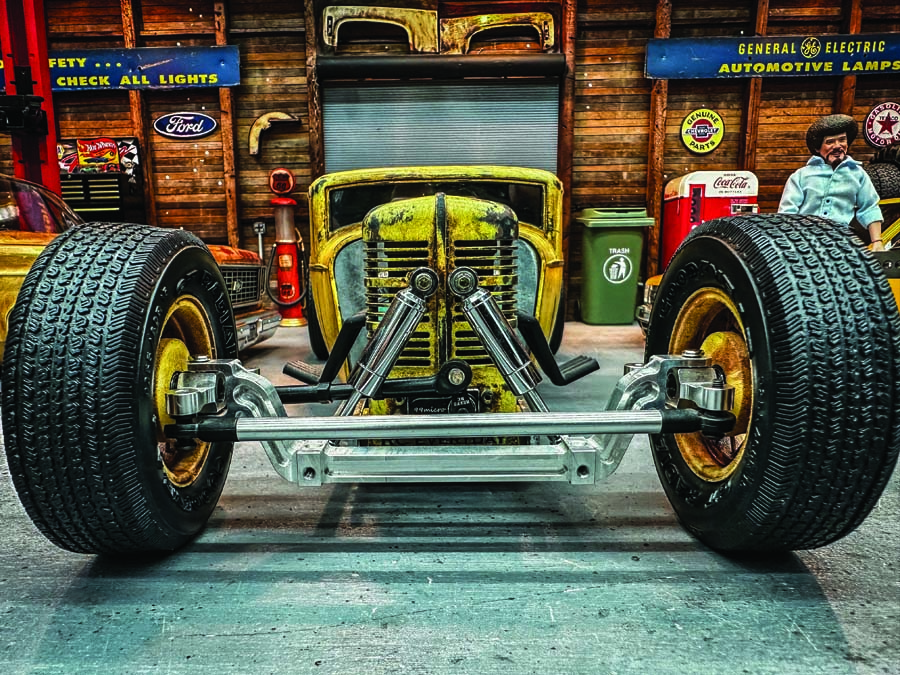
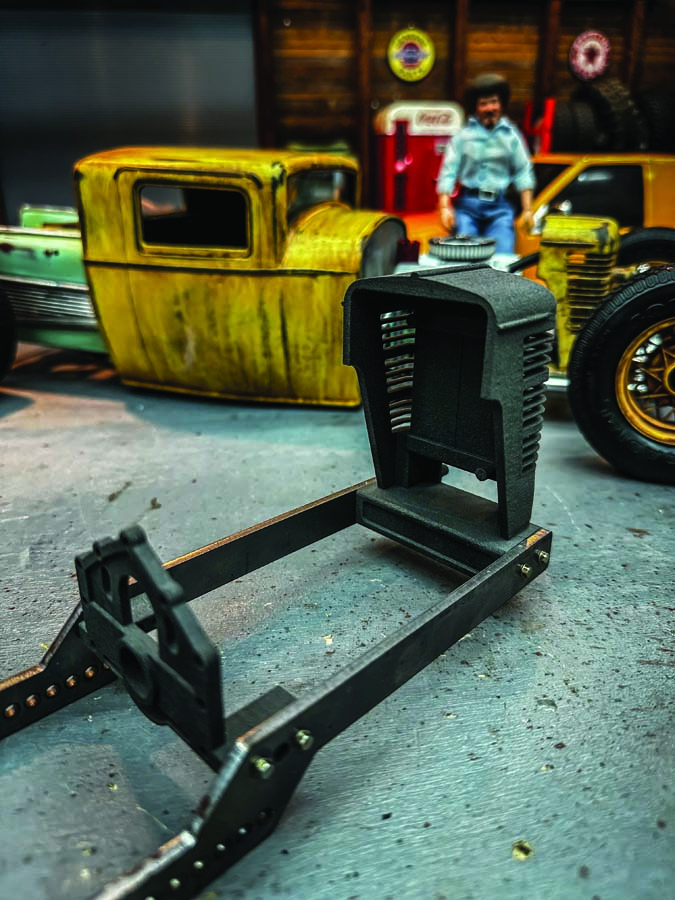
One of the standout features of this kit is the grille, which draws inspiration from vintage Farmall tractors. It’s not just a functional element; it’s a work of art in itself. The grille not only houses a scale radiator with hose hookups, but also serves as the front shock mounts and provides a cozy spot for a Reefs RC Micro 99 servo.
Modeled after my #2 Rat Rod build, this setup offers ample room for your creative touches. The essential components you’ll need are some M3x6 hardware, the RC4WD transmission, and the front axle from a Tamiya 1/14-scale semi-truck. If you prefer a dropped version of the axle to accommodate taller tires, custom options are available on eBay. Beyond these essentials, the wheelbase, suspension and overall appearance of your build are open for customization to align with your unique vision. Any rear axle with a 4-link mount will do the trick.
The body shells I offer are officially licensed by my dear friend Ossumdesigns and are also printed in nylon SLS, resulting in a remarkably smooth finish that’s perfect for your painting and weathering endeavors.
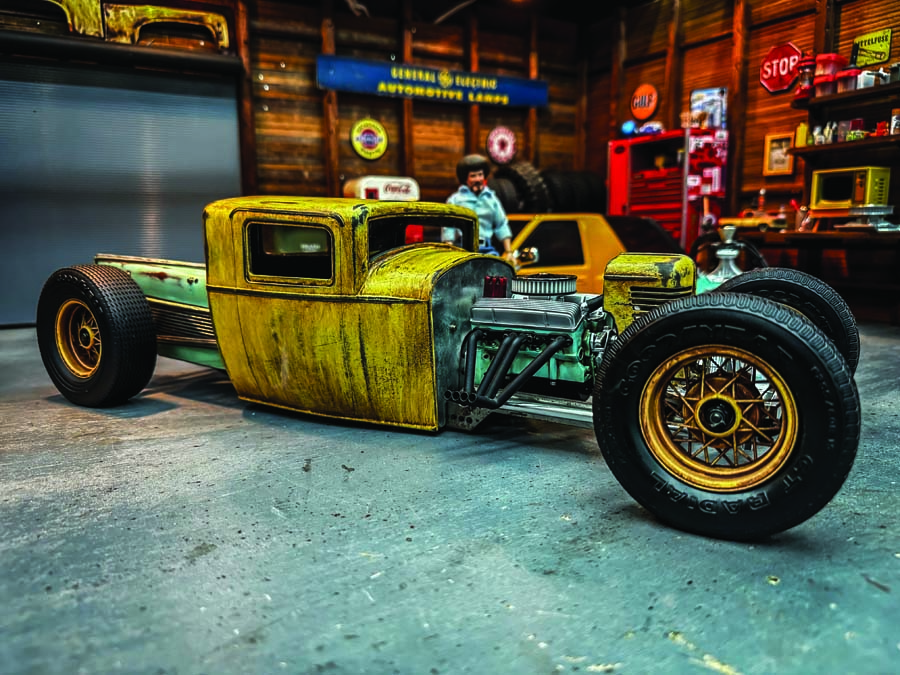
Keeping it scale with some wheels and tires that are taken from a Hot Rod model kit.
Assembling this kit is a straightforward process, and I’ve created a comprehensive playlist on the RCeveryday YouTube channel to guide you through various building techniques. I typically start by painting the chassis components, allowing for weathering if that’s your preferred style. The chassis rails, made from raw mild steel, are weldable and can develop a natural rust patina if you desire. Once painted, you can install your servo in the grille housing.
Next, you can install the transmission onto the motor plate and rear mounts. The chassis is designed to work with most 3D-printed engines and others like the SSD Trail Walker engine. Once your components are painted and ready, bolt them into the chassis.
In the rear, you’ll find two versatile crossmembers that support the rails for your chosen suspension setup. Whether you opt for simple RC4WD Bilstein 50mm shocks or go all-in with a cantilever or leaf spring system, the choice is yours. The length of the 4-link suspension is also customizable, allowing you to fine-tune the proportions based on your tire size and aesthetic preferences.
The front suspension is equally adaptable. The shocks attach to the ends of the 2-link radius-type suspension and tie into the grille for upper mounts. This part of the build is all about the builder—if you have bins of rods and rod ends, you’ll relish the opportunity to design your own suspension.
The RCeveryday Rat Rod chassis kit serves as a foundation for your creativity to build on.
“The essential components you’ll need are some M3x6 hardware, the RC4WD transmission, and the front axle from a Tamiya 1/14-scale semi-truck.”
FINAL WORD
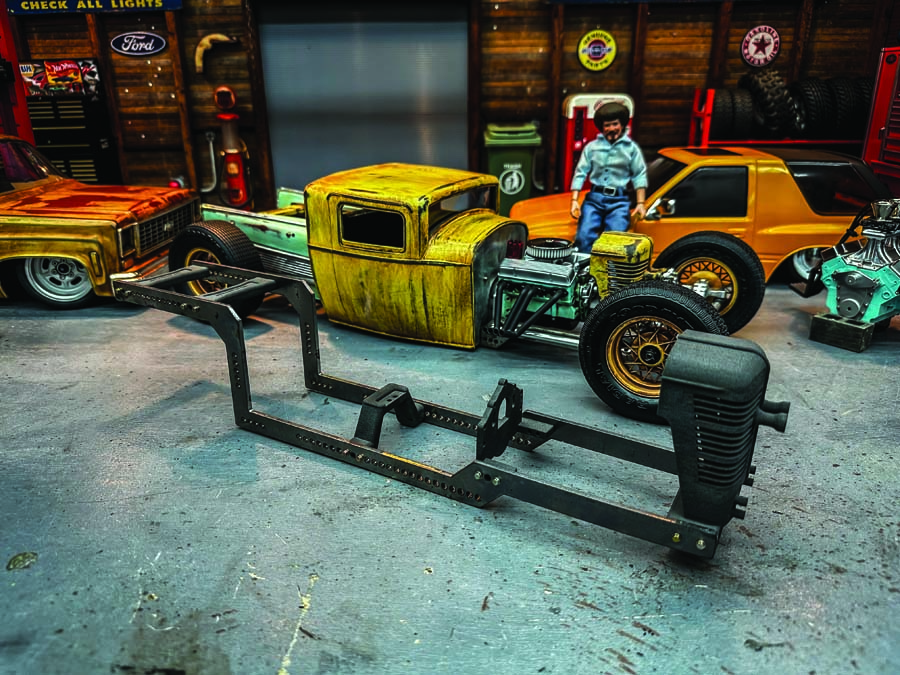
With this setup, I aimed to offer assistance while still preserving the spirit of a fully custom build. Each RC Rat Rod created using this kit will be unique, reflecting your individuality and creativity. If you’re ready to “think outside the kit” and embark on a one-of-a-kind RC Rat Rod adventure, this kit is tailor-made for you.
Let’s keep it scale and bring your RC Rat Rod dreams to life!
The Rat Rod kit’s pieces come ready for assembly. Add your own parts for a fully customized creation.
Visit RCeveryday.com for more information and to snap one up today. The chassis kits are priced at $140, while the bodies are available for $120. For a comprehensive assembly guide, check out the RC Rat Rod Kit Tutorial playlist on RCeveryday’s YouTube channel.
Text and Images by Josh Dutton


![RC Car Action - RC Cars & Trucks | This 1/3 scale 125cc V10 Buggy is CRAZY [VIDEO]](https://www.rccaraction.com/wp-content/uploads/2018/05/V10-HP.jpg)


 Stay up to date with the latest information, sign up for our FREE newsletter today.
