


Brushless motors come in so many of the RC kits we enjoy nowadays. These compact powerhouses revolutionized the power delivery in our surface RC kits, providing loads more power and torque than their brushed predecessors. Unlike their brushed counterparts, brushless motors tend to require far less regular maintenance thanks to the lack of brushes.
Though brushless motors don’t require regular changing of brushes, they still benefit from regular basic cleaning and occasional thorough maintenance, when needed. If you have put a lot of time on your brushless motor or are noticing a lack of power or some crunchy sounds, it’s a good idea to get in there and give it a full cleaning. Follow along with this simple guide as we detail the process of disassembling and thoroughly cleaning your brushless motor.
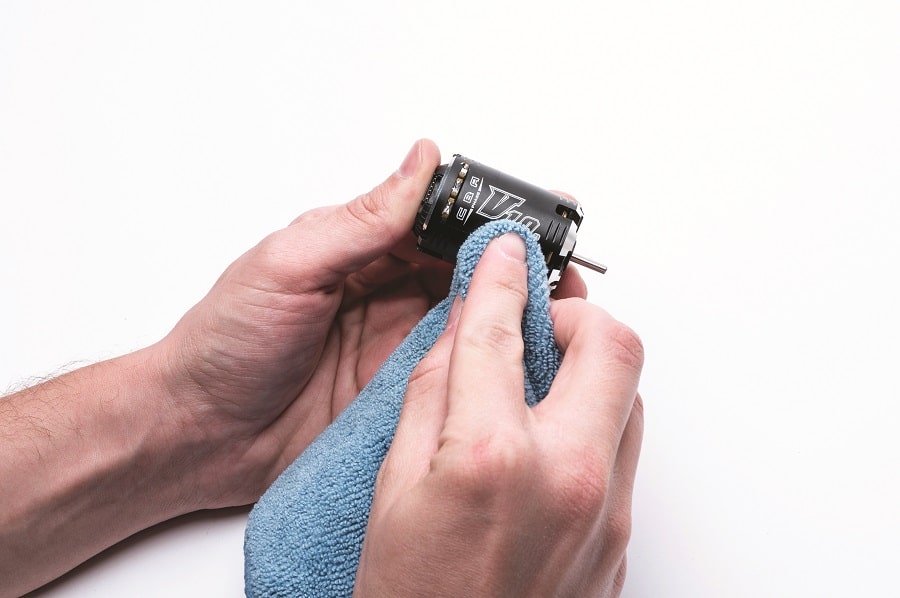
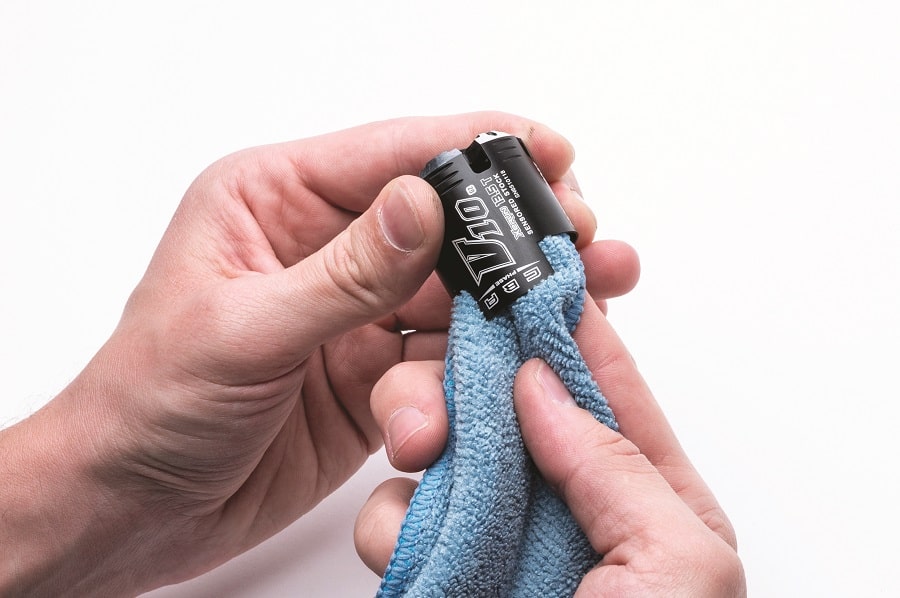
1. Cleaning the Exterior
The first step in the process is giving the exterior of the motor a good cleaning. I like to first blast off any loose dirt with some compressed air and then remove the motor from the chassis. Once removed a wipe down with a microfiber towel and some gentle use of a soft bristled brush will work nicely to dislodge and remove any stubborn dirt on the exterior of the motor can. Take care around any timing adjustment parts, being sure to brush away hidden dust and debris.
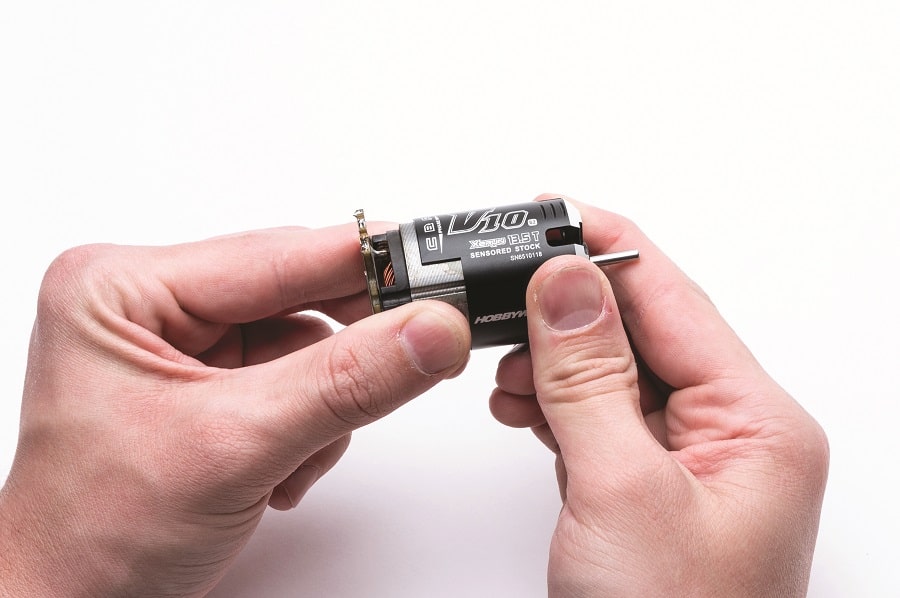
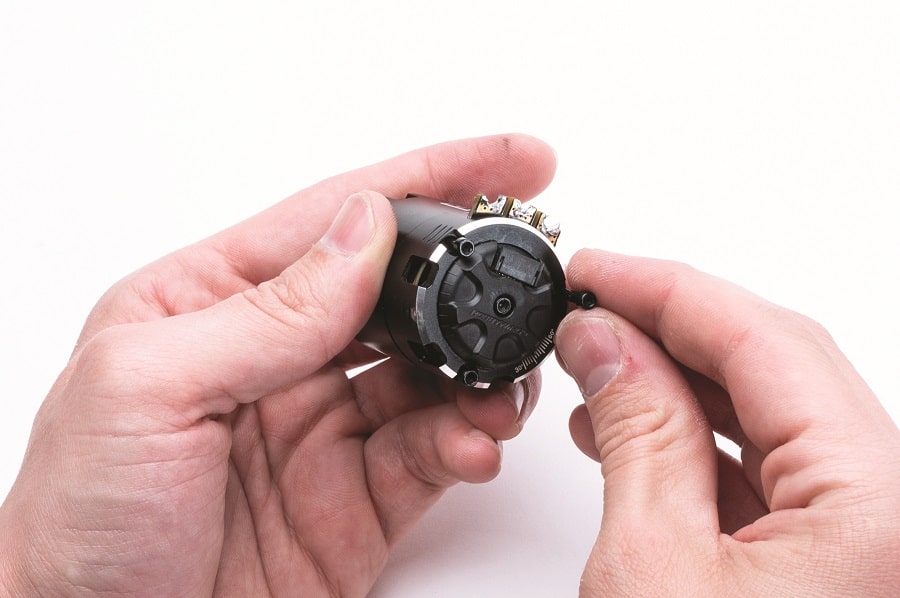
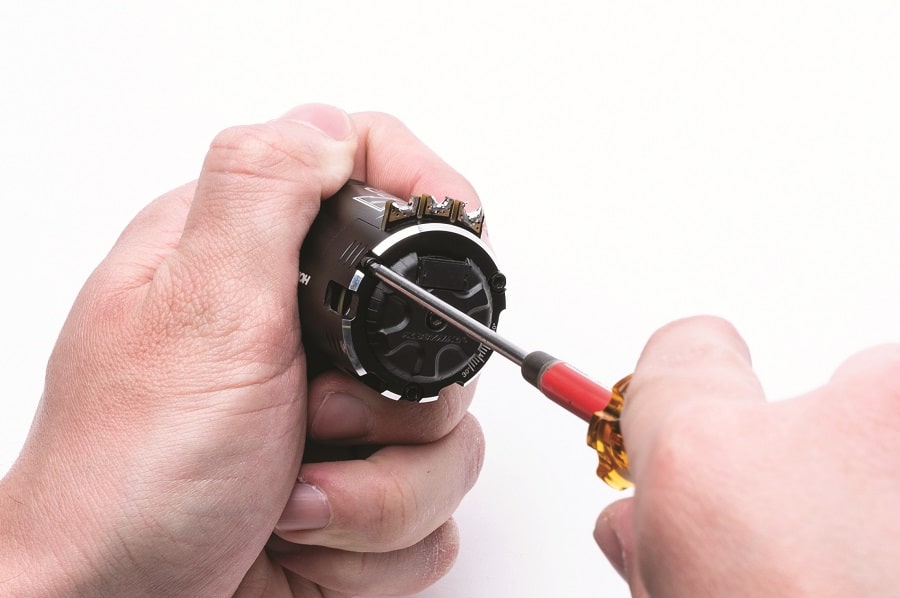
2. Taking it Apart
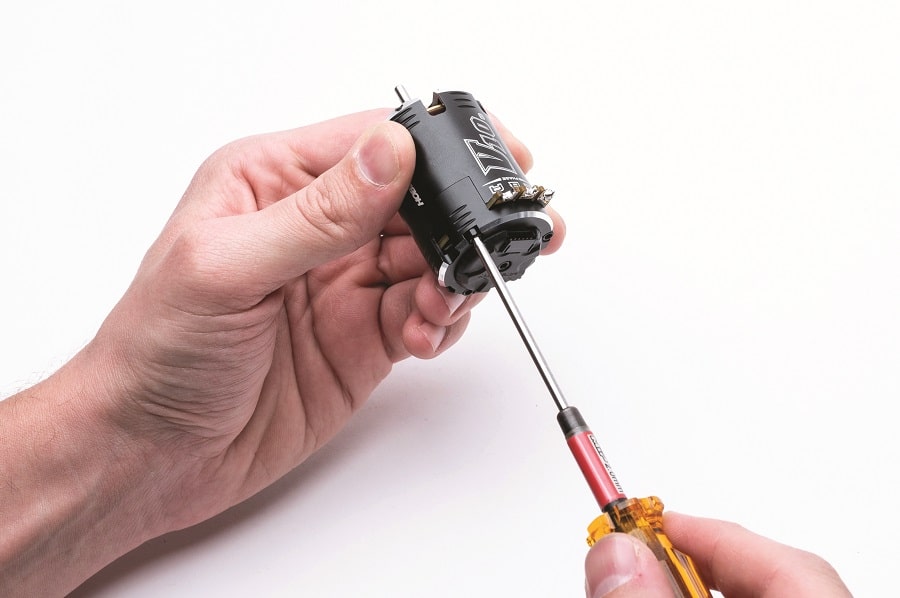
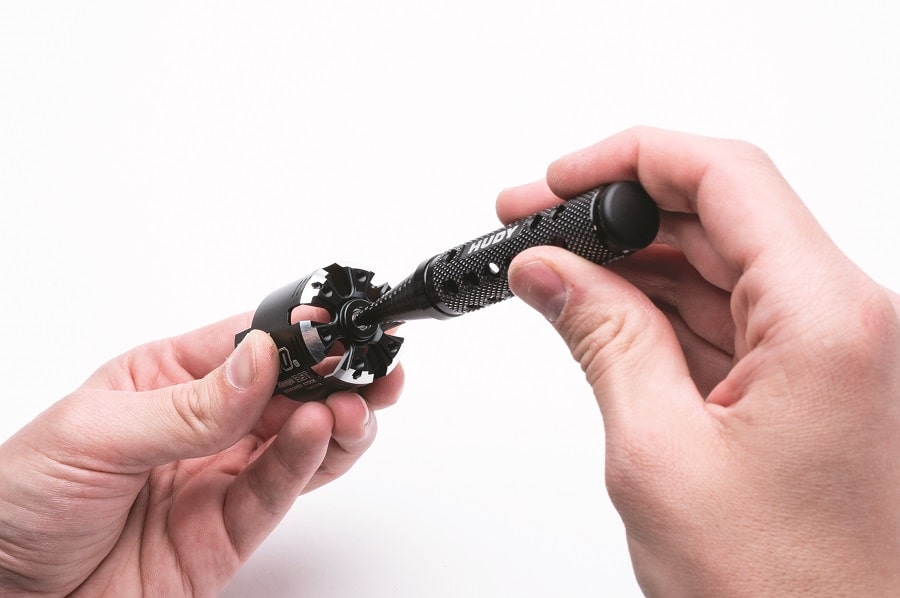
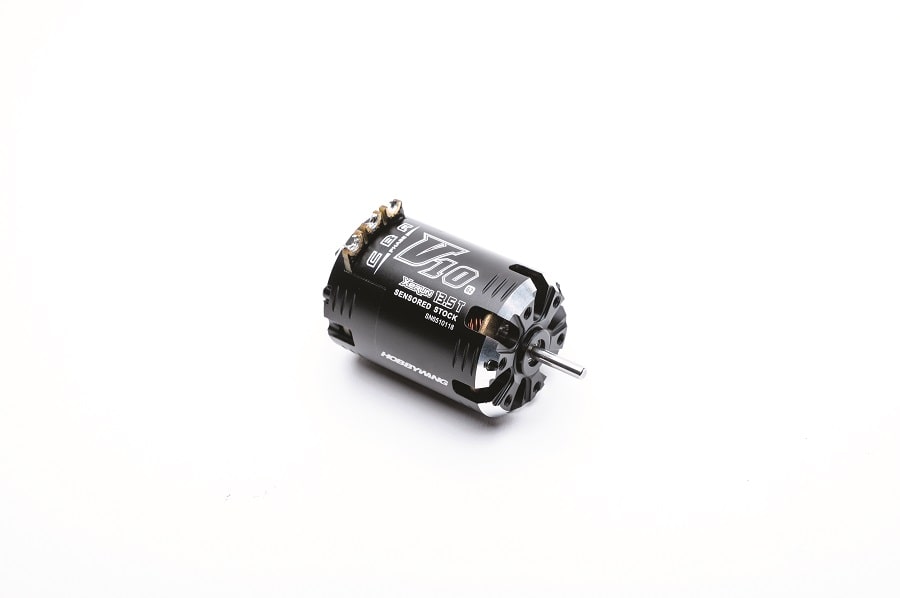
The next step of the process is taking the motor apart. Locate and loosen the main screws that hold the motor together. We used a Hobbywing V10 racing motor for the example in this article, which has 3 long main screws that tighten the front and rear portions of the case together. Other models may vary, but are usually similar, having just a few long main screws to keep it all together. Once you loosen them up, remove them, give them a good cleaning, then set them aside in a parts tray to await reassembly.
After removing the main screws it’s time to remove the outer case. For the Hobbywing V10, this consists of a front shell that makes up for about 2/3 of the outer case and a rear shell that takes up the last 1/3. Always take care when removing the outer case so as not to damage it, the bearings, or the internal rotor. If it gives you a hard time, simply stay patient and gently wiggle the can ever so slightly back and forth until it starts to loosen up.
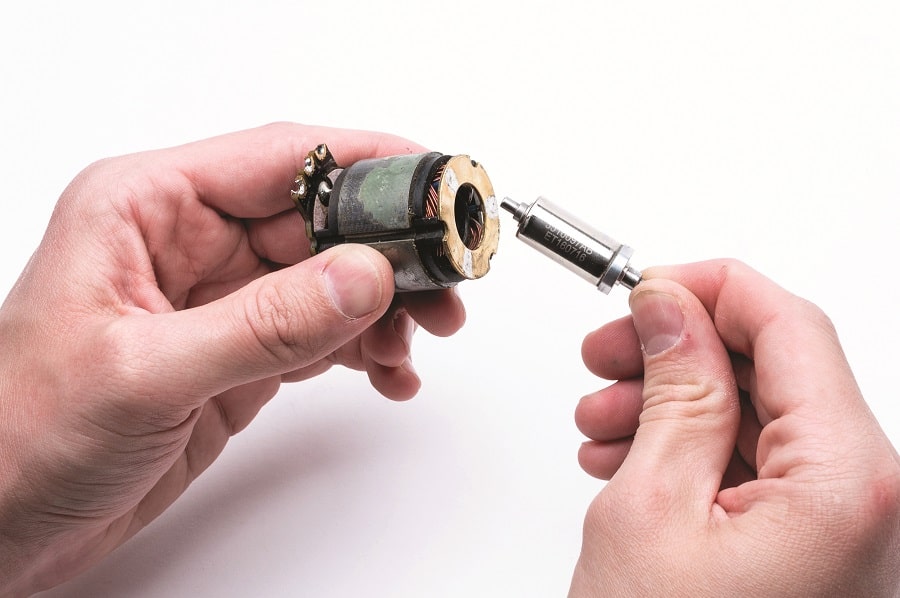
3. Removing The Rotor
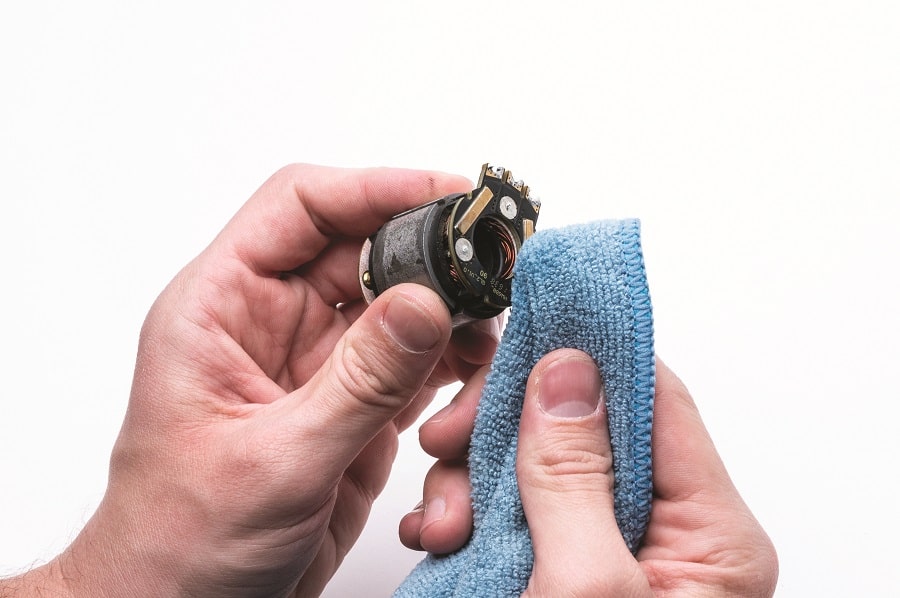
Now that the case has been disassembled, it’s time the remove the rotor. The internal rotor is one of the major parts of the motor and requires some care when cleaning and removing. Without the bearings to support the rotor, it will almost certainly stick to the inside of the stator (the big outer portion with the wound-up wires). Don’t worry when this happens, just take care when removing the rotor not to scratch it too much or move it around abruptly. Rotors aren’t so delicate that they’ll break the instant they touch something, but they are still a sensitive piece of the brushless puzzle.
Once the rotor has been removed, inspect for excess wear, and give it a good wipe down with a clean microfiber towel. After the rotor has been cleaned it’s a good idea to seal it in a small plastic bag and set it aside to await reassembly. Rotors are highly magnetic and can pick up all kinds of small bits of junk and debris if you let them roll around unprotected, so the plastic bag helps to prevent that from happening.

4. Removing The Rotor
Now that the case has been disassembled, it’s time the remove the rotor. The internal rotor is one of the major parts of the motor and requires some care when cleaning and removing. Without the bearings to support the rotor, it will almost certainly stick to the inside of the stator (the big outer portion with the wound-up wires). Don’t worry when this happens, just take care when removing the rotor not to scratch it too much or move it around abruptly. Rotors aren’t so delicate that they’ll break the instant they touch something, but they are still a sensitive piece of the brushless puzzle.
Once the rotor has been removed, inspect for excess wear, and give it a good wipe down with a clean microfiber towel. After the rotor has been cleaned it’s a good idea to seal it in a small plastic bag and set it aside to await reassembly. Rotors are highly magnetic and can pick up all kinds of small bits of junk and debris if you let them roll around unprotected, so the plastic bag helps to prevent that from happening.
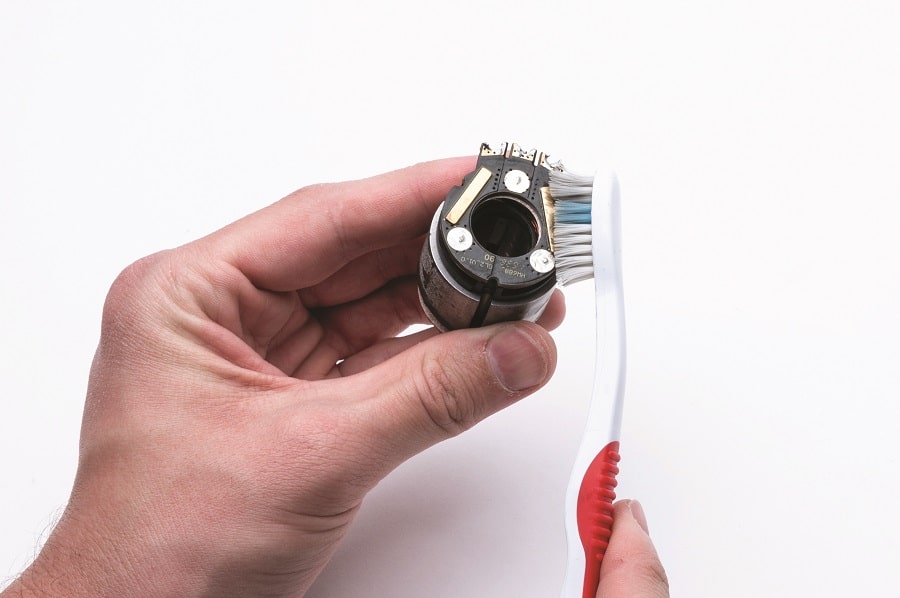
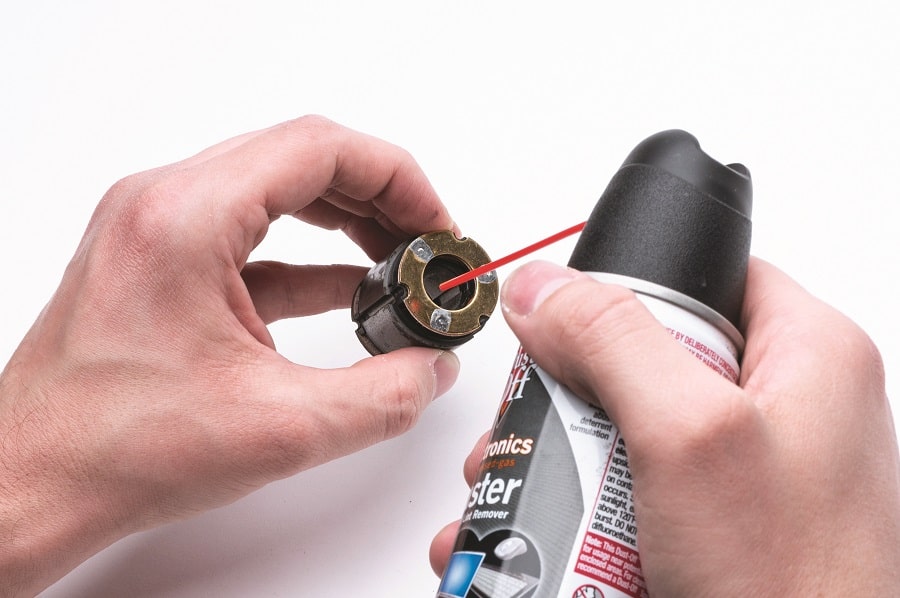
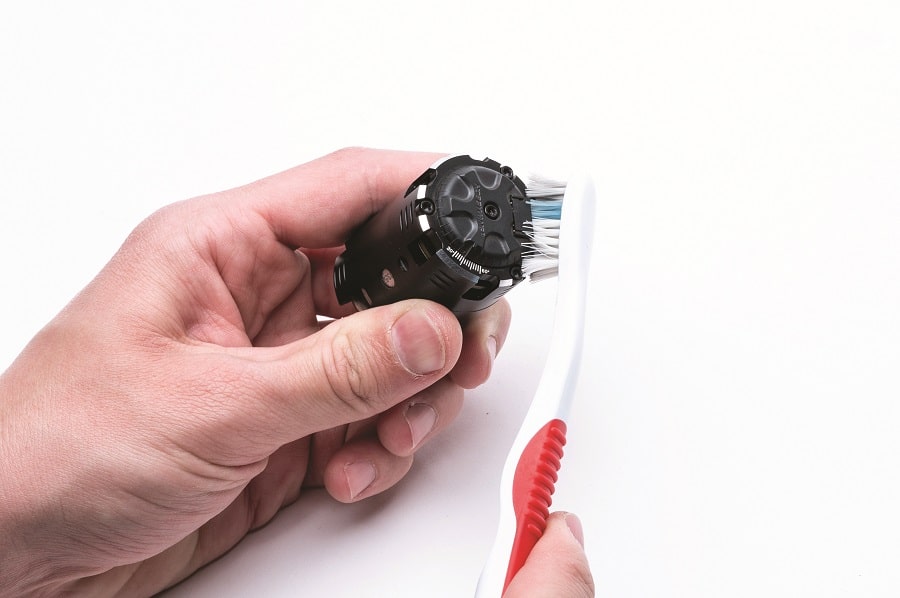
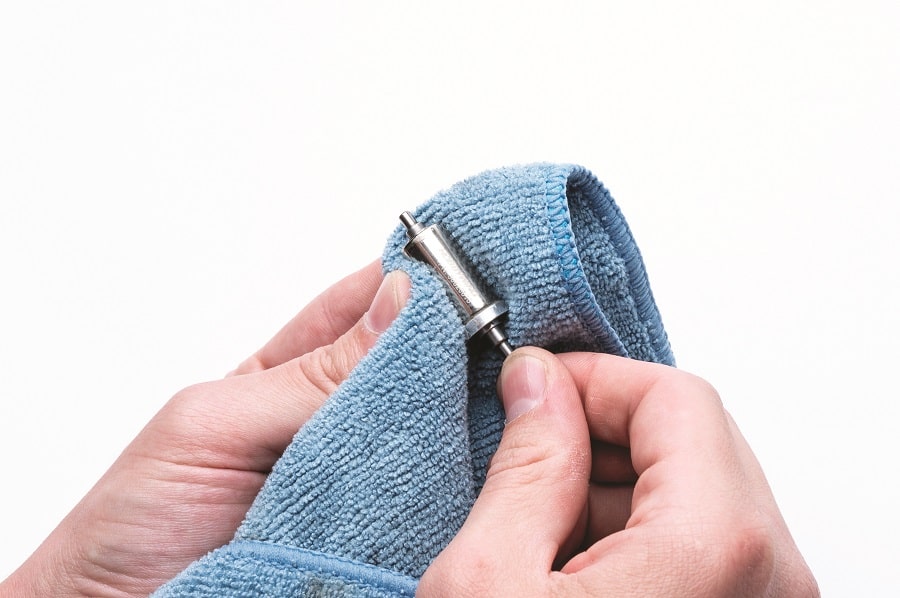
5. Clean The Contacts
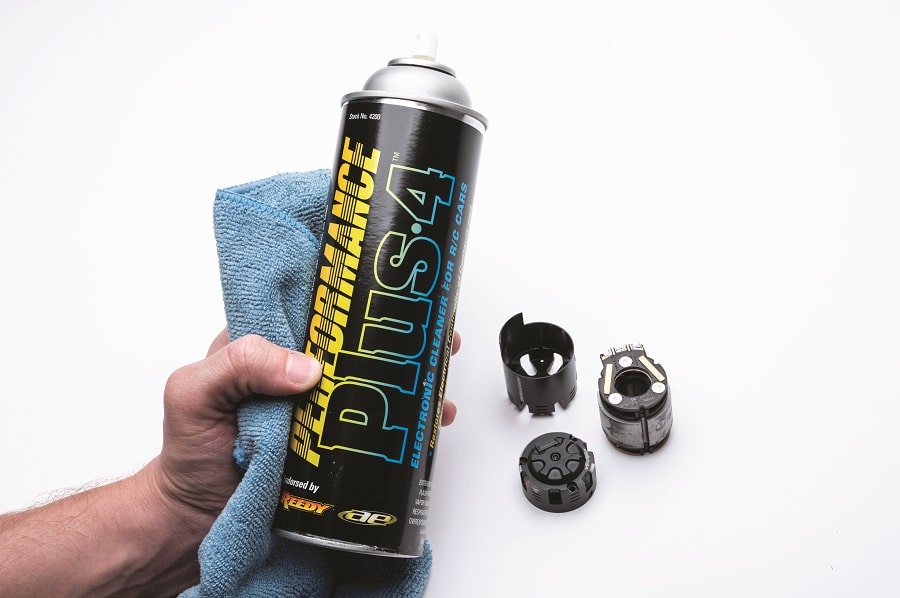
The next step of the process is to clean all the circuit boards and contacts. For this I reach for my preferred RC electronics cleaner, spray it onto a clean microfiber towel, and gently wipe down the boards, contacts, and circuitry on the stator and inside the end cap. For the sake of thoroughness, it doesn’t hurt to wipe down the inside of both portions of the motor case either, just to be sure they’re nice and clean.
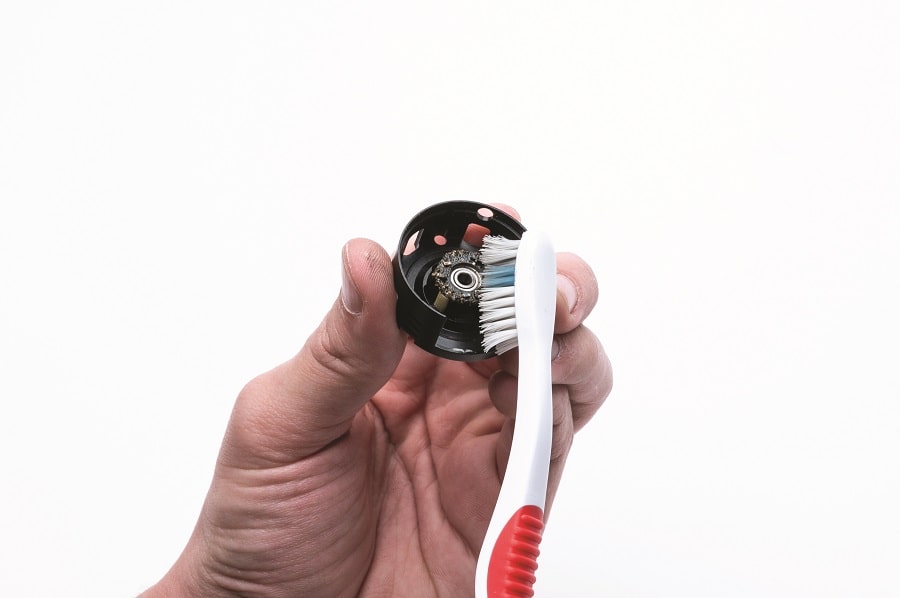
6. Inspect The Bearings
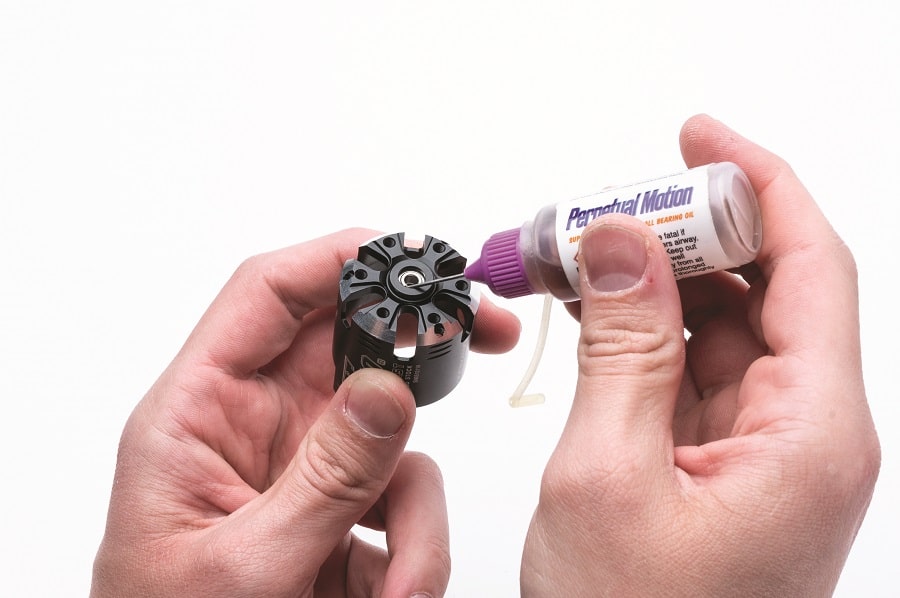
Now that the motor has been thoroughly cleaned, it’s time to give the bearings an inspection to be sure they’re still in good shape. Use a bearing checker, or properly sized tool shaft to spin the bearings feeling for any grit or excessive wear. They should spin smoothly and freely. If you feel anything funny, chances are they’ll need to be cleaned or replaced. Pressing them out and soaking them in some bearing cleaner will usually do the trick, but most manufacturers also offer replacements, so it never hurts to contact them and ask, if need be. If the bearings check out fine simply oil them with some lightweight bearing oil to make sure they continue to perform at their best.
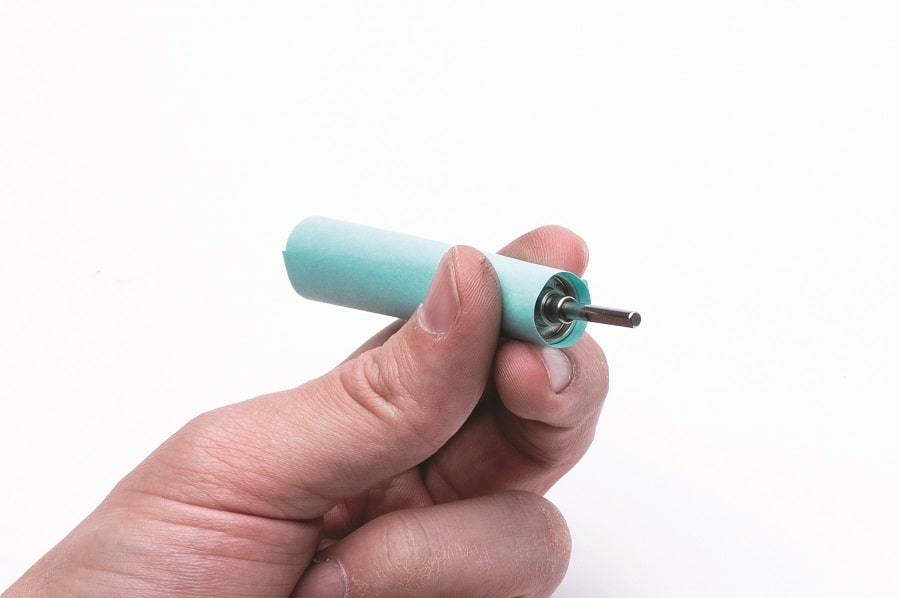
Reassembly Is A Reversal of Dismantling
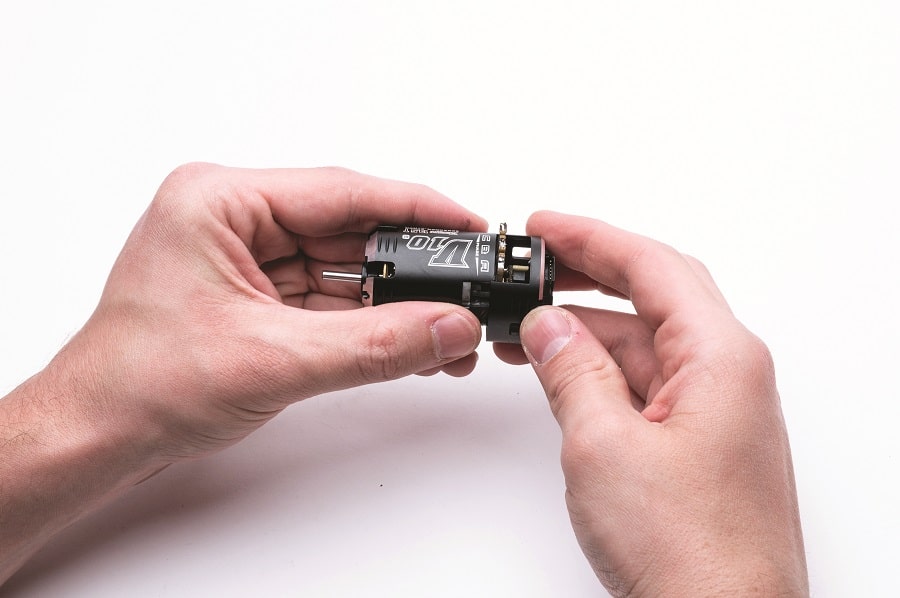
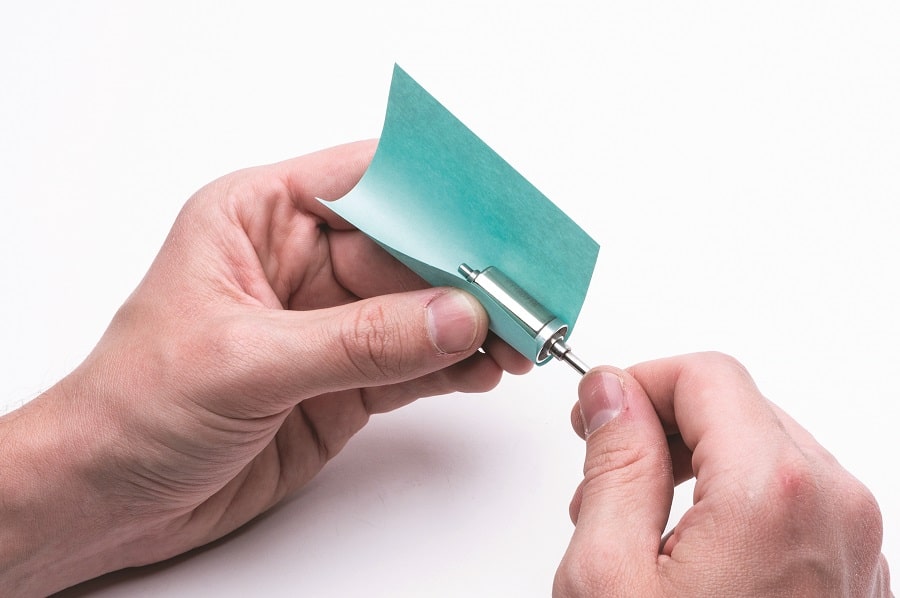
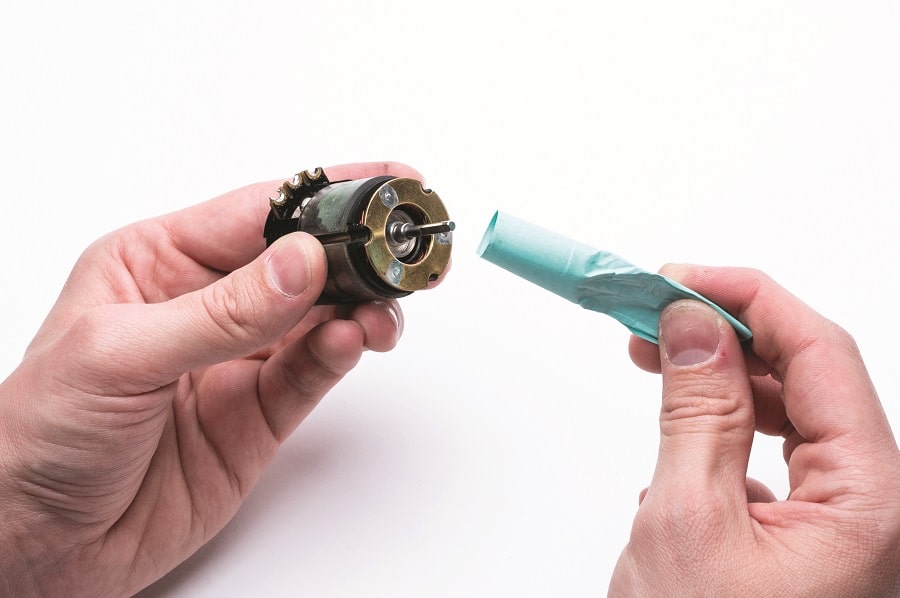
As the age-old saying goes, reassembly is the reverse of disassembly, with a few minor caveats. The first detail to pay attention to is the reinstallation of the rotor. I like to use what can be dubbed as the “Charlie Method”, a simple tip courtesy of Charlie Suangka from Hobbywing USA. Take a small, clean piece of paper like a sticky note or slightly thicker and make a cylinder by wrapping it around the rotor prior to installation. This will allow you to easily reposition the rotor into the stator without scratching it up or damaging it. It’s a simple tip and goes a long way in protecting your rotor.
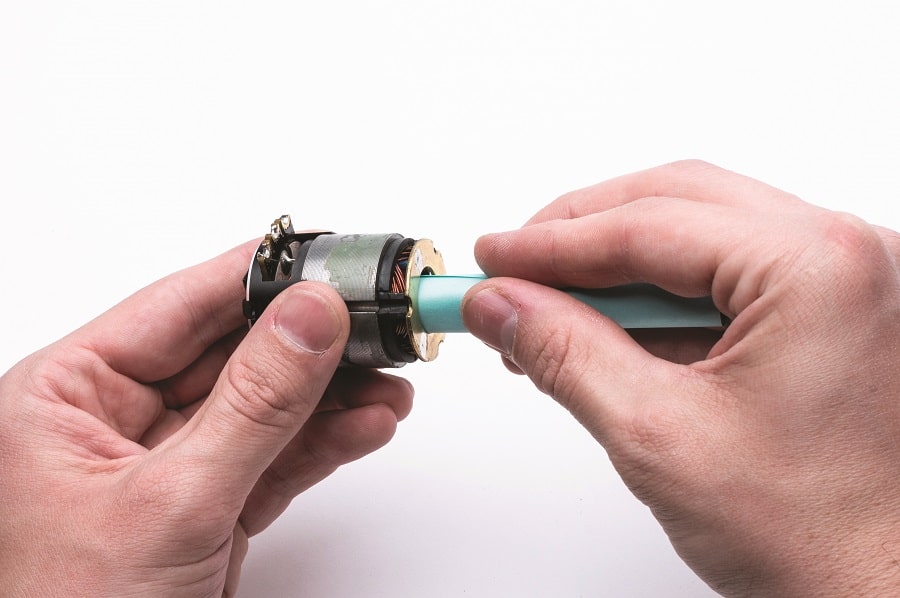
Once the rotor has been repositioned into the stator, it’s time to reassemble the shell. I like to start with the back portion of the case since it’s a lot easier to center the back bearing first, rather than the other way around. Take care not to catch any of the timing components on competition motors, taking time to align the rear shaft of the rotor with the rear bearing. Once aligned simply reinstall the rear portion of the case and you’re good to go.
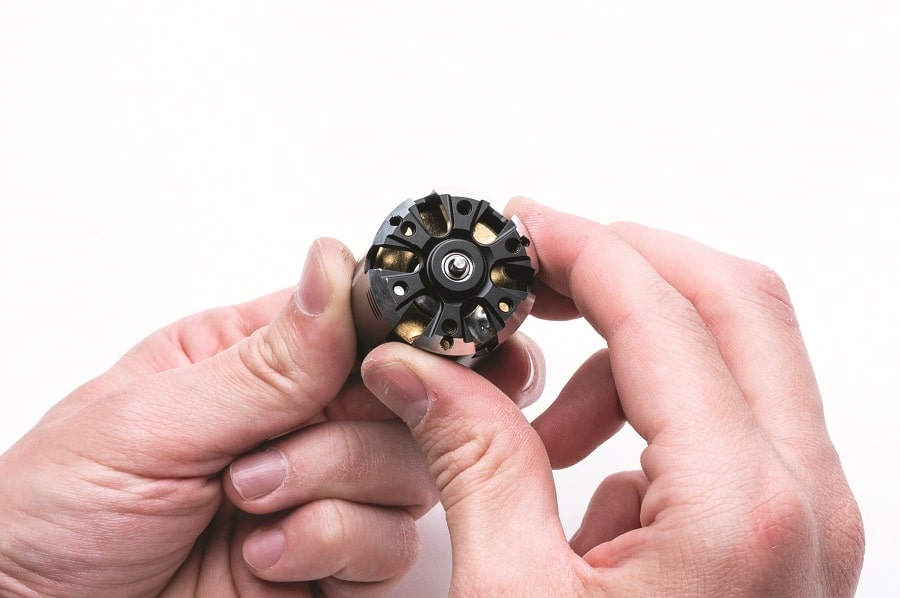
After replacing the rear case it’s time for the front. This can be easily done by slowly aligning the main shaft of the rotor with the front case bearing. Gently press the front case back over the stator and your motor is almost completely reassembled. Finish up reassembly by threading in the main screws. Drop them into place, tighten them up and your motor is cleaned and ready for action.
The Wrap Up
By giving your brushless motors a thorough once over and some occasional extended cleaning when needed you can ensure that they provide a long service life for years to come. Hopefully this simple guide helps you keep your brushless motors in top shape and ready to put the power down the next time you take out your favorite kit. Thanks for reading, I’ll catch you in next how-to.
Patience is a Virtue
Keep in mind that motor designs will vary. Use your best judgment when removing parts, take your time, keep a clean workspace and it’ll all work out fine. As with any technical process, the slower and more methodical you go during your first attempt, the more you
will learn.


![RC Car Action - RC Cars & Trucks | This 1/3 scale 125cc V10 Buggy is CRAZY [VIDEO]](https://www.rccaraction.com/wp-content/uploads/2018/05/V10-HP.jpg)


 Stay up to date with the latest information, sign up for our FREE newsletter today.
