


Tube frame crawlers have become a very popular style in recent years. With that in mind, I figured it would be worth highlighting some customization for these cool kits. There are tons of mods available, but one that recently caught my eye was the humble job of making your own custom panels to cover the chassis. This can be done with several types of materials, but the cheapest and quite possibly most fun option is using aluminum cans from your favorite drink. Join me as we go over the process of cutting your own custom panels using this thrifty method.
Needed Tools
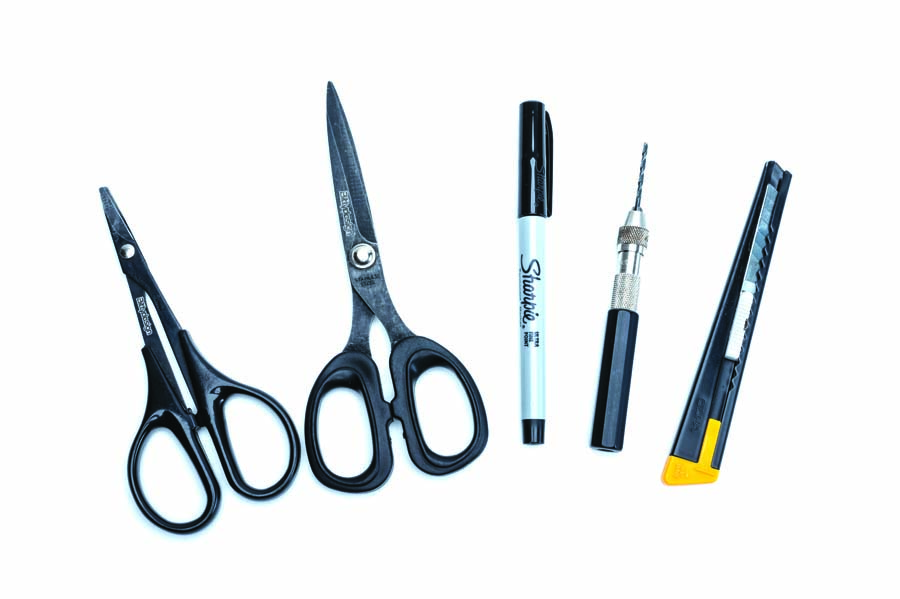
As always, let’s take a closer look at the tools needed for the job. The first thing I recommend is setting aside a good quality utility knife or small box cutter with a sharp blade. This cutter will be used to remove the top and bottom of the can and will leave the best finish when doing so. Next up you’ll need some scissors, ideally a set of straight-blade scissors and a set of curved. I personally prefer polycarbonate body scissors for this task as the blades hold up well to cutting the thin aluminum material. From there, grab a fine-tip permanent marker and a pin vise with a small drill bit.
Making Templates
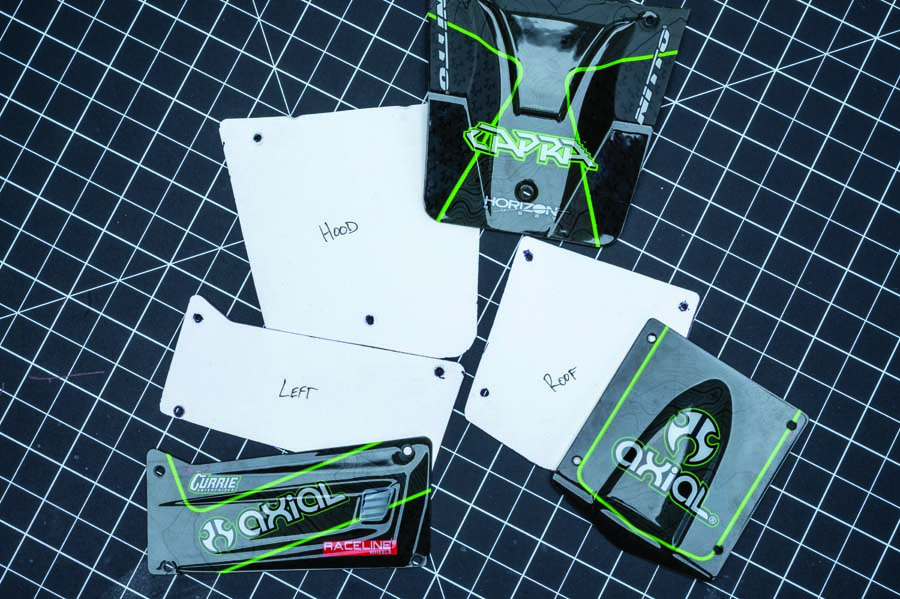
This is a fairly simple job, but a way to make it easier, and more importantly easily repeatable, is to make yourself a nice set of templates. I first removed the panels from the chassis, then one by one traced their outlines onto some white card stock. Any type of thin, heavy duty cardboard or thick paper should work fine. I made sure to also mark the screw holes as precisely as possible, which will help ensure proper panel alignment. Once each template has been cut out, you’re left with a full set of ready-to-use patterns that make the whole job that much easier.
PANEL TIME
Now that we have our templates, it’s time to work on the actual panels. I stopped drinking energy drinks years ago and don’t drink a whole lot of beer or soda, so the first thing that caught my eye in my recycling bin was the punchy design from a can of Liquid Death. Looks edgy, has a cool logo and a cool font—perfect.
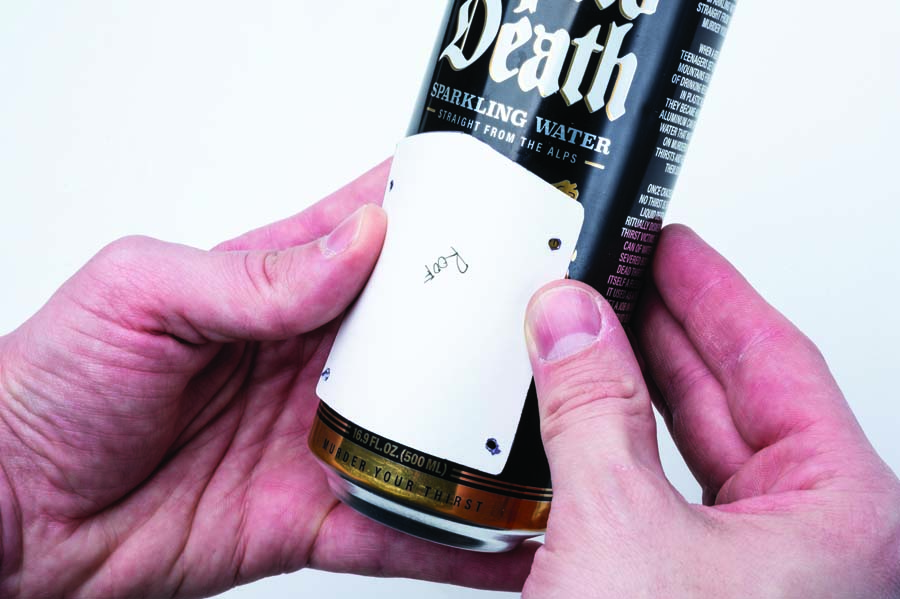


Using the templates, I mapped out exactly where I wanted each portion of the design. This is where the paper templates really help, as they easily bend around the shape of the can, allowing you to see exactly where the design will end up. As for how many cans you’ll need, that will depend on the size of the panels and the parts of the design that you like. I used a small-scale Capra for this job, so I was able to get away with using a single tall can for the whole set of panels.
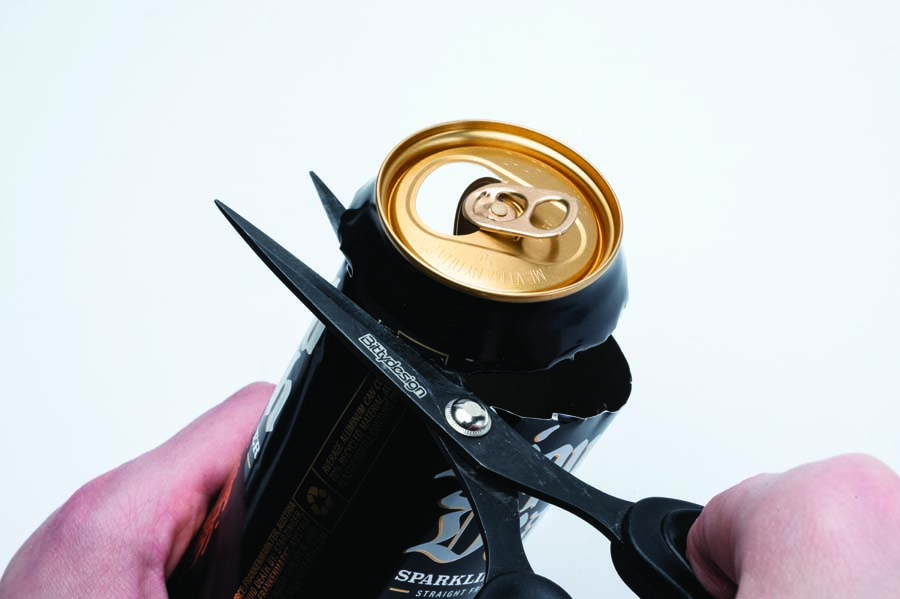
Once you’ve roughly gauged the design, it’s time to remove the top and bottom of the can. This part requires a bit of care since the aluminum will be sharp. Starting at the top, make a cut with the utility blade and trim around the neck of the can. I found the best place to trim was just where the can starts to bend into the smaller-diameter section. Cut all the way around the can, taking care not to cut yourself on the trimmed aluminum or the super-sharp utility blade. I used scissors to trim the last half-inch or so of the cut. Repeat this process for the bottom of the can. Once the top and bottom have been removed, cut the body of the can lengthwise with the straight scissors, or wherever makes sense for your panel layout. Take your now fully cut aluminum can and lay it out onto your cutting mat so it’s nice and flat. The can will still want to curl up and curve, which is natural, but do your best to keep it flat. Mark the outlines of each template on the face of the can and set the templates aside.
Now that we marked off each panel with our templates, it’s very easy to cut them from the material. Take your scissors and carefully remove each panel from its respective section. Once the panels have been cut out, it’s time to punch the screw holes and trim any possible excess. Using the template, set it against the silver side of the aluminum. This allows for quick comparison of the template to the cut piece. Mark off any excess with your marker and mark out the screw holes as well. Using the pin vise and drill bit, carefully press and twist the bit on the marked holes. With a little bit of pressure the hole will start to open, leaving a centering point on the other side of the panel. Don’t worry about drilling all the way through from the backside; simply flip the panel over to find the point of each screw hole and continue from there. A minute or two later you should have cleanly punched screw holes. Alternatively, if you have a good center punch or a small enough metal hole punch, that will be even better for this process.
Bent Out Of Shape
It’s worth noting that the aluminum will bend a bit and may crinkle in some spots. This is a trial-and-error process, so if you find that the metal is too bent for your liking, try to figure out what went wrong and apply that knowledge to the next can that you cut. The beauty of this custom job is that it’s cheap and easy, and easily repeatable with the templates we’ve made.
Panel Fitment
Once the panels have all been cut and trimmed, it’s time to mount them up. Though we took care to be as precise as possible, you will most likely need to fine-tune some things for the panels to sit just right. This will probably require enlarging some of the screw holes to allow for a bit of wiggle room. The Capra specifically also needed a couple of small washers here and there; other models may be similar. In the end it’s all about personal taste, so take a bit of time, add a bit of patience, and you should have a final product that makes you smile.
Final Word
And that’s that. A cheap, fun, and simple solution for adding custom flair to any tube frame RC crawler. This custom job can be done with just some basic tools and an empty can of your favorite drink. Bold text, cool logos, and bright colors will really help you set your own tube frame crawler apart from the rest. I hope this article strikes up some inspiration for your own RC customization. As always thanks for reading, we’ll catch you in the next one.

Text and Images by Lauren Short


![RC Car Action - RC Cars & Trucks | This 1/3 scale 125cc V10 Buggy is CRAZY [VIDEO]](https://www.rccaraction.com/wp-content/uploads/2018/05/V10-HP.jpg)


 Stay up to date with the latest information, sign up for our FREE newsletter today.
