


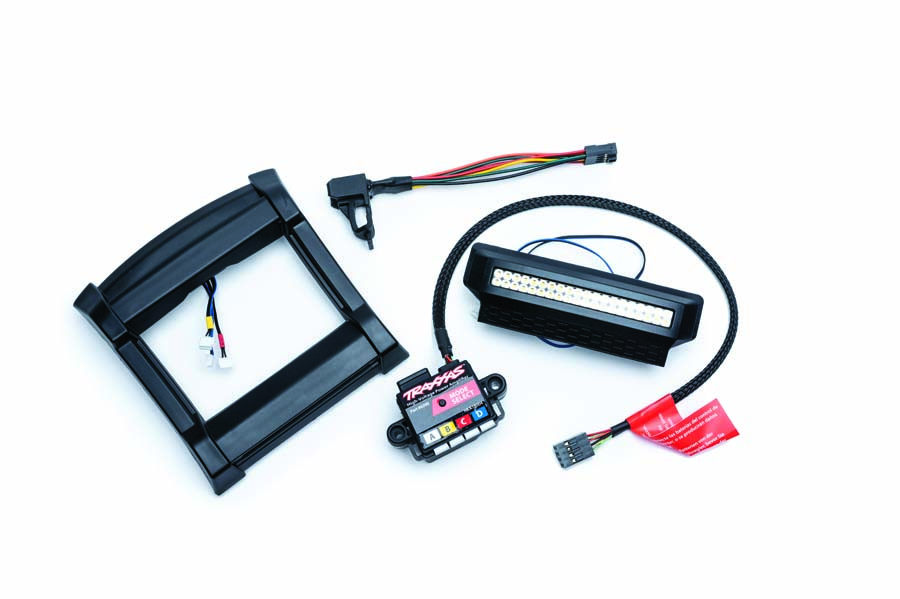
Traxxas is well-known for releasing tons of upgrades and option parts for their ever-growing lineup of RC vehicles. We recently got our hands on the optional LED light kit for the Traxxas Sledge and figured it’d be great to detail the installation process and our overall thoughts on the kit.
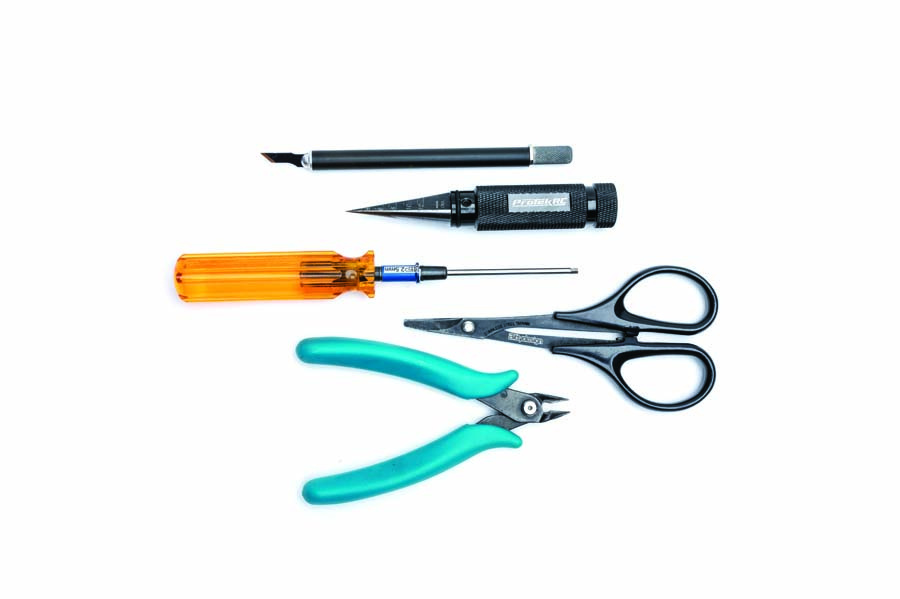
Tools
As with any modification or DIY work, you’re going to want to set aside the right tools for the job before you get started. The Traxxas Sledge light kit is relatively simple to install, so all you will really need is these few basic items: a 2mm and a 2.5mm hex driver, a tapered body reamer, a hobby knife with a sharp blade, a small pin vise with 2mm drill bit, some curved body scissors, and a small pair of flush cutters.
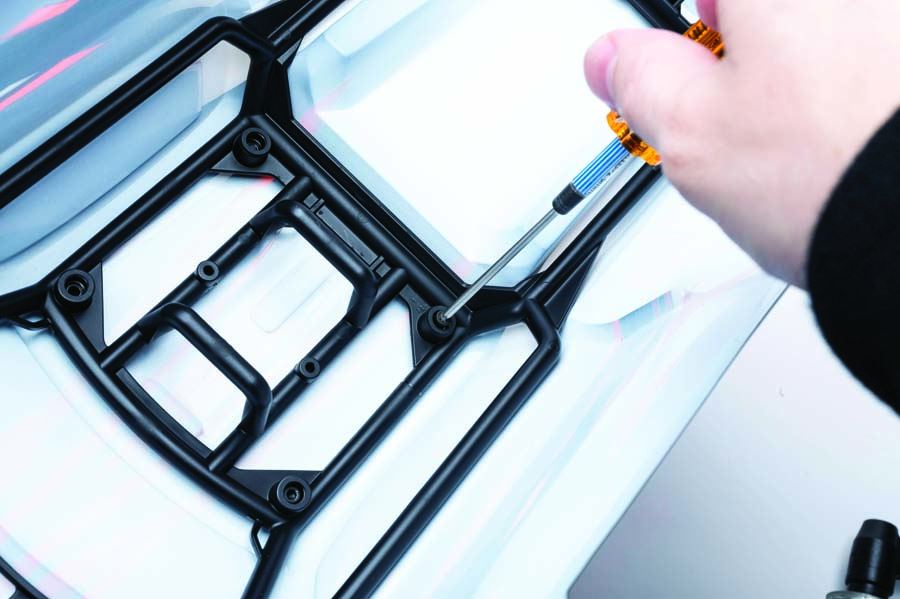
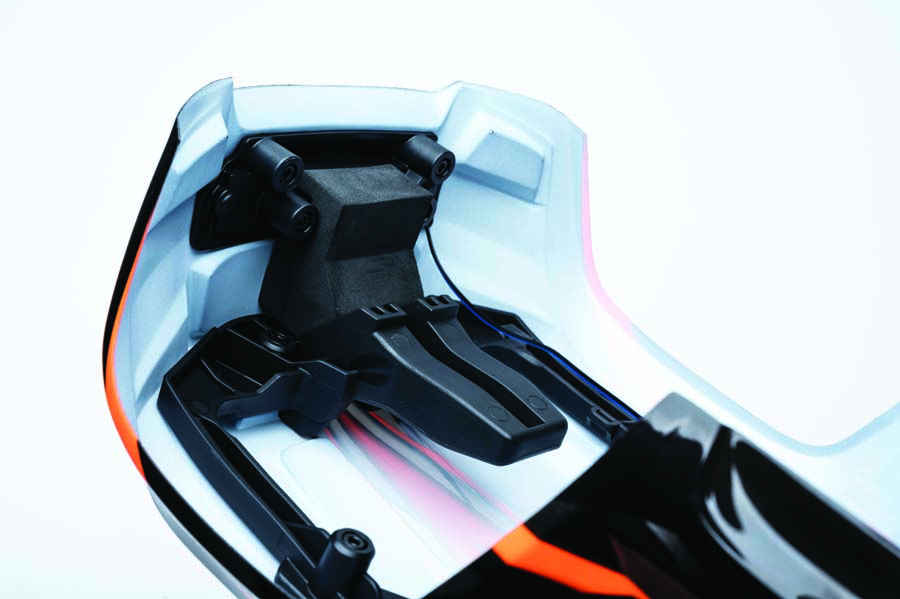
Removing The Inner Frame
The first step in the installation process is to remove the inner frame from the Sledge body. The cool thing about this truck is it uses a unique body mounting system that eliminates the need for traditional body posts and uses an innovative inner frame clip system instead. The main part of this frame needs to be removed in order to make the necessary modifications that are required to install the LED light kit. This is a simple process and only requires the use of your 2.5mm hex driver. Remove screws starting where the mid-section meets the front and continue all the way back towards the end until you finally remove the rear body clips and rear skid plates.
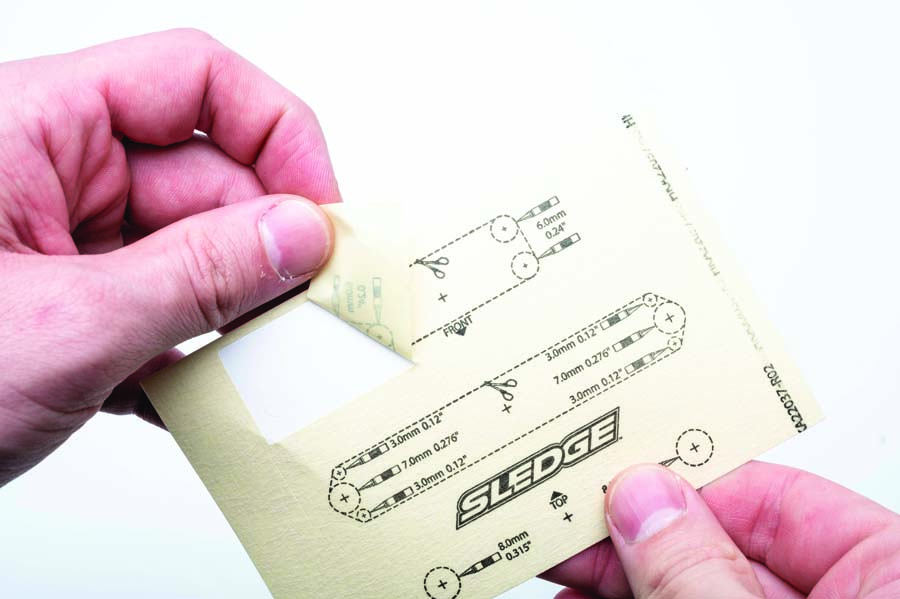
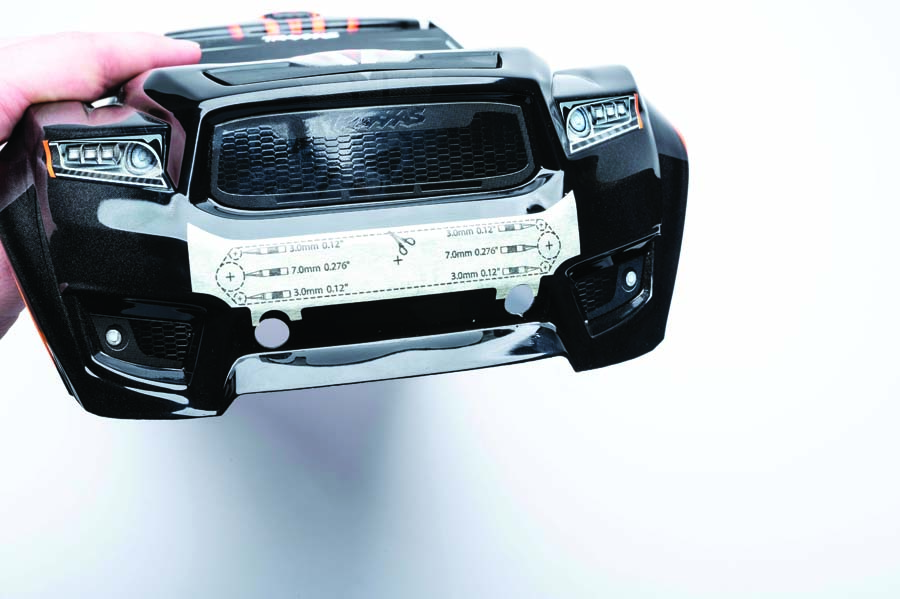
Easy Templates
To make installation even easier, Traxxas includes a sheet of pre-cut, pre-marked sticker templates to be applied to the parts of the body that need trimming. I found this sheet to be the perfect material, seeming to be made from high-quality body masking tape. The markings on each template are clear and concise, and line up nicely with existing holes and reference points. A caveat to this is that I did find placement of the second template, the one that goes on the front bumper, to be a slight bit finicky, but ultimately this didn’t really have an effect on the overall installation process.
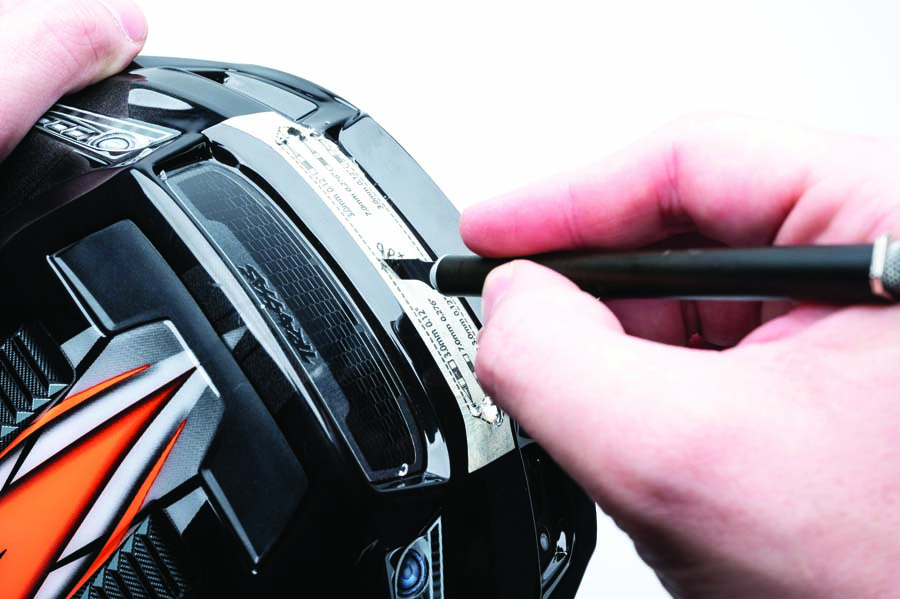
Cut By Numbers
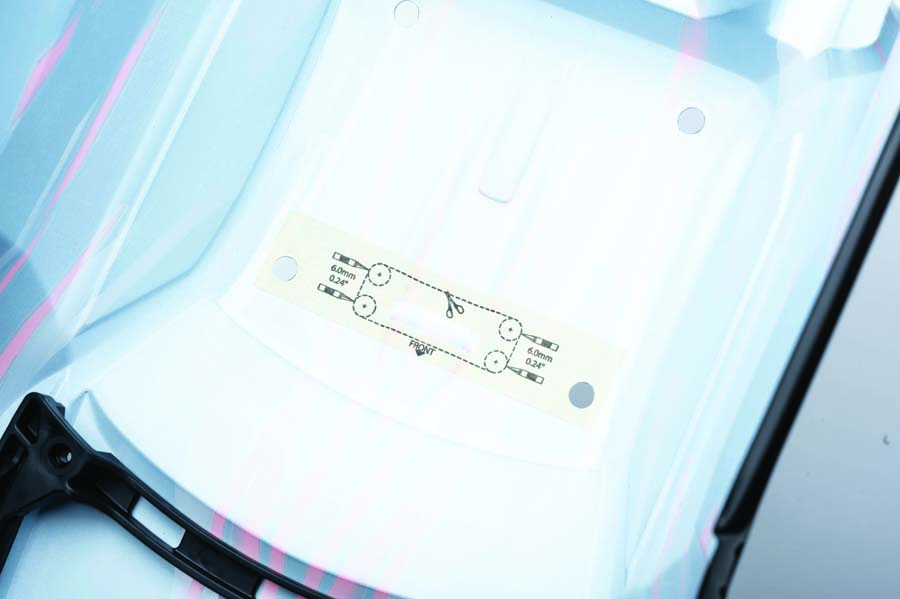
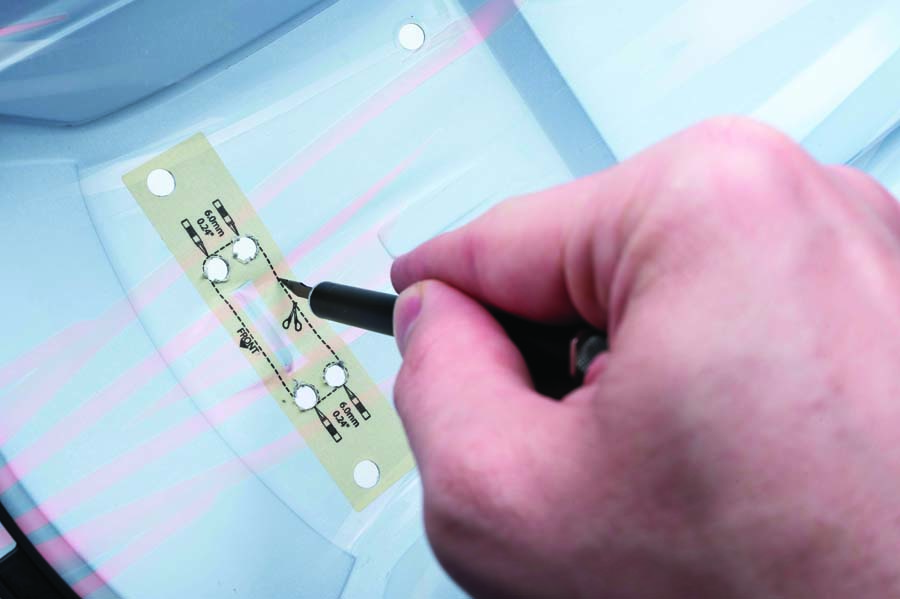
I started with template #1, the one that goes on top of the body. Traxxas’ instructions called for placing this template on the outside of the body, but I opted to place it inside instead. This is because any time there is even a little bit of cutting or trimming involved, I prefer not to potentially damage the outside of the body. Placing the template on the inside means if my hand slips or I mark something incorrectly, it only affects the inside of the shell.
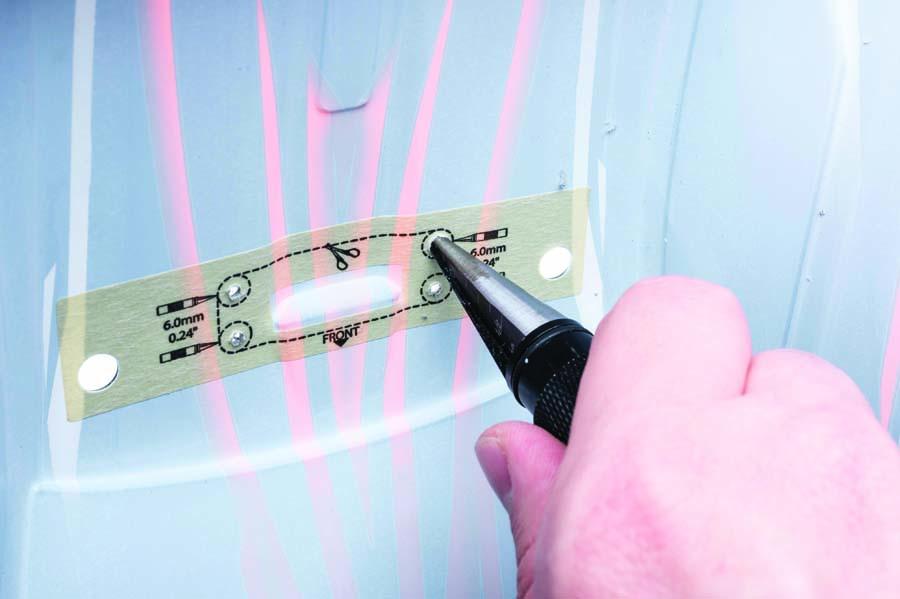
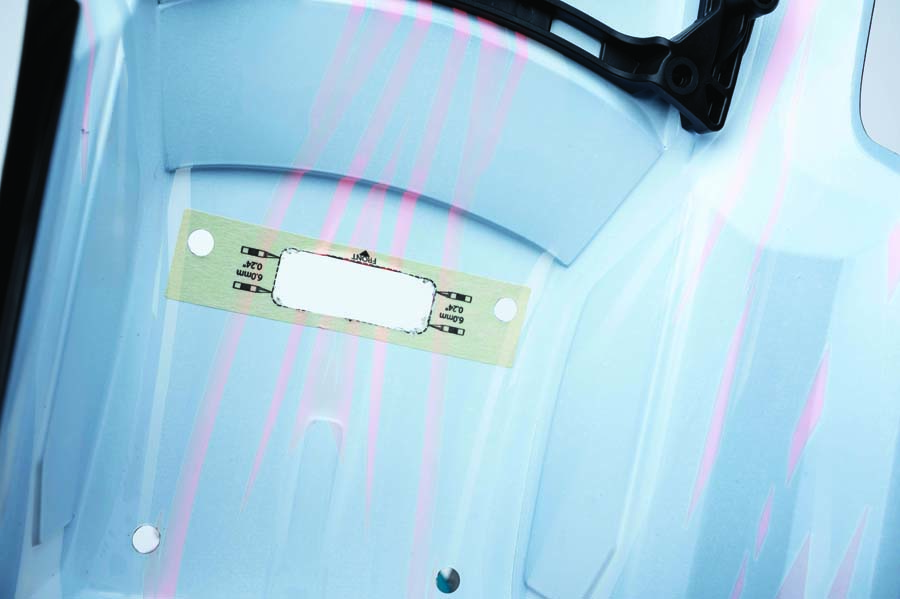
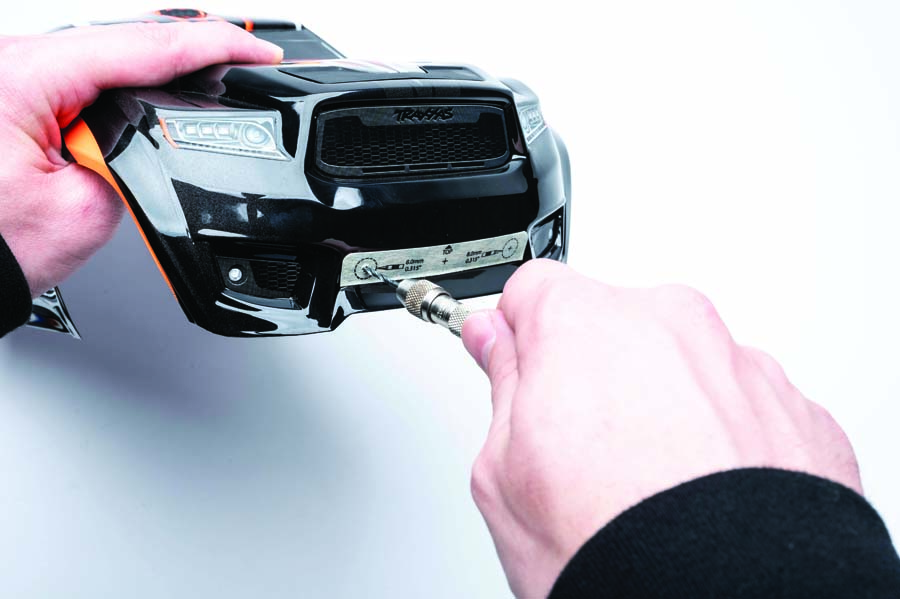
Placing template #1 was simple using the pre-existing body holes and clearly marked directional orientation on the decal. Traxxas ingeniously designed these templates by marking preset holes where you are meant to use your body reamer. This method of cutting ensures you have exactly the right placement of the cutouts and corners and also makes it really easy to get the body scissors in place for the rest of the trimming.
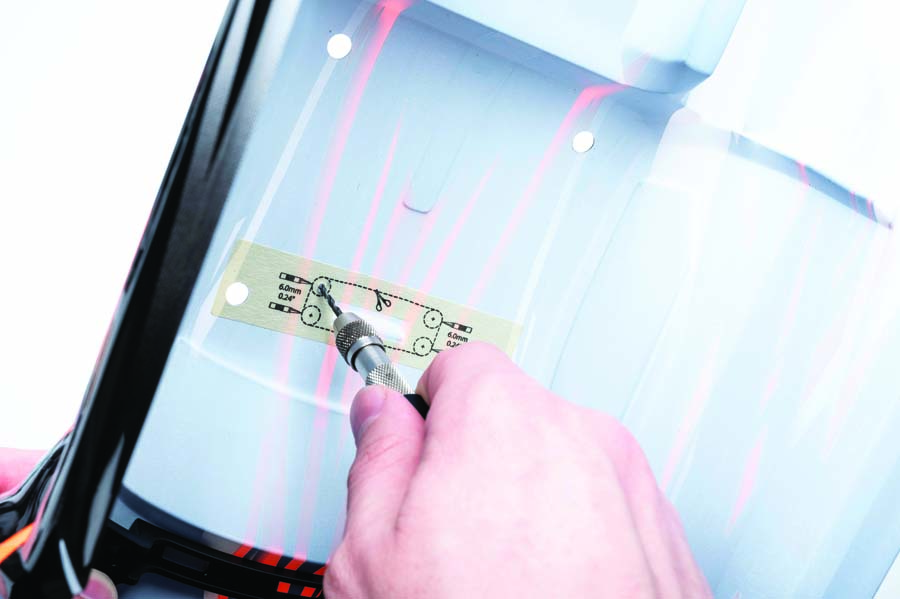
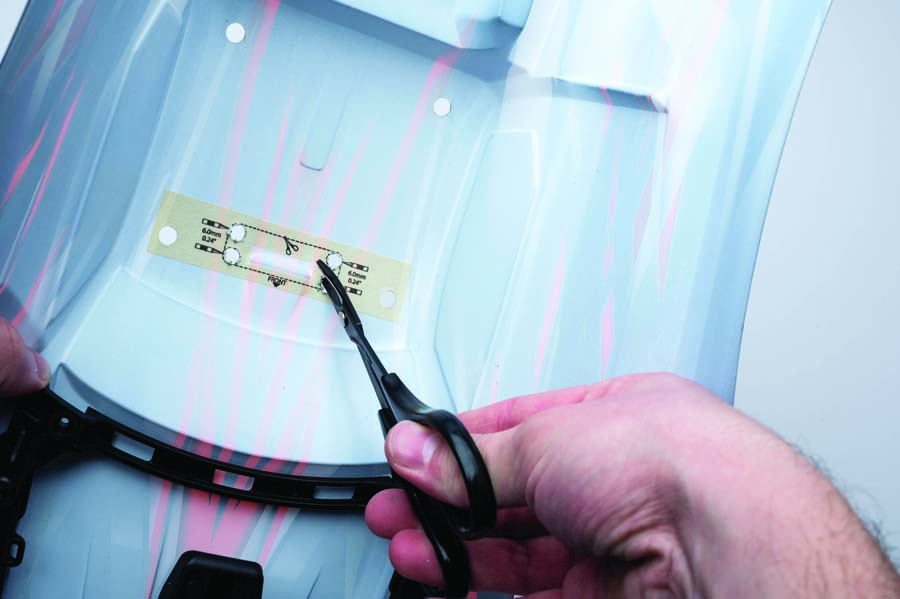
Whenever I use a body reamer, I like to make a pilot hole first. I did this with the pin vise and 2mm drill bit, using the center point that was pre-marked on the template. After reaming out the marked holes, I scored the long edges with my hobby blade. Similar to the way I cut a body from scratch, this scoring makes it easy to snap the pieces away, leaving a nice, clean cut behind. After scoring with the blade, I went in with the curved scissors and cut from end to end, which left me with enough material to bend and break away at the score marks.
Templates 2 and 3 were a combined process for fitting the front LED piece. As I mentioned earlier, template #2 can be a little tricky to apply. I first removed the original grille decal and made sure the surface was nice and clean. Fitting template #2 required aligning it within the bounds of a very specific space on the bumper. This was the tricky part, as there aren’t any hard edges or body holes to use for reference like we had with template #1. I aligned the template as best I could and cut out the holes. After my cuts I realized my template alignment was slightly off. If this happens to you, don’t worry about it too much—it ended up not being a big issue.
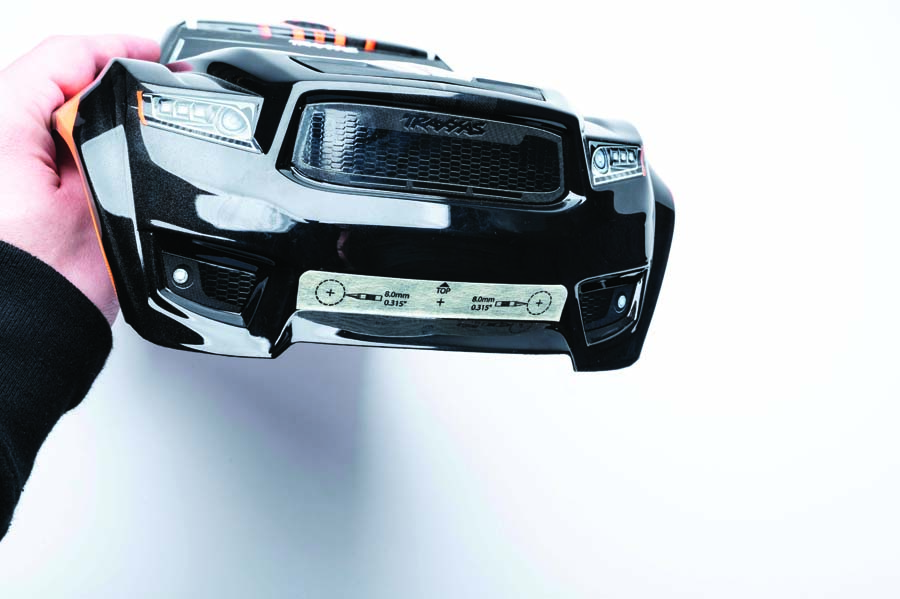
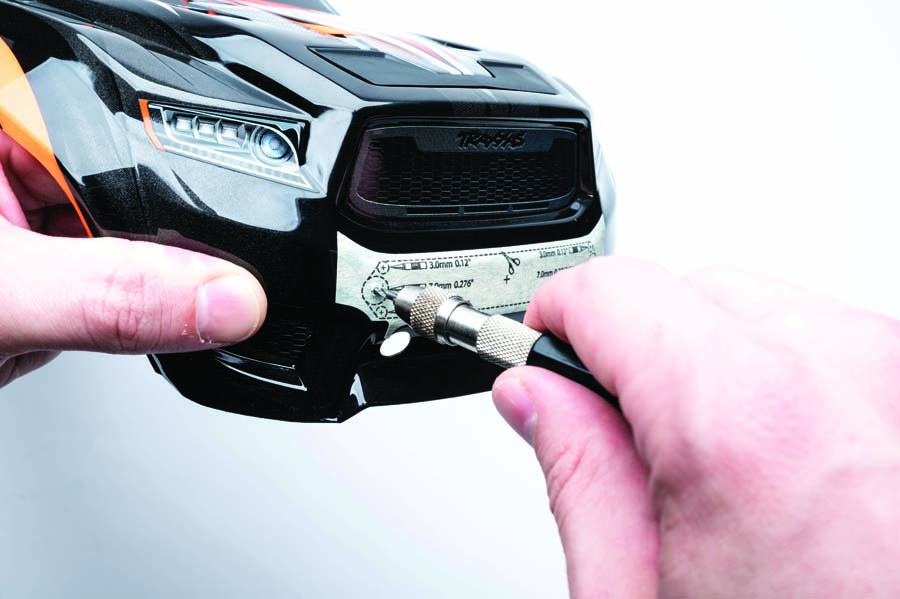
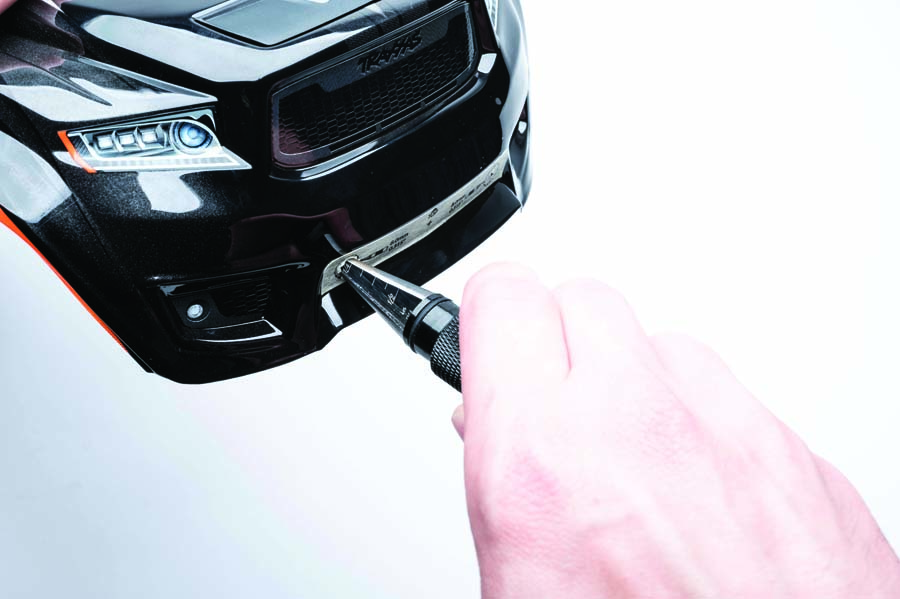
Using the holes we just cut with template #2, it’s time to place template #3. I found that referencing the main lines on the bumper and grille, as well as the holes we just made, was the key to success with proper placement of template #3. The main goal of this step is to make a rectangular cut in the front bumper for the front LED panel to sit in. As long as you keep this in mind and pay attention to where that bumper piece will ultimately sit, placing the template should make sense. Similar to my process for template #1, I used my pin vise for pilot holes, finished the holes with the body reamer, and used the combination of the hobby knife and body scissors to score and break away the material. All in all a simple process, only requiring removal of a small bit of material.
Reassembly Is the Reverse of Disassembly
As with many instructional guides, reassembly is the reverse of disassembly, except in this case we are adding our new components to the truck body. I first started by installing the front LED piece. The outer section slots into the cut we made in the front bumper, while the rear piece attaches to it from the inside, effectively clamping it to the body’s front end. There is a long, thin wire coming from the outer LED panel. Make sure to thread this wire through the cutout and leave it aside for now.
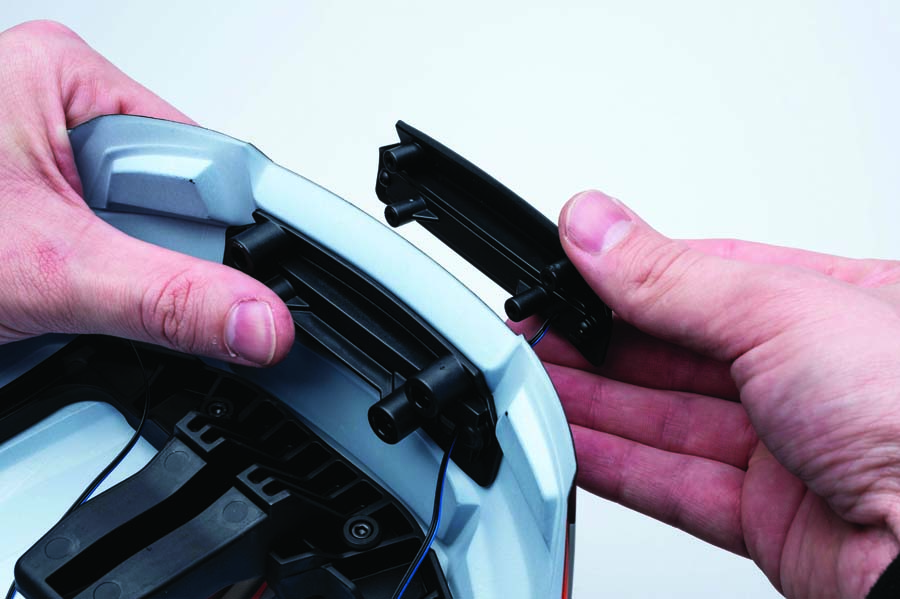

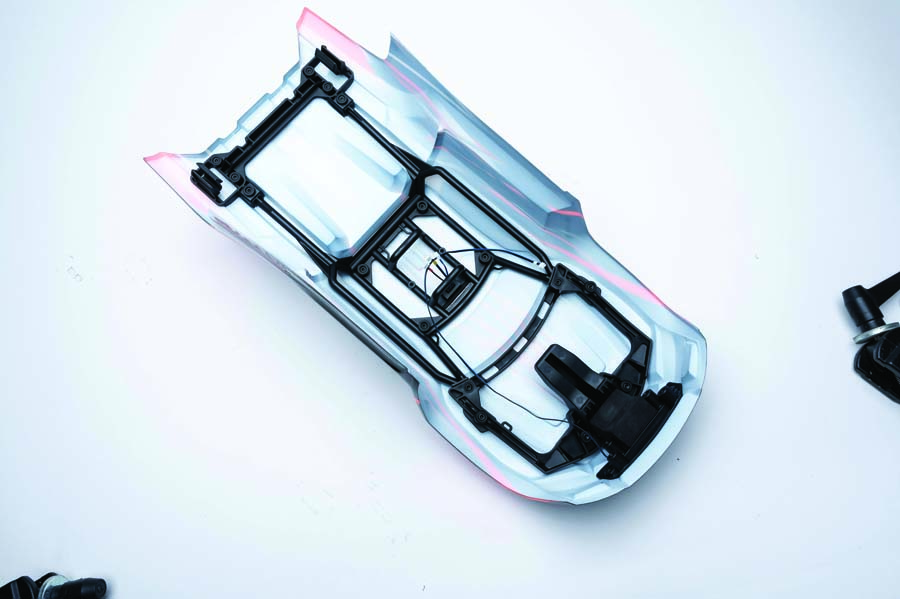
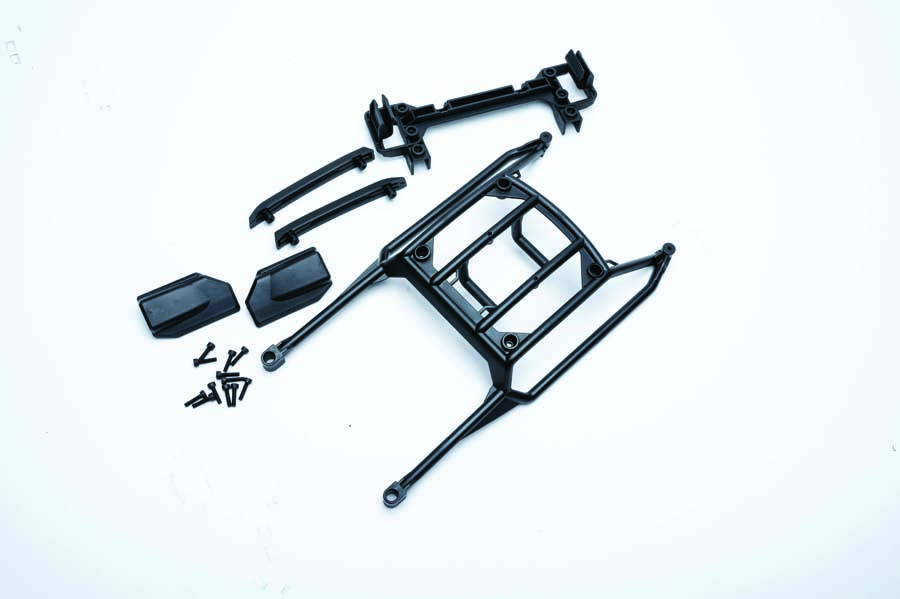
Next up, we need to reinstall the body frame. This is exactly the reverse of disassembly. I reinstalled all the removed screws, starting from the front and working my way back. For the mid-section, we are installing the new top LED rack. This is new material and lacks threading for the screws, so take care to screw them into the rack slowly but surely. You only need to apply a small bit of pressure to get the screws seated correctly; they will do the rest of the work. Just like the front piece, there will be some wiring coming from the top. Make sure these wires aren’t getting pinched and leave them aside for the next step.
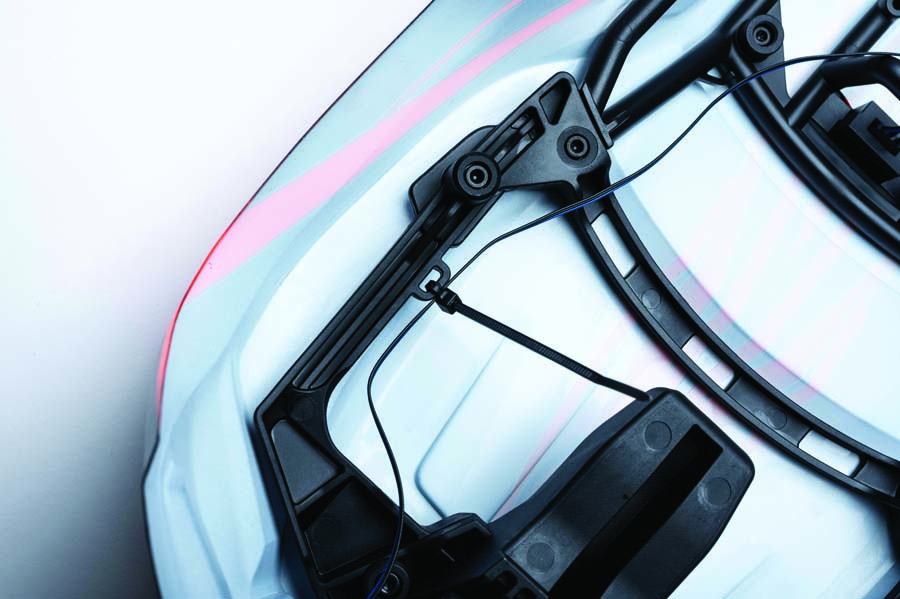
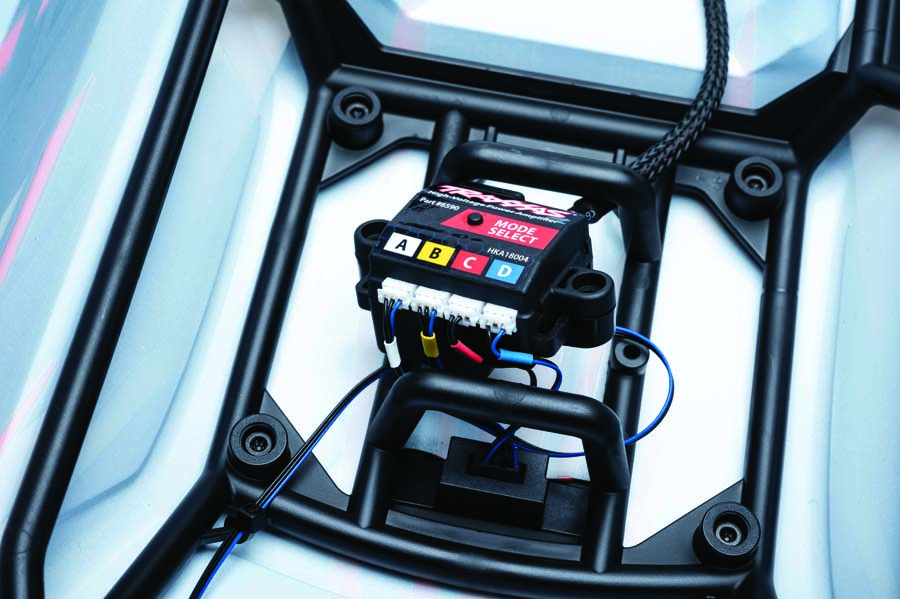
Hooking It Up
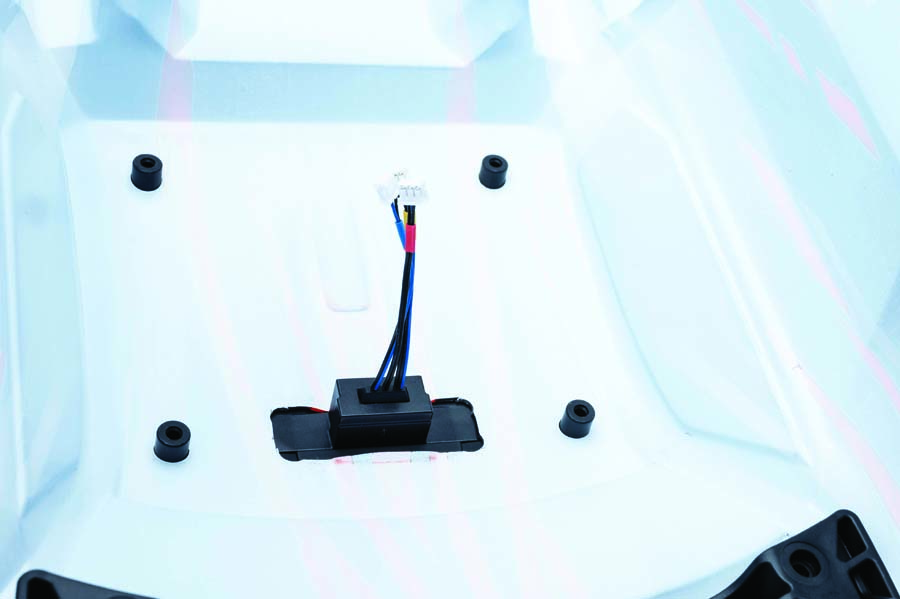
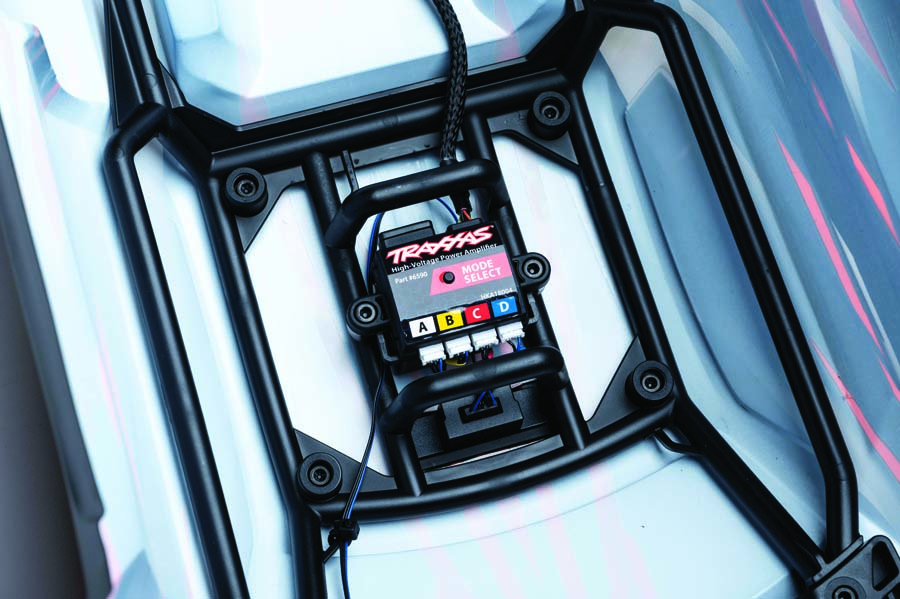
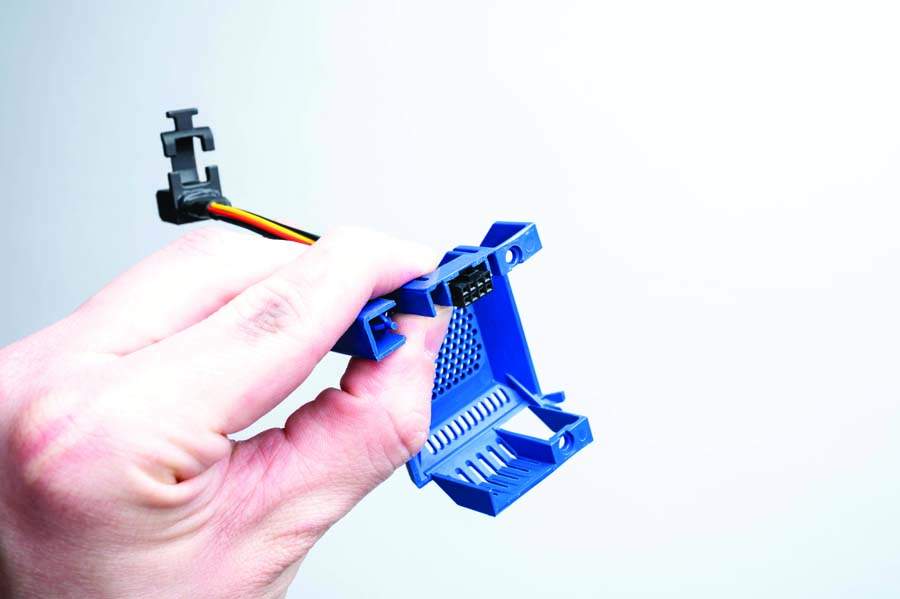
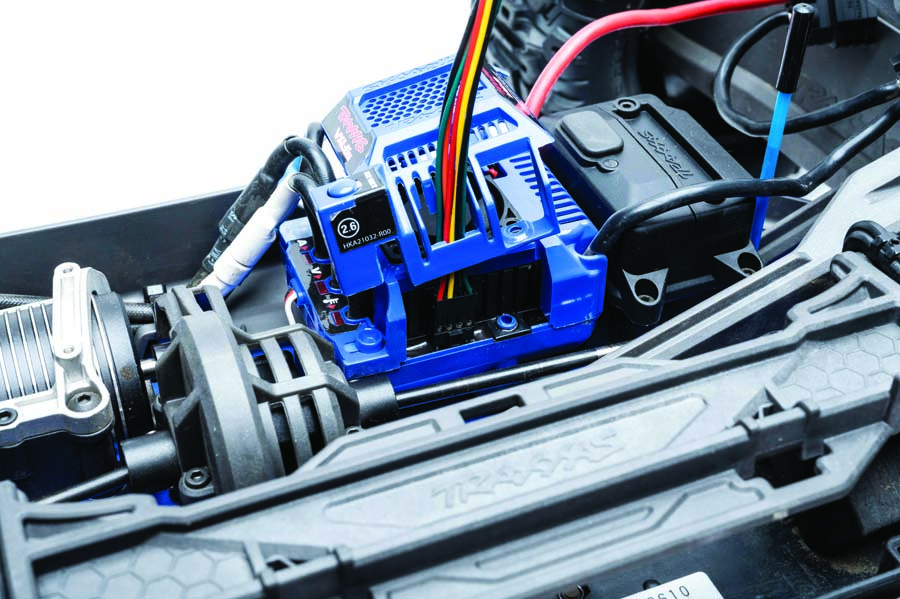
With the body frame reinstalled and the new components in place, it’s time to tackle the wiring. Route the front wire along the inner body frame, zip-tying where needed. The LED control module is designed to mount seamlessly in the top-center portion of the body frame. Before screwing it into place, hook up each of the four wires coming from the LED components. These wires are color-coded to match their corresponding ports in the control module, making it super simple to hook up each lead. Once the wires are securely connected, mount the control module to the pre-existing holes in the body frame. And that’s it, the work on the body is done. We only have one more step to go, and that’s installing a wire adapter to the ESC.
Fully Connected
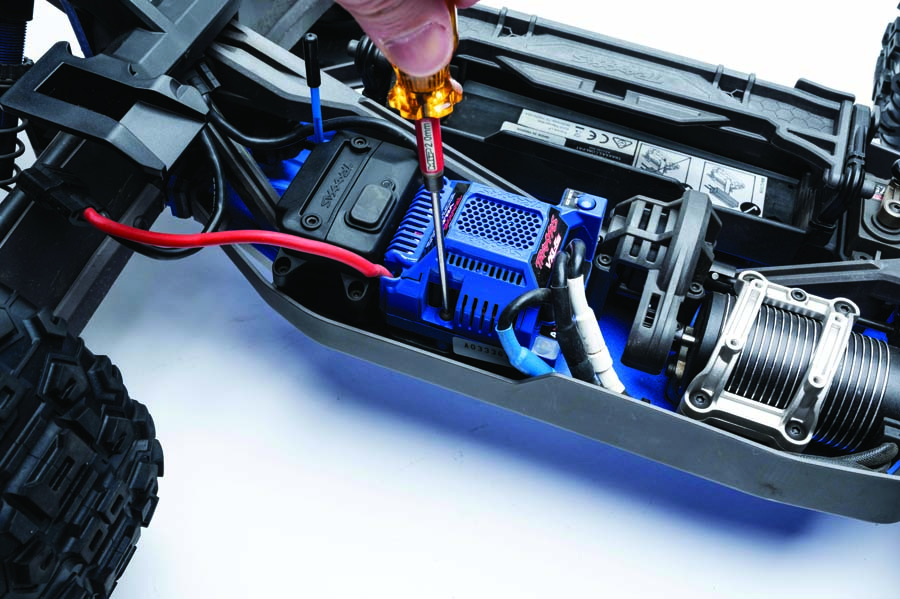
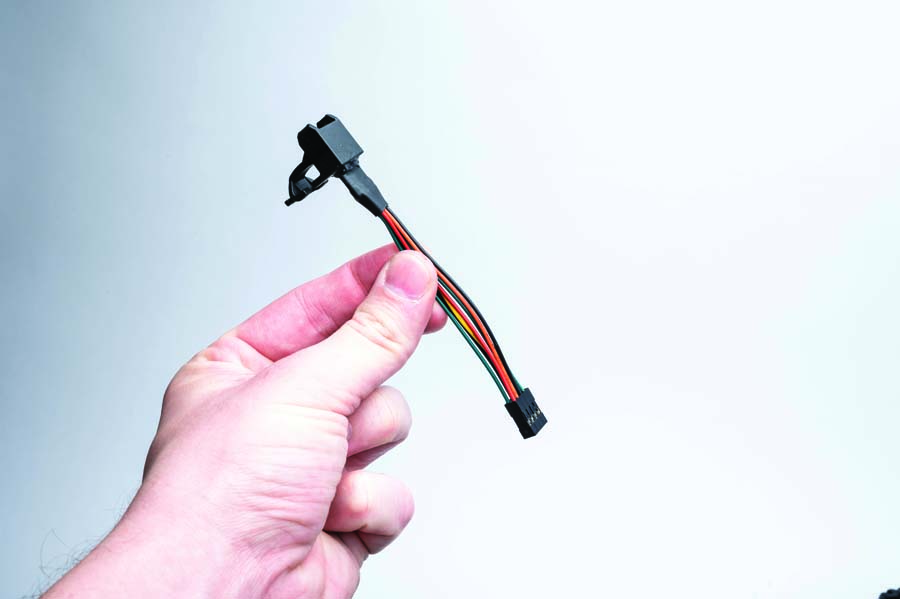
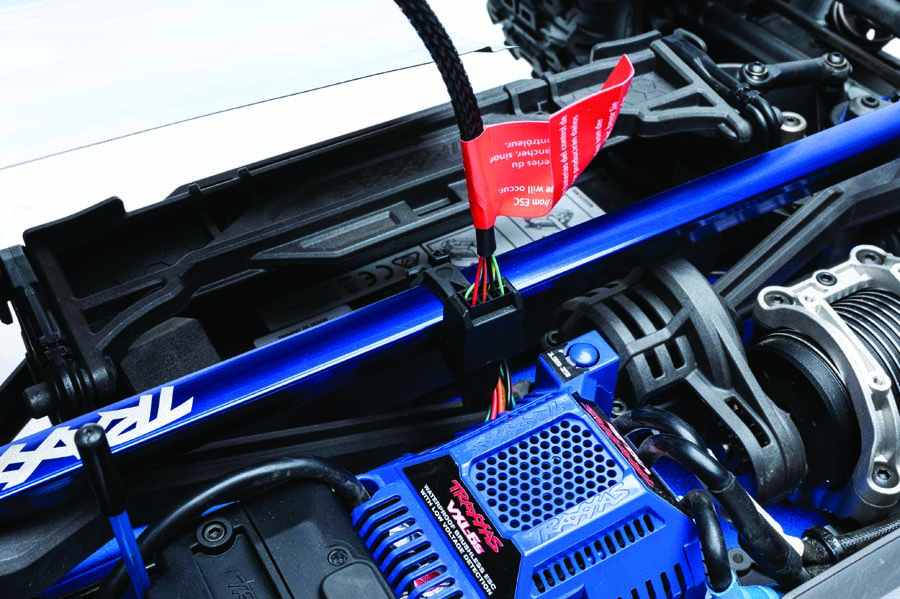
To install the included wire adapter, start by removing the top panel of the ESC as well as the center aluminum chassis brace. Once the ESC top cover is removed you will see the port that the adapter hooks up to toward the inside of the unit. Place the adapter through the top panel so that the connector sits with the little notch sticking outward. Carefully place the top cover back on the ESC and tighten up the cover screws. The wire adapter coupler is designed with a cutout specifically to slide over the chassis brace. Carefully slip the chassis brace through this cutout and slide the brace back into place. Pull up the wire slack, zip-tie it to the coupler, and reinstall the chassis brace screws. And that’s it, we’re done.
Seeing the Light
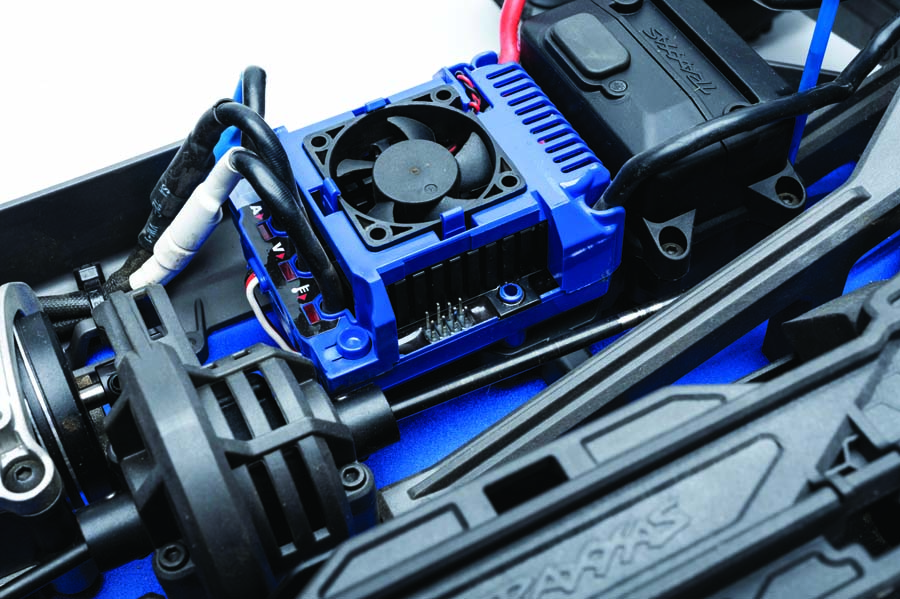
Now that it’s all installed, we can simply connect the wire from the body to the coupler installed at the ESC. I love this design because it’s so simple, yet so effective. The connector slots into the coupler with ease, sitting nice and secure, yet it remains easily removable. I also appreciate the care that Traxxas took with their attention to detail on how well the main control wire was shrink-wrapped and protected, eliminating any concerns about wiring getting tangled or torn.
Once the control unit is connected, simply plug in the batteries and power on the truck. The control unit has a button to toggle between several different brightness settings, and might I say that these suckers are bright! Both the top and bottom LED bars output a ton of light, while the rear has that perfect red glow, so you’ll know which way is which even in the darkest of settings. The light output from this kit is a real game changer for anyone who likes to go out and bash at night. Even when bashing in fully lit skateparks and parking lots, the truck will still benefit from the added light from this kit.

Final Thoughts + Impressions
The Traxxas High-Output LED light kit for the Sledge is excellent. Not only did Traxxas make it easy to install, the level of quality of the product itself is second to none. The way the system installs, how easy it is to connect, and how easy it is to operate and adjust make it a no-brainer upgrade for anyone seeking to spice up their own Traxxas Sledge. The high-intensity light output combined with the system’s simplicity make it a great all-around upgrade. If you too want to see the light with your own Sledge, I recommend you snag one of these kits for yourself. As always thanks for reading, I’ll catch you in the next one.

Traxxas High-Output Off-Road Light Kit for Sledge
P/N#: 9690
MSRP: $99.95
traxxas.com
Text and Images by Lauren Short


![RC Car Action - RC Cars & Trucks | This 1/3 scale 125cc V10 Buggy is CRAZY [VIDEO]](https://www.rccaraction.com/wp-content/uploads/2018/05/V10-HP.jpg)


 Stay up to date with the latest information, sign up for our FREE newsletter today.
