

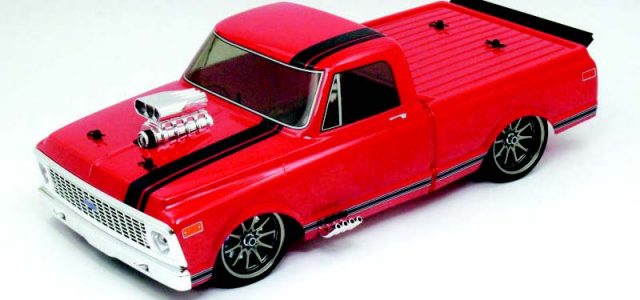
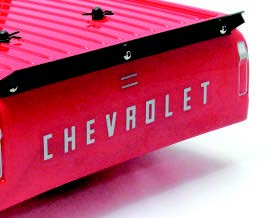
ONE OF THE MOST ATTRACTIVE THINGS about the RC car hobby is the chance to build custom dream machines in scale that would require a second mortgage (and a full-time garage takeover) to build in “real life.” In this article, I’ll show you how you can easily add details to your vehicle to increase realism and make it your own. In a case of perfect timing, Vaterra’s 1972 Chevy C10 Pickup Truck V100-S just arrived and is ripe for mods. It’s a great-looking truck out of the box and easy to transform into a personalized stunner that stands out from the stock machine. Here’s how I did it, with just a little time and not much money.
The Wheel Deal
If you’ve ever goofed around with the “view on vehicle” wheel-shopping gizmo at tirerack.com, you already know how much a set of wheels can make even something as basic as a Kia Rio look like a fairly cool car (especially if you lower it a couple of inches). The Vaterra C10 already has a slammed stance and a sweet set of wheels if you’re after a show-truck look, but I wanted more of a street-performance vibe. I installed the Volk CE28N replica wheels from Vaterra’s Ford F-100, and they look great.
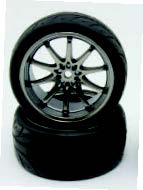
The stock chrome wheels have a show-truck vibe, while the Volk replica wheels look more high performance.
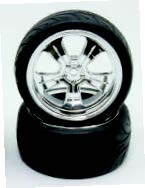

The truck’s personality really changes with each wheel design.
Stylish Stoppers
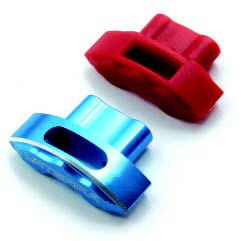
All the Vaterra V100 models include nonfunctional brake rotor and caliper detailing that’s a big step up from the “empty wheel” look of most touring cars, but the red plastic calipers look like the plastic parts they are up close. You can paint them to make them look more realistic or just swap them for Vaterra’s optional machinedaluminum calipers. They come in blue and gold, and install in just a few minutes.
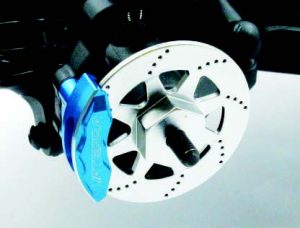
The machined-aluminum calipers blow away the plastic parts with a real-metal look.
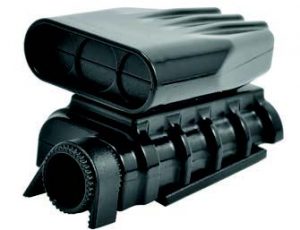
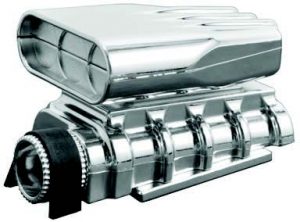
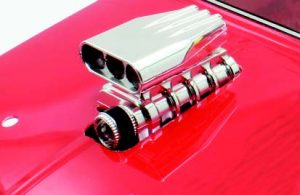
You can get RPM’s blower in chrome (73413) or black (73412).
Blown Away
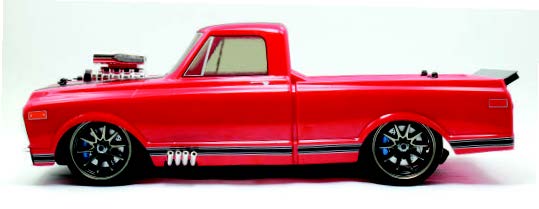
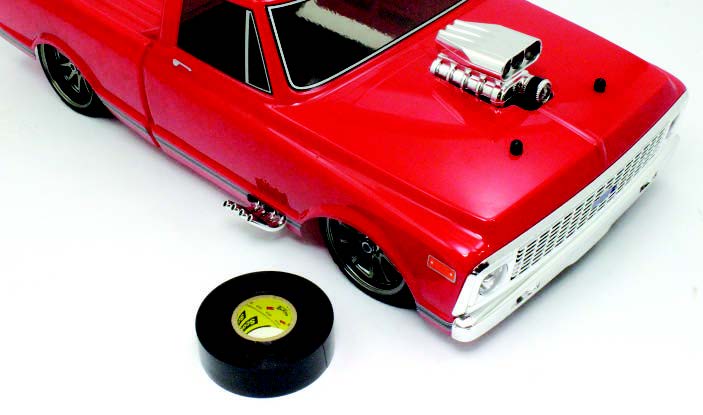
On-road cars with big blowers sticking out of the hood always look great. RPM’s scale blower and intake makes it easy to give any car or truck the same pro-street style. It’s designed to be mounted directly on the hood, and it looks fi ne from a few feet away when mounted that way. But to really make it look realistic, recessing it into a cutout in the hood is the way to go.
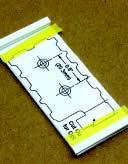
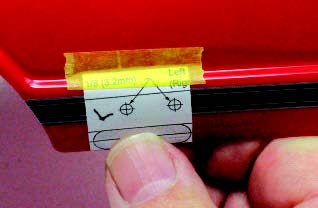
If you’re mounting the blower assembly directly to the hood, you can use RPM’s template to locate the mounting holes—just tape it into place and drill the mounting holes.
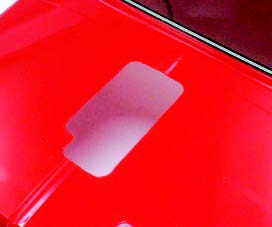
To make the opening, I drilled a hole at each corner, then used a hobby knife and straightedge to score the plastic from hole to hole and popped out the waste. A little cleanup with a sanding stick made the opening look factory.
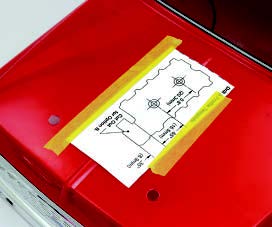
To recess the engine inside the hood opening, I simply glued together a shelf made out of .080 styrene plastic and used the supplied template to drill the mounting holes for the blower. I painted the shelf black to maintain the illusion of a deep engine compartment under the hood.
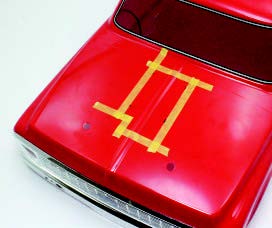
To recess the blower, I marked the hood opening with tape, using the paper template as a guide. I added an extra 1/8 inch of clearance around the blower intake.
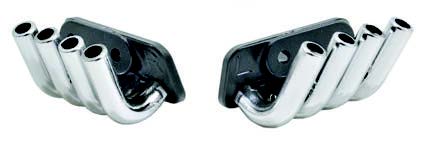

The Zoomies also come in black (70852) and chrome (70853), and their angled plastic bases wrap the pipes realistically under the body.
Pipe Dreams
RPM’s Zoomie headers are a great complement to the blower assembly, and they are easy to install. Before you drill holes in the body, you’ll need to decide if you want the pipes to come through the body or below the body. Then you just attach the included template to the side of the body and use the markings to locate the mounting holes.
I wanted the pipes to sit flush with the rocker panels rather than hang below. The included template makes it easy to get the position right.
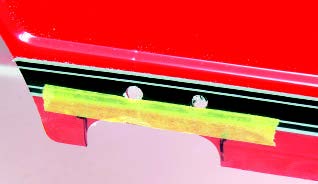
A placed a length of tape on the body as a guide and trimmed gradually until the fit was perfect.
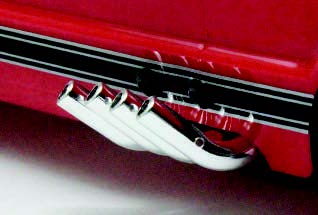
Each pipe is attached to the mount separately, so you can “pose” them just right. I raked the pipes toward the rear of the truck.
Wingin’ It
I thought the C10 body would look faster with a lowprofile wing on the tailgate, but no one makes one—so I got busy with sheet styrene again. I used .040 plastic and 3mm screws to do the job; the wing is just two flat strips, with gussets to set the angles. Showing is better than telling, take a look:
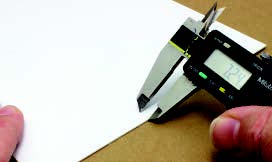
I used my caliper as a scribe to mark the styrene for cutting the “base strip” and the wing itself.
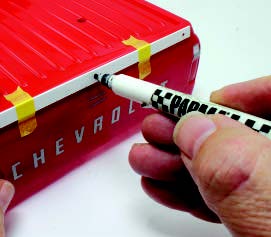
I taped the base into place and marked holes for the mounting screws.
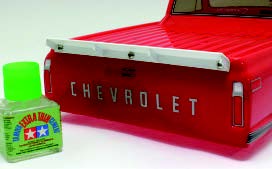
I cut four support gussets for the wing plate and assembled the parts in place on the truck. Tamiya’s Extra Thin Cement is a great choice for this type of work.
After the glue dried, I removed the wing to paint it black. Looks trick!
Shockproof Stripes
Don’t judge me: I striped the body using electrical tape. It sounds lame, but electrical tape is cheap, comes in colors, goes around curves, and can be easily removed if you want a new look. The key to making stripes look good—whether painted or tape— is getting them straight and properly positioned.
Electrical tape is available in a few colors, but basic black was all I needed.
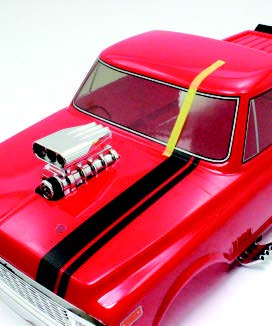
To make it less obvious that the stripes are electrical tape, I narrowed the tape’s width and added a skinny flanking stripe. I stuck the tape onto a cutting mat so that I could trim it accurately with a straightedge, then transferred the stripes to the hood and used a piece of tape to perfectly align the stripes on the cab.
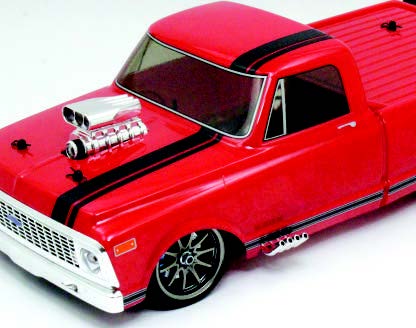
Gotta say, that looks pretty good. If you goof up, the tape peels right off
That Was Easy
Minor changes made a major difference in the look of my Vaterra Chevy C10. These techniques can be applied to any type of RC body; it doesn’t matter if it’s Lexan or an injection-molded “hard” body. Everything shown in this article was easy to do and doesn’t take much time to complete. Give these techniques a try and show us how you do; send your photos to us at ReadersRides@AirAge.com


![RC Car Action - RC Cars & Trucks | This 1/3 scale 125cc V10 Buggy is CRAZY [VIDEO]](https://www.rccaraction.com/wp-content/uploads/2018/05/V10-HP.jpg)


 Stay up to date with the latest information, sign up for our FREE newsletter today.
