

You’ve got your new body freshly painted and ready to go. Well, not really—you have to trim and mount that flashy new shell, and then you’ll be off and running. Like painting and decaling, trimming and mounting is easy—if you follow these basic tips.
Tools
- Body scissors
- Hobby knife
- Body reamer
- Lamp
- Nail polish
Trimming
There are two methods that you can use to trim a body. The first is to simply use curved body scissors and follow the molded-in trim line. As long as you’re careful, this should yield good results. You might have to clean up some jagged edges, but a Dremel tool with a sanding drum will make quick work of even the worst hack job. The second method achieves clean results, but it can be a little trickier. Using a hobby knife with a fresh blade, score the entire trim line. You should now be able to flex the body at the trim line and have the excess material snap free. This method might take a little practice but it results in smooth edges that do not need to be sanded.
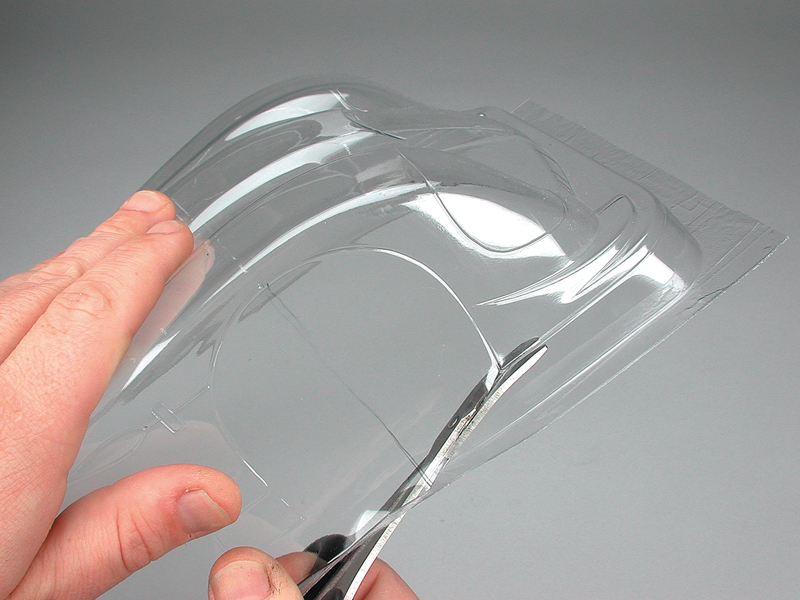
Curved body scissors make it much easier to cut a body.
Easy street
Many bodies are designed to fit a specific vehicle perfectly. Most of these bodies come with molded-in dimples to indicate where the holes for the body posts need to be “drilled.” These are by far the easiest bodies to mount—no guesswork required. There are a number of ways to make the holes for the body posts and antenna, but using a body reamer is the easiest and will deliver the best results. You can find one in any hobby store; several companies make them. The key is to go slow and only make the holes as large as needed.
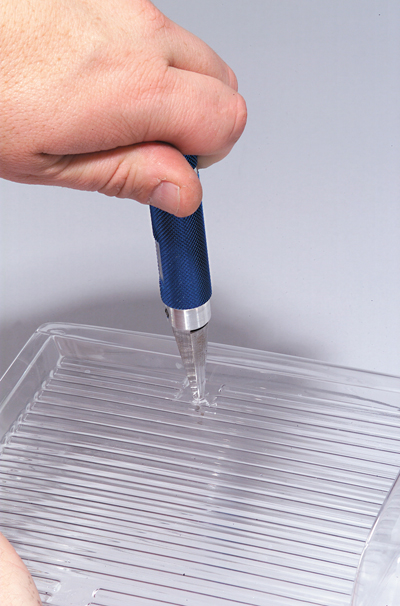
A body reamer is the easiest way to make the holes for the body posts and antenna.
Wheel wells
Many bodies have all four wheel wells clearly molded in, and you can just cut them out as previously described. Many touring car bodies only have the front wheel wells molded in. This allows the body to fit vehicles with different wheelbases. If this is the case, cut out the body, but leave the rear wheel wells intact. After you have installed the body, place your car on flat surface. On the outside of the body, place either a spare tire or the material you removed from the wheel well over the rear wheel. Using this as a guide, draw a scribe line with a Sharpie marker. Do this on both sides, and you should have perfectly placed rear wheel wells.
- Measure up
To make mounting the body easier, mark the holes for the body posts before you paint the body. To do this, just place the unpainted shell down on the chassis. To get the body to sit correctly on a nitro car, remove the exhaust pipe; often the stinger tip will prevent the body from sitting level until the body has been trimmed to clear it. To place marks for the body posts use a Sharpie or another permanent marker to mark where holes must later be made for the body posts. This step sounds simple, and it is, but take your time when you do it. This is especially important with sedan-type cars that need the wheels more precisely lined up with the wheel wells. The adage “measure twice, cut once” definitely holds true here.
Besides the body-post holes, nitro rigs usually receive a few more whacks of the knife than their electric siblings, so before you paint the body, mark where you’ll need cutouts for glow-plug access, exhaust clearance, engine cooling and fuel-lid access. These holes and cutouts are always easier to place when the body is clear. Here’s a list of the things you’ll want to mark ahead of time: - Body-post holes
- Front engine-cooling hole
- Rear engine-cooling hole (if used)
- Fuel-lid access hole (sometimes an entire side window is removed for this)
- Optional tuning holes for needle access
- Stinger-tip clearance hole
MOUNTING
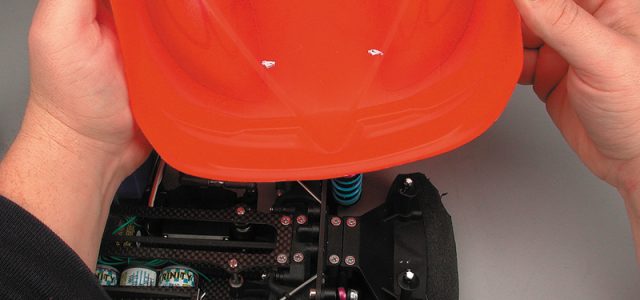
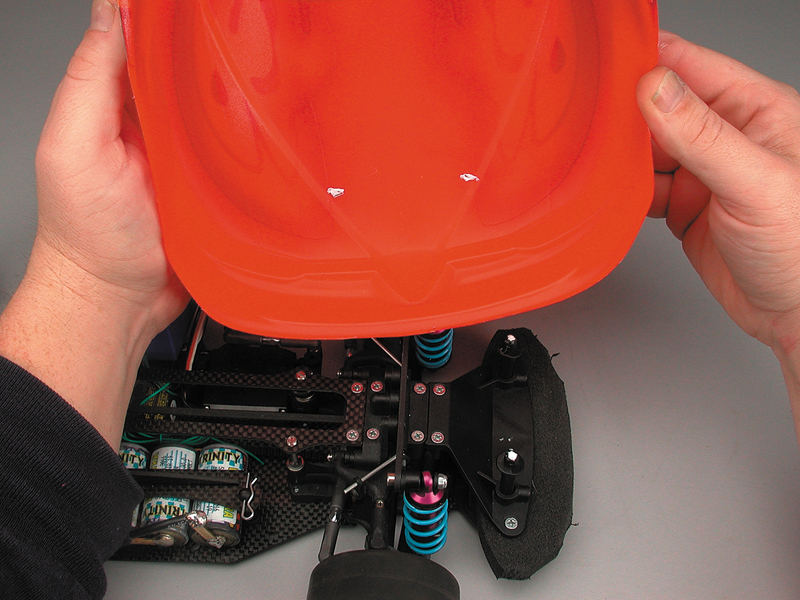
If your body doesn’t have molded-in dimples for the body-post holes, you’ll need to find the proper place for these holes on your own. You can do this in a number of ways. One way is to place the vehicle over a strong light source. Place the body on the vehicle, and you should be able to see the body posts touching the body through the painted Lexan. Another is to put a drop of paint such as nail polish on each post and then carefully lower the body into place. This will leave small marks on the inside of the body where the holes need to go. Regardless of which method you use, always double-check your work. Trinity also makes some handy little devices for mounting bodies; No-Brainer Body Markers come in two sizes (1⁄10-scale and monster truck). These little spikes attach to the tops of the body posts and will make little dimples in the body when it is pressed down.
A drop of paint on each body post will help to indicate where you need to make body-post holes.
Helpful hint
You can mount your body before you paint it. This will make finding the proper locations for the body-post holes much easier.


![RC Car Action - RC Cars & Trucks | This 1/3 scale 125cc V10 Buggy is CRAZY [VIDEO]](https://www.rccaraction.com/wp-content/uploads/2018/05/V10-HP.jpg)


 Stay up to date with the latest information, sign up for our FREE newsletter today.
