

Word and Photos By Drew Trudeau
In Part One of our Factory Team B4.2 build we constructed the steering, front end assembly, and the transmission. When we started digging into the build it was plain to see that Team Associated’s upgraded and high performing B4.2 2WD buggy goes the extra mile over the standard B4.1 platform. We got acquainted with the extended chassis, smooth ball-bearing steering and titanium turnbuckle linkage that is surely going to make this buggy a true competitor on the race circuit. Now in Part Two we will continue our step-by-step build by constructing the VTS slipper and work our way through the rear end assembly and then finish up our build of this rolling chassis by putting together a sweet set of Factory Team 12mm shocks.
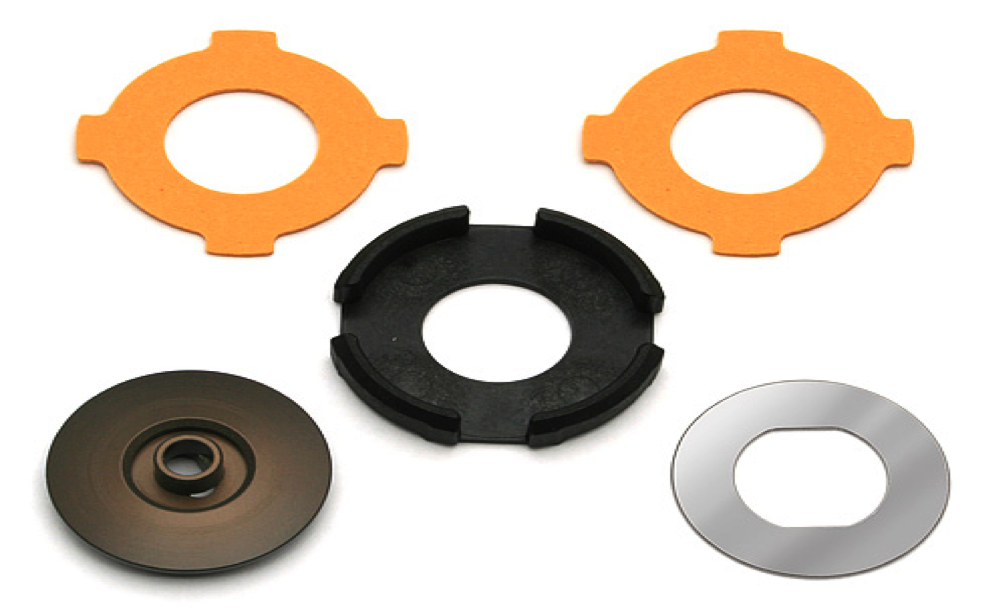
The VTS slipper is a nice addition to this Factory Team ride. Because it uses multiple friction plates, it offers plenty of grip or slip and a high resolution spring that only requires small amounts of adjustment to change the setting. Installing the slipper onto the top shaft is easy enough but be assured that you have the slippers and plates in the right order. The slipper hub is then placed on last and offers up a nice receptacle for the slipper spring to sit in. Before installing the spring, be sure to compress it completely with a set of pliers to prep it for installation. Bolt on the locknut so that it is flush with the top shaft and the slipper is ready at its default setting.
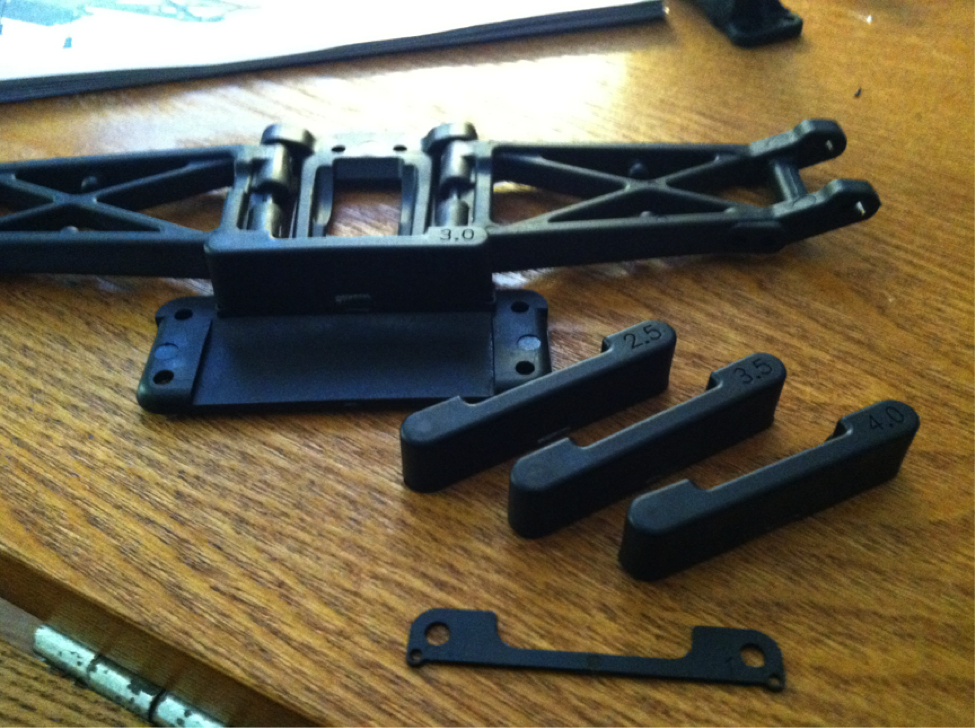
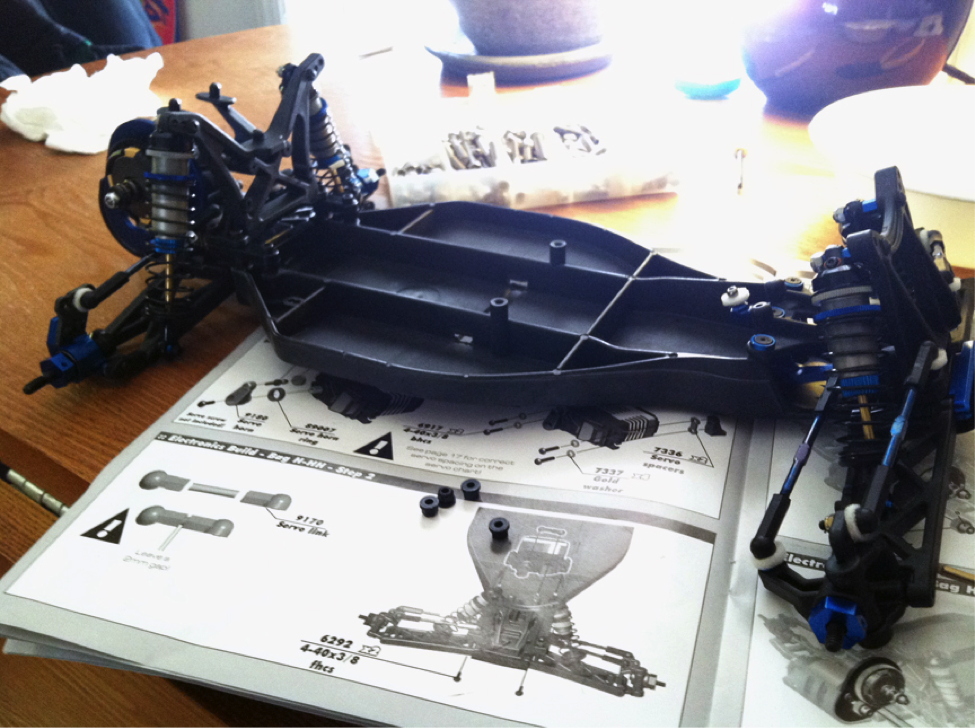
The rear end comes with optional rear arm mounts and anti-squat shims that give you full adjustability to dial in your buggy during acceleration and braking for varying tracks types. This is a nice feature for racers looking for a range of anti-squat degrees which can be easily swapped out. For this build we are just going to start with the default set-up and use the 3.0 degree rear arm mount stacked on top of the 2.0 degree anti-squat shim. The hinge pins are then secured in place with a small screw giving you the ability to quickly remove them when needed.
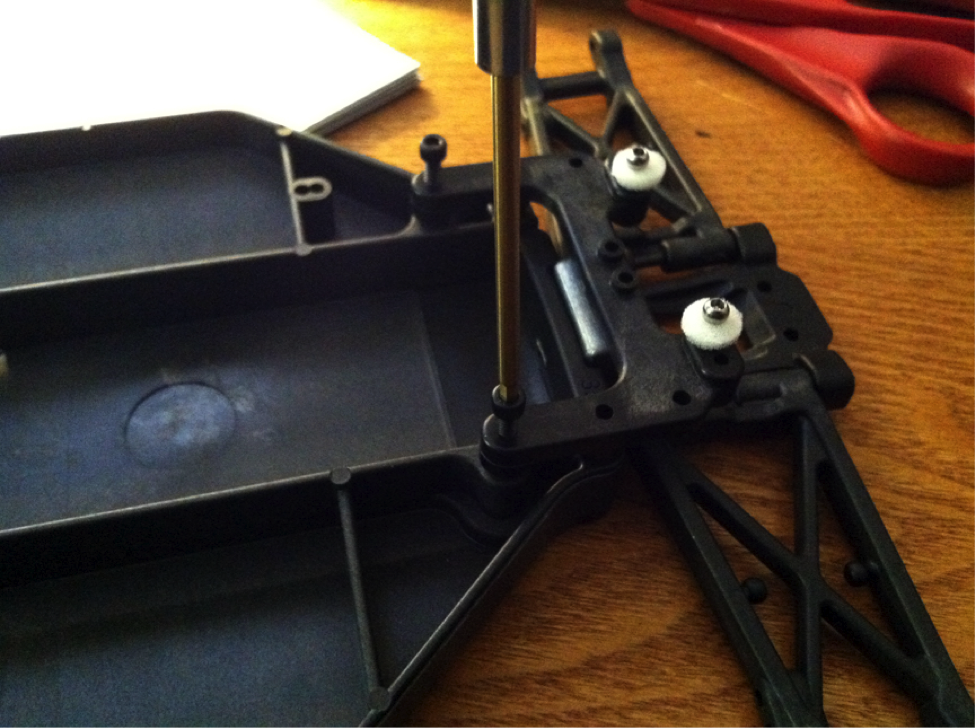
Let’s move on to securing the rear end to the chassis by bolting it down from the bottom directly into the chassis. The whole rear end is a solid design that uses dense durable plastics to keep it rigid. Before bolting down the chassis brace the ballast weight is bolted into the small area on the chassis just in front of the transmission. Let’s move on to the rear shock tower which is bolted down on top of the brace with two screws that are also received by the chassis for extra sturdiness under stress. The central components of the rear assembly are finished off with the transmission housing which is then bolted down to the brace and through the bottom of the chassis.
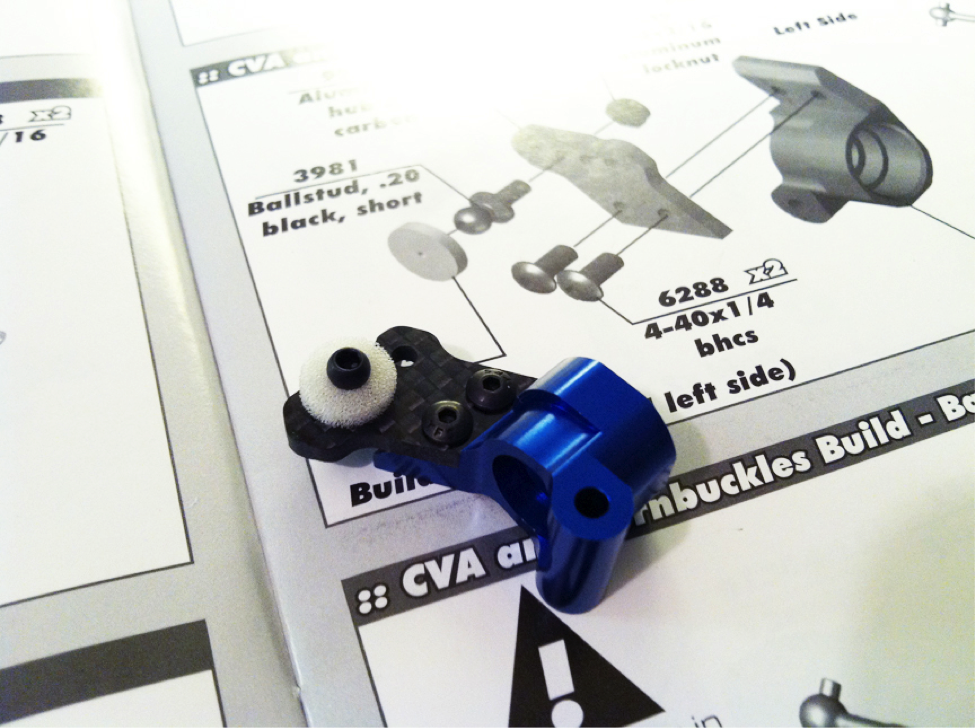
The CVA and turnbuckle section of the build is highlighted with these cool Factory Team aluminum hubs that feature a carbon fiber portion which receives the turnbuckle ball studs. Two ball bearings are placed into each side of the hub for silky smooth axle rotation. The design of the hubs is expertly created to take abuse offering super-duty strength in a lightweight package. You should never have to replace these bad boys, unless you are a maniac like me who eats wall a lot. I highly suggest when bolting down the carbon portion to use a little thread lock for the part of the screw that goes into the aluminum. Any time you have a situation of metal on metal when a screw goes into an aluminum part you have the risk of vibration loosing the screw that is why I suggest the use of threadlock even when the instructions do not advise it.
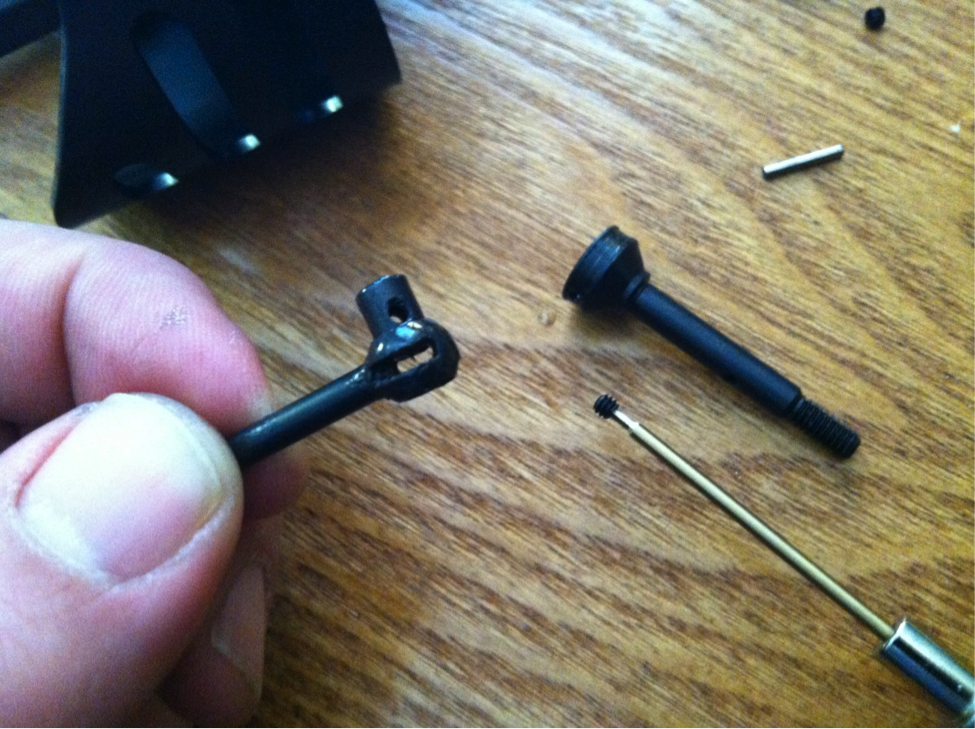
The CV style axle design is also noteworthy and offers up durable construction that is meant to take a lot of beating. The axles are very strong but also feature an inner roll pin design that allows them to operate smoothly throughout the suspensions full travel throw.

The axles are put into place within the hubs and secured with 12mm aluminum wheel hexes. Once the axle is secured within the hub you couple the CV shafts with the transmission’s outdrives and then the hub is secured in place to the a-arm with hinge pins that are retained by a small screw. We finish off this portion of the rear end assembly with the installation of the turnbuckles. Pull out your trusty ruler or even better a good caliper to make sure both turnbuckles are exact before popping them on to the ball studs. The instructions are very detailed and give you the correct length so they go on with the camber settings in place.
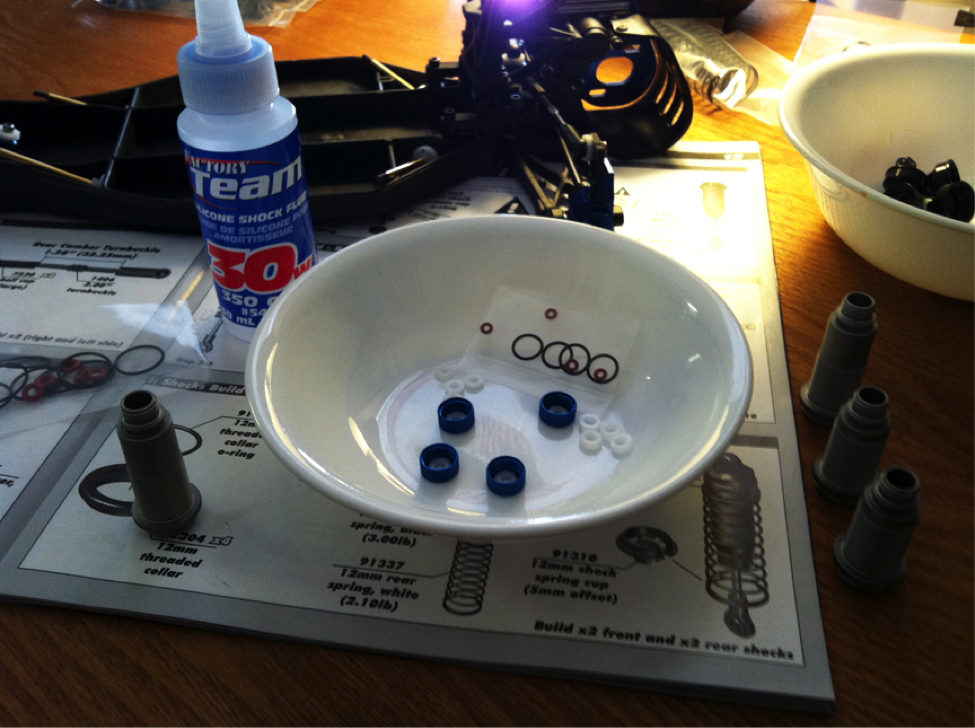
Now we move on to what I feel is the best option that comes with the Factory Team B4.2, the 12mm Big Bore shocks. The assembly of the shock’s seals is an interesting part of the build which utilizes bushings, spacers and o-rings that work within a lower reservoir beneath the shock body to give the shock shaft more concentric movement and a leak free seal. They were simple to put together and require some concentration only in that you must make sure you place each part in the correct order! Using Green Slime lube or a little shock oil on the o-rings is very important to make sure you don’t damage the o-rings.
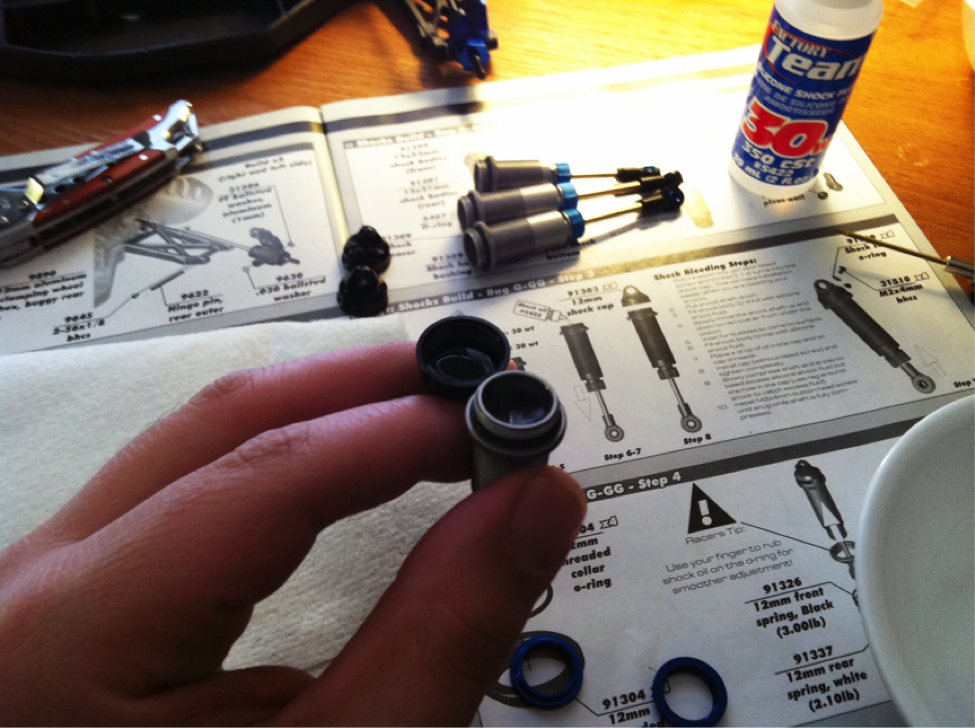
Once you have the shock seals built, the shock pistons on the shaft and all the o-rings oiled and in place you can move on to filling these bad boys up with the included 30 weight shock oil. Okay we’ve all gone through the motions of how-to correctly fill your shocks right? So this is a pretty typical procedure but here we have an extra bonus with the addition of shock bleeding screws. This feature ensures your shocks have absolutely no air bubbles in the oil reservoir. Follow those bleeding steps closely on each shock for balanced performance.
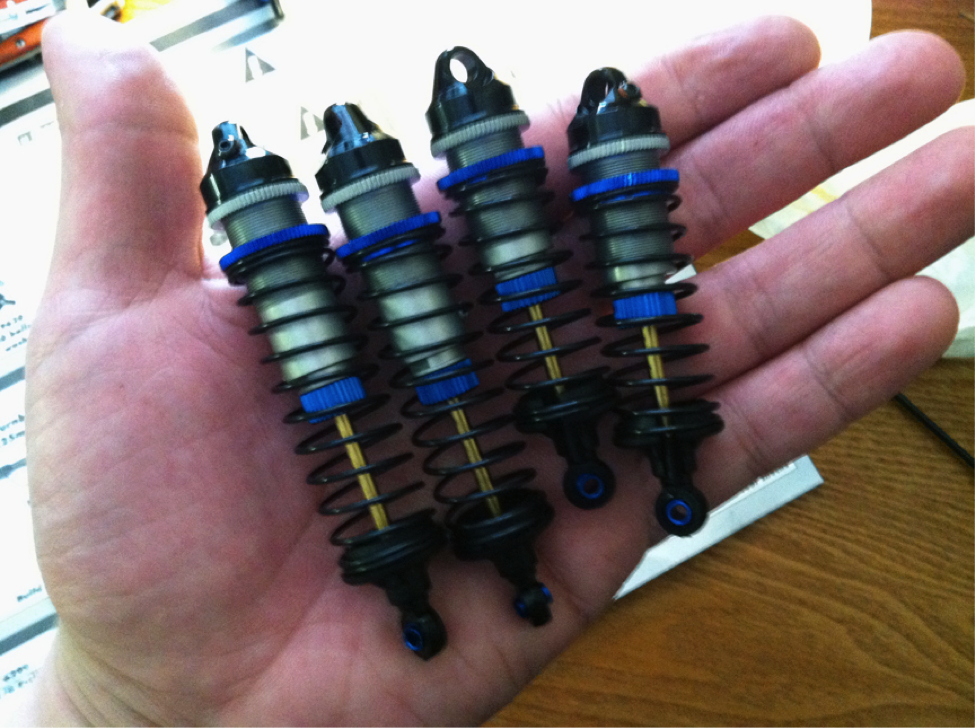
Before installing your shocks onto the chassis behold their beauty. The big bore shock body gives you plenty of oil volume for dampening that equals pillow-like shock absorption. With all four put together, it’s time to bolt them up!
After you have the shocks completed and mounted you’re on your way towards completingthe buggy. To finish up, install the carbon battery strap which is secured to the chassis with large set screws that go into the two center posts on either side of the battery tray. The strap is then bolted down with Factory Team blue aluminum thumb screws which offer moderately quick battery removal. Having the extended chassis gives you the benefit of a more centralized battery location as well.
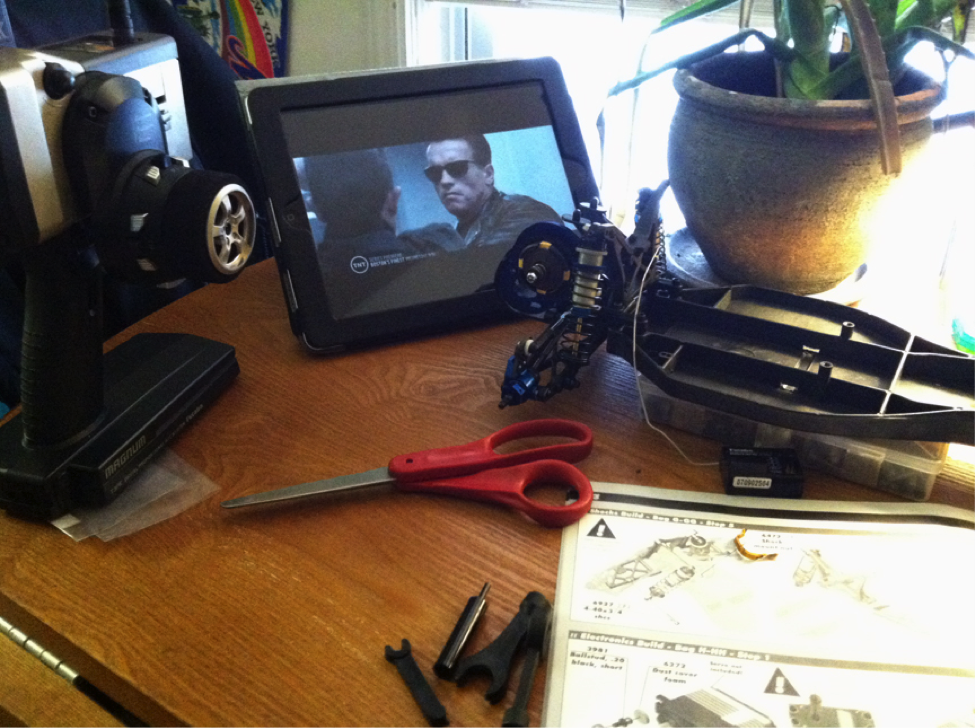
While installing your favorite electrics be sure to watch an action flick for inspiration. My new favorite tool while building and working on my RC rides is my iPad. When I’m not being entertained by Terminator 2 I must admit that having an iPad around makes for a handy reference tool for troubleshooting problems and surfing Car Action’s website.
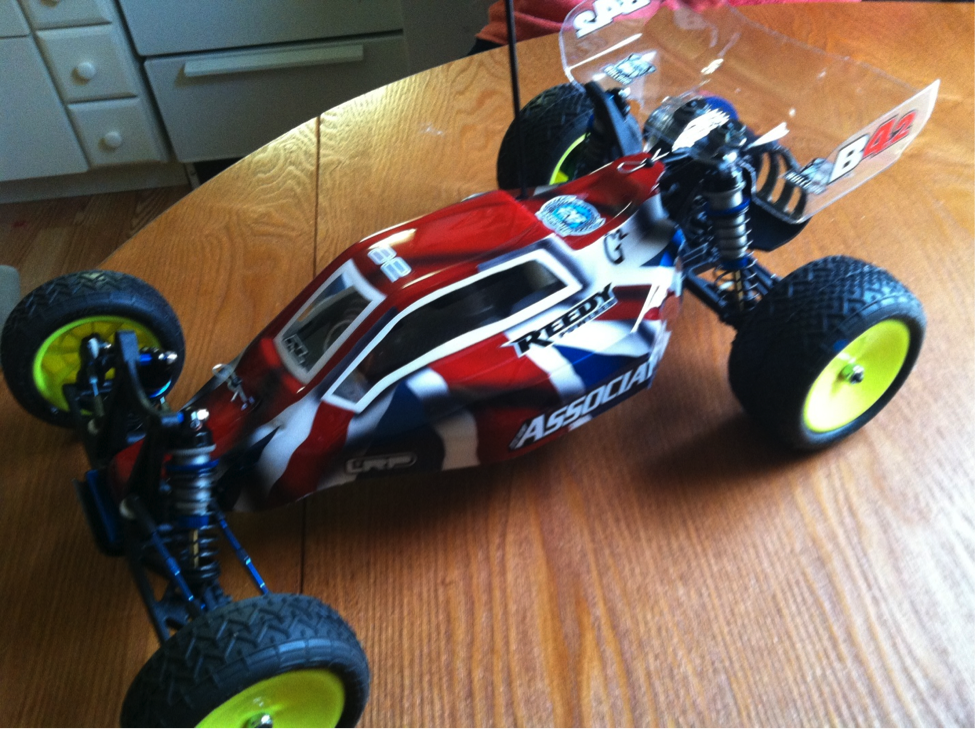
Associated has included Pro-Line’s Bulldog buggy body and wing set which I had expertly painted by G2 Airbrush Designs out of Stamford, CT. Raul owner/designer at G2 does a fantastic job airbrushing your body and giving it that dynamite look that will turn heads at the track. To airbrush like Raul look out for our tutorials and how-to’s online and in the magazine. The kit does not include tires because it is a vehicle that is really anticipating the racer who wants his own choice in racing shoes. I choose Pro-line Suburbs and mounted them to the included wheels. Once the body is mounted and the tires and wheels were bolted it’s just a matter of getting to the track and tearing it up. Good luck with your own build and to get more details on how the B4.2 handles, check out RC Car Action’s Pro Racer special issue.


![RC Car Action - RC Cars & Trucks | This 1/3 scale 125cc V10 Buggy is CRAZY [VIDEO]](https://www.rccaraction.com/wp-content/uploads/2018/05/V10-HP.jpg)


 Stay up to date with the latest information, sign up for our FREE newsletter today.
