

Even in this RTR age we’re in, there’s still a whole lot of building going on in RC. There are still plenty of kits and lots of hop-ups and modifications that can be done to pre-built vehicles.
Wrenching is easy. Anyone one can throw a kit together and go race. And, anyone can slap some aluminum goodies on a basher and go tear up the lawn. Like I said, it’s easy and yet I am always amazed when I see a sloppy build. You know what I’m talking about. The vehicle that just looks hack. Don’t be that guy. Instead, check out these tips for the perfect build.
1. Use Flush Cutters. This one is number one on the list for a reason. Get some high-quality flush cutters. I’m not talking about discount store side cutters that are anything but flush cutters. Instead, check out high-quality side cutters from Tamiya and Hobbico and say goodbye to those plastic little nubs left over on parts broken off from a parts tree. Not only do those little bits look hack (there’s that word again), but if they’re on a suspension or drivetrain part, they can impact performance by causing binding or parts rub.
2. Read the Directions First. I know it might be manly to say you don’t need instructions, but I always read the instructions before starting a build and I reread each step before starting it. This is the key to eliminating building mistakes. Read the instructions and take notes in the manual as you go along.
3. Work in a Clean Area. Whether it’s your workbench or the kitchen table, clean the space you’ll be working in. You’ll be far less likely to lose parts or get dirt where you don’t want it if your work area is clean. I always build my shocks and differentials on clean paper towels also. Some small parts trays will be real handy at keeping screws and the such organized as you build.
4. Screw Parts Together Correctly. Here’s a secret you probably haven’t heard of: before tightening a screw, turn it counterclockwise slightly and then turn it clockwise to tighten it down. This little move seats the screw properly in the hole or nut and greatly decreases the odds of a screw getting cross threaded. Next, thing you need to know is that there is a fine line between tight and overtightened. Snug down all hardware, but don’t go all Hulk on the screws or you’ll just strip them out. Every material is different. Take your time and just slowly tighten each screw down. When a screw bottoms out and feels tight, resist the temptation to give it one final crank.
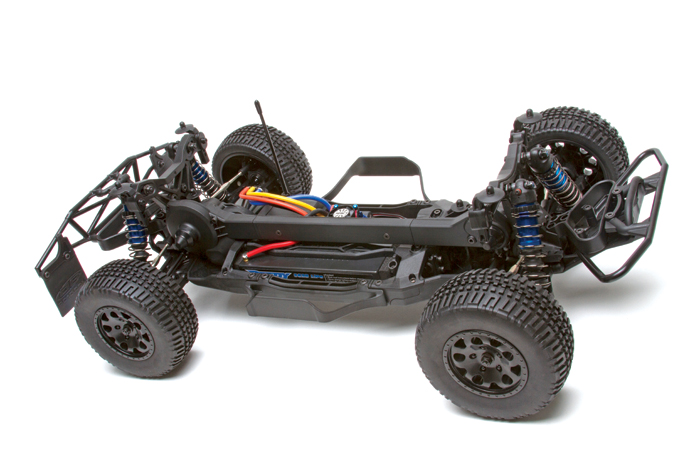
5. Neatness Counts. When you’re all done with the chassis and suspension and your ready to install the electronics don’t switch to rush mode. Take your time and make sure the wiring is as neat as possible. Put some real thought into the path of the wiring. Use a few small cable ties to keep wires away from moving parts and use narrow strips of servo tape to keep servo wires down on the chassis. Also, make sure the wires are long enough to be slightly loose. Your chassis will flex, so you don’t want the wires from your speed control to your motor constantly getting stretched.
6. Use A Lot of This And Little of That. Two things I recommend using a lot of are O-ring grease such as Associated’s Green Slime and black grease used on thrust bearings. I’d say it’s impossible to use too much of either one of those greases. On the other hand, I don’t recommend using a liberal amount of silicone grease when building a ball differential. Use just enough to lightly coat each diff ball. An excessive amount will just get flung onto the gears inside the transmission and this sticky grease will actually cause drag on gears that are usually made to run dry.
7. Turnbuckles Done Right. Almost all turnbuckles are made with some sort of indicator that shows thread direction. Make sure each turnbuckle and steering link has this mark or indicator on the same side. Having them all mismatched is a little, well, hack. Even more important, doing it right will make adjusting your suspension and steering easier.
8. Test the Drivetrain. As you build the drivetrain continually test that it spins freely. Check and recheck as you go along. Make sure each bearing is properly seated, that the gears are meshing correctly and just make sure it spins freely. there’s no point in having a fast motor and the latest battery if all that power is going to get wasted in a binding drivetrain.
9.Test the Suspension. After you’ve built the suspension and before you bolt on the shocks, make sure each suspension arm moves freely. Lift it up and let it drop. It should move easily and without any binding or noticeable resistance, and it should smoothly and quickly drop under its own weight. If it doesn’t, find out where the binding is occurring. You may have to loosen pivot ball caps, ream out the suspension arms or file some parts. Just take your time make sure each part of the suspension pivots smoothly.
10. Use the Right Screw. I see this all the time and it amazes me. What I see is kits built where the builder clearly used the wrong screw in multiple areas. It looks sloppy when a clearly too long of a screw is hanging out of a part, but it also means that some other part is improperly fastened with a screw that is too short. Get a ruler or set of calipers and check each screw as you build.


![RC Car Action - RC Cars & Trucks | This 1/3 scale 125cc V10 Buggy is CRAZY [VIDEO]](https://www.rccaraction.com/wp-content/uploads/2018/05/V10-HP.jpg)


 Stay up to date with the latest information, sign up for our FREE newsletter today.
